To open the Fleet status menu, the user must click the corresponding icon in the navigation menu located on the left side of the screen. After clicking the icon it will be highlighted in blue and a new panel will appear next to the navigation menu. This is the fleet status panel.
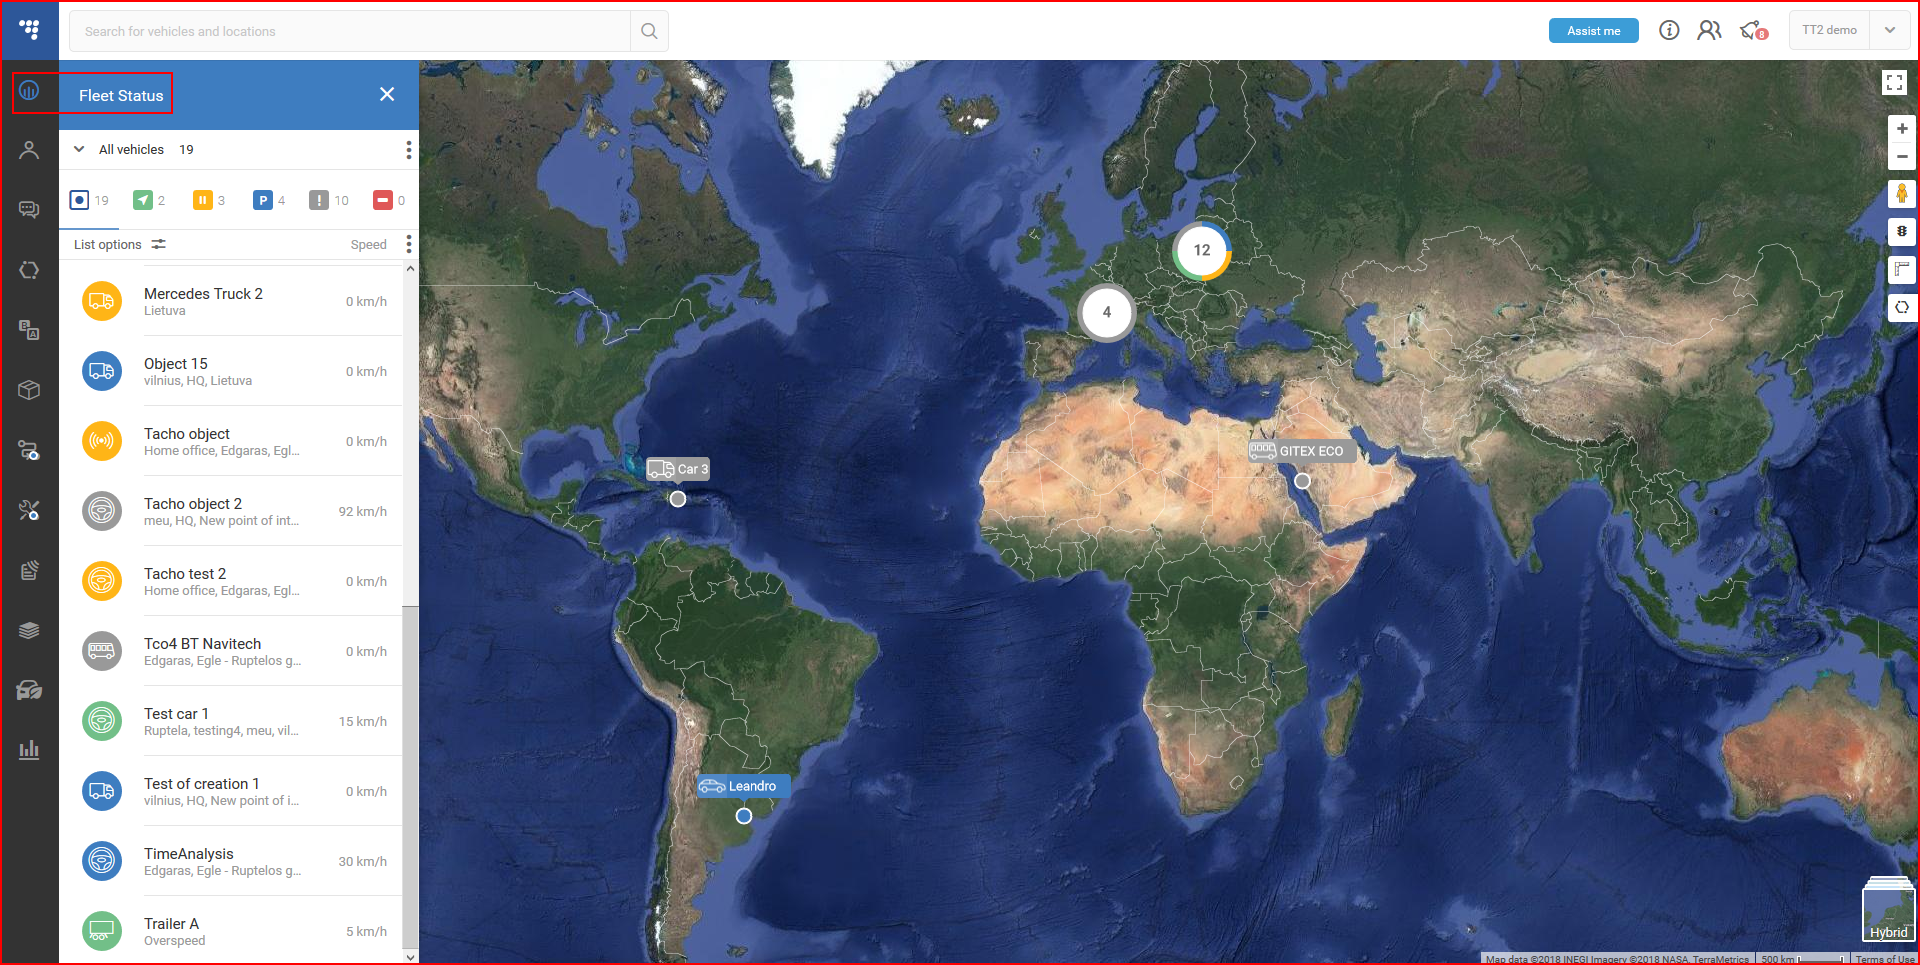
The fleet status panel displays an overview of all the objects in the users fleet. By default, all vehicles are shown. It is important to mention that not only vehicles may be present in the list. Trailers can also be displayed in the list and will be displayed if they exist for the current web user. Trailers are managed by the service provider, so the user cannot define which objects are trailers by himself.
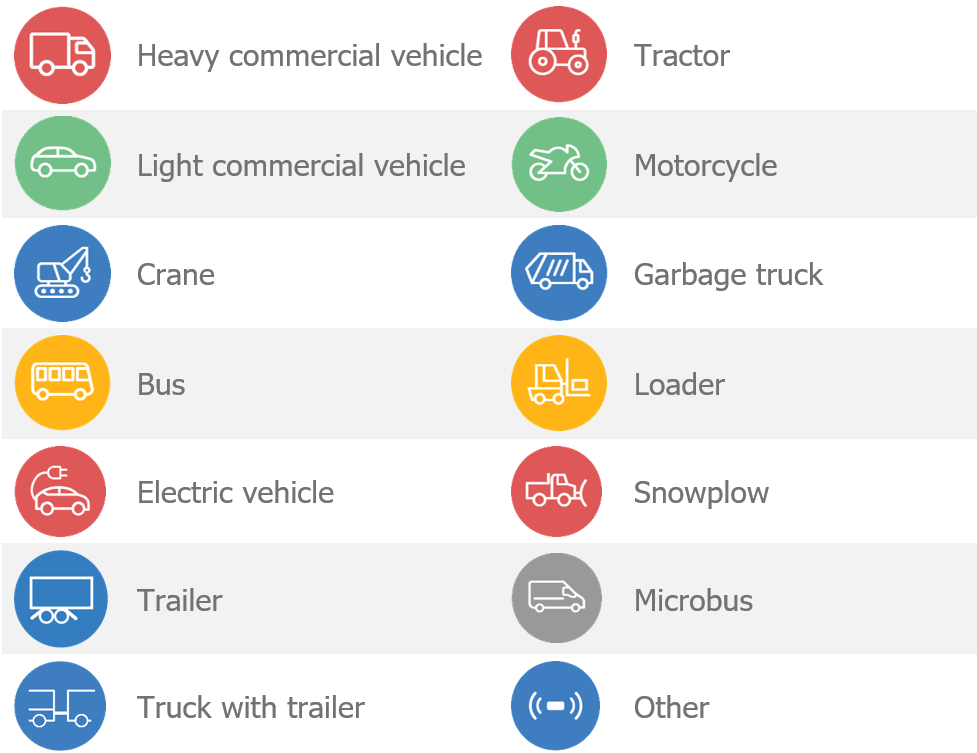
Each object in the list has a specific indicator that shows what type of object it is and what state it is in (states are described in Individual objects). Some types of objects can be set via the Vehicle details option, while others are managed strictly by the service provider. Currently, the following types of objects are available:
Once a trailer is attached to a vehicle, a combined object will be displayed in the list, until it is detached. The object will first display the vehicle name and afterwards the trailer name.

Additionally, the number of objects in all statuses will be lower by one because of the attachment, while the total vehicle amount will remain the same.
There are several ways to filter the object list.
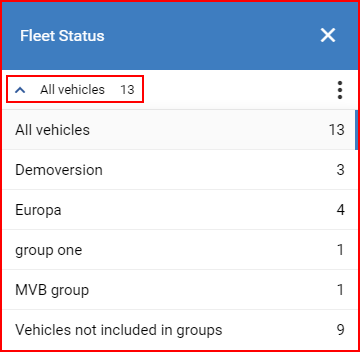
The first filter is by groups. It is located at the top of the list. Clicking the drop-down arrow will open a list of all existing groups for the current user. The user can then select which group of objects to show. Selecting a group will filter the list to show only objects assigned to that specific group.
Vehicle groups
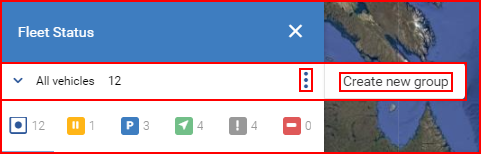
Alternatively, the user can create a new group for a set of vehicles that are required for display. This can be done by clicking the three dots, located on the right side of the vehicle group selector. This will show available options and settings for the vehicle group. In the example below, All vehicles is selected, therefore only one option is available.
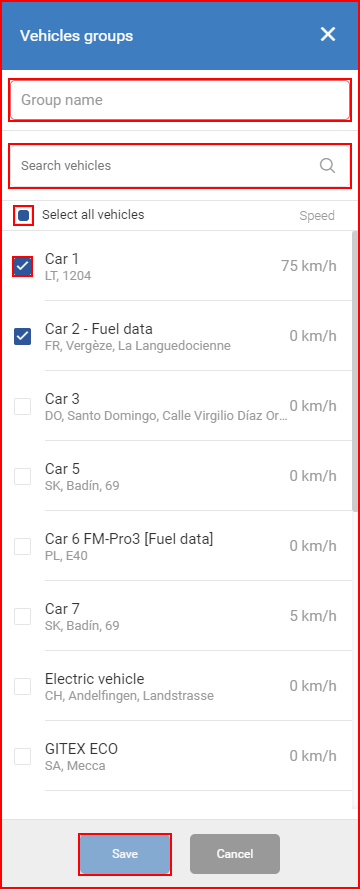
Clicking this button will open the vehicle group creation form. In this form, the user must specify a name for the group, and select vehicles that will be assigned to this group. To select a vehicle, the user must simply click on its name, once a vehicle is selected, it will be highlighted with a blue tick. Marking the checkbox next to Select all vehicles will select/deselect all vehicles. Additionally, a search bar is implemented, to quickly search through all the vehicles in the fleet. The list will be filtered by every letter inputted in the search bar. After the user-specified a group name and select which vehicles will be assigned to the group, he must click Save, otherwise, the group will not be saved. If the group name is not specified, the Save button will be unavailable.
This covers the vehicle group selection.
In cases when the user has selected a vehicle group in the list and wishes to modify it, he must click the same three dots on the right side of the group list. In this case, more options will be available.
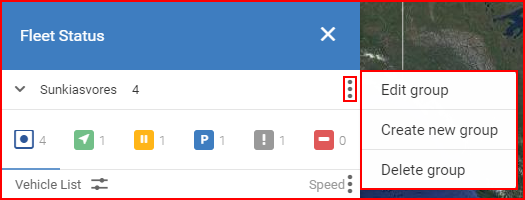
Now the user can select to edit a group, which will open an identical window to the Create new vehicle window, only now the name of the group will be specified and some vehicles will be selected. Same as for the new group creation, after any changes are made, Save must be clicked.
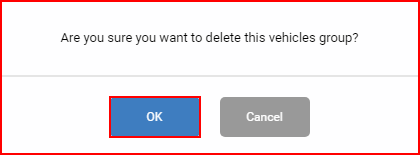
If the user wants to delete a group, he must simply click Delete group, afterwards a confirmation window will appear.
Note
Groups created by a user with Administrator rights will only be visible to other users with Administrator rights for the same account. If a user with User rights creates a group, it will be visible only to that user, other users will not see that group. A user with Administrator rights can assign a group to a user, which will make it visible. Group assignation to a user is described in the Webusers admin panel.
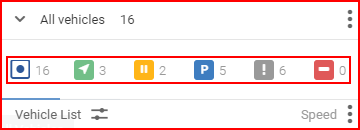
Vehicle status filter
The next filter is the vehicle status filter, which is located right under the group list row. Here the user can select one of the following status filters:
- All vehicles – enabled by default
- Moving
- Idling
- Ignition off
- No signal
- Ignition blocked
Parameters
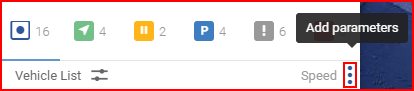
Lastly, the user can specify, which additional parameters will be displayed next to each vehicle in the list by clicking on the three dots in the Vehicle List field. By default, only Speed is displayed.
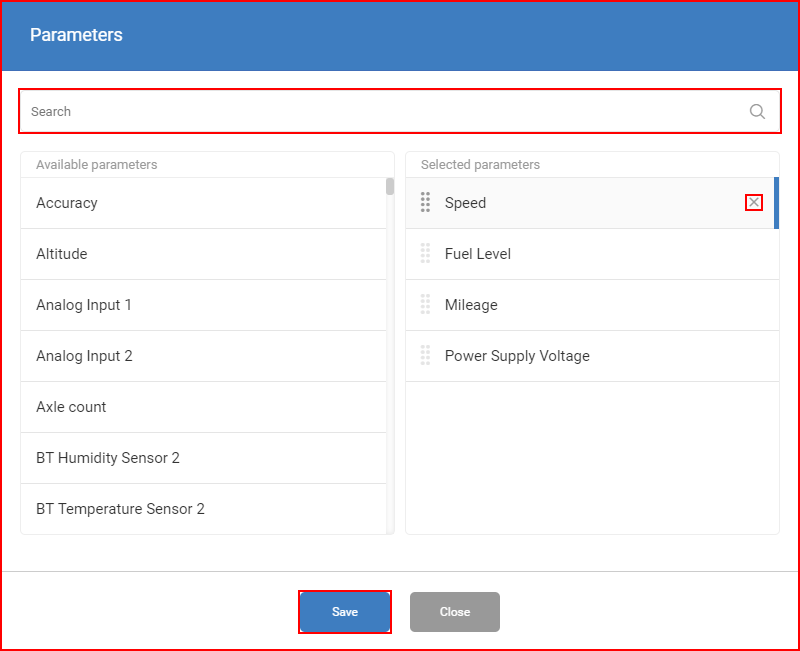
A new window called Parameters will open. Here the user can select up to 7 parameters that will be displayed in the fleet status panel. Speed, Fuel Level, and Mileage are selected by default (Fuel Level and Mileage are not displayed in the fleet status panel unless the user clicks the expand panel button shown later in this chapter). There is a search bar to find the needed parameters quickly, the parameter list is updated automatically with each entered letter.
The order in which the selected parameters are displayed can be changed by dragging and dropping. Parameters can be removed by clicking the x symbol.
The user must click Save in order to save the parameter settings. Clicking Close or anywhere outside of the Parameters window will close the window and discard all unsaved changes.
Note
Specific parameters such as Custom inputs can have custom names and values. Please refer to your service provider for more details.

List options
It is possible to generate links with vehicle positions that can be sent externally by clicking on Vehicle List and then Share vehicle position in the drop-down list.

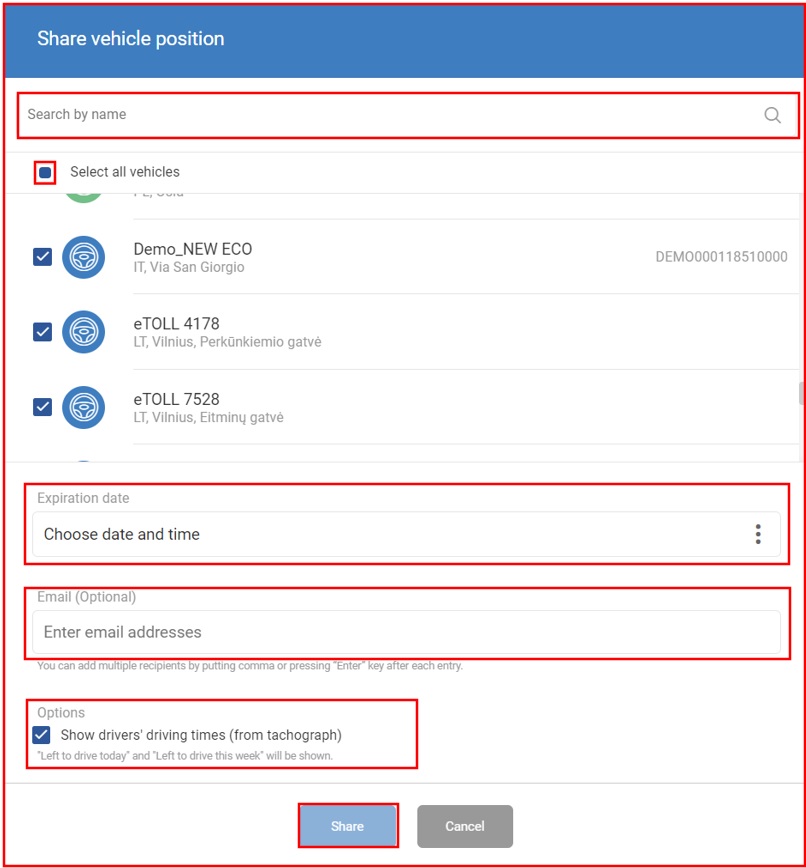
A new window called Share vehicle position will open. Here the user can select which vehicles will be included in position sharing. In order to select a vehicle, the user has to mark the checkbox next to it. Marking the checkbox next to Select all vehicles will select/deselect all vehicles. There is a search bar to find the needed vehicles quickly, the vehicle list is updated automatically with each entered letter. Up to 200 vehicles may be shared with one link.
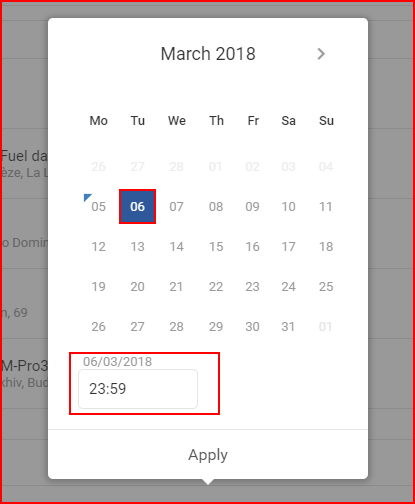
Expiration date – the user has to select the date and time, until which the shared link will be valid. The selection process is identical to all other FMS date and time selections. To select the expiration date, the user must simply click the desired date. The selected day will be highlighted in blue. The current day is highlighted by a small blue triangle on the top left side of that day. If the current day is selected (highlighted), the triangle will be inverted to white. Afterwards, the user can specify the exact hour until which the link will be valid. To apply the changes, Apply must be clicked, otherwise, the changes will not be saved.
Email – the user can add email addresses, to which the shared link will be sent. After entering an email, the user must press Enter. This field is optional.
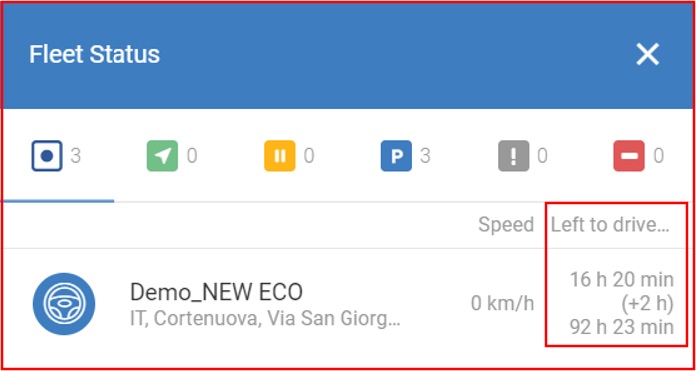
Options – the user can select to include data about driving times together with vehicle position when generating link. This option shows the amount of time that is left to drive both for a day and all week. This information can be used to help customers evaluate when the vehicle will arrive to its destination.
The user must click Share in order to generate the link. The Share button will only be enabled after selecting the expiration date. Clicking Cancel or anywhere outside the Share vehicle position window will close the window and discard all unsaved changes.
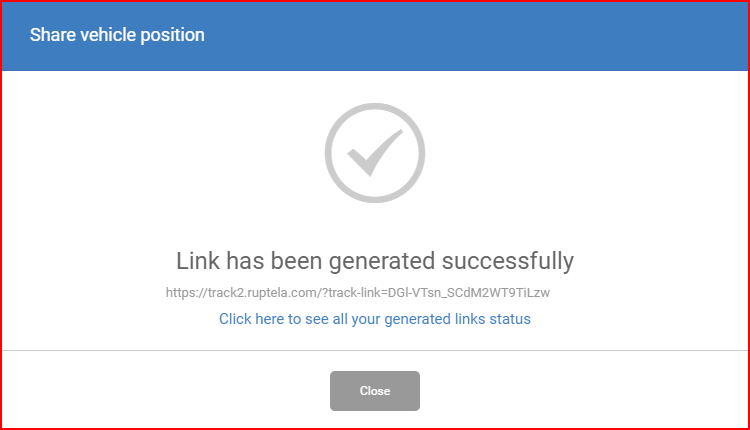
After clicking Share, the link will be generated and a new window will appear with the link. The user can click on the link to copy it. After opening the link, the vehicles’ current position will be displayed on the map and the fleet status panel will contain only the selected vehicles and no additional settings.
All links generated by the current user can be found by clicking on Click here to see all your generated links status. The same menu can later be opened by clicking the drop-down list in the top right corner of the main FMS window and clicking Generated links.
Returning to the Vehicle list drop-down list, there are several more options:
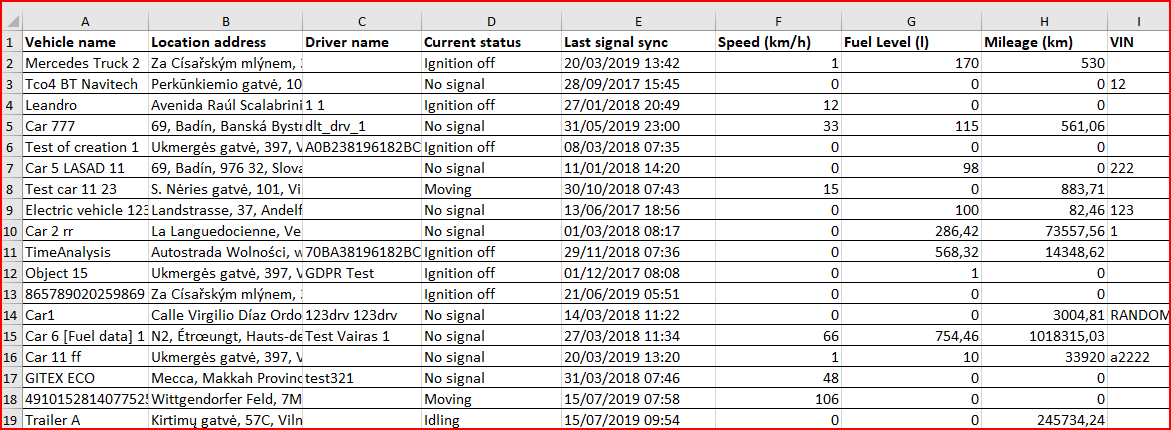
Export vehicle status data – clicking this option will export the vehicle list and selected parameters to a .xls file. The downloaded file contains the following vehicle’s details:
- Vehicle name
- Location address
- Driver name
- Current status
- Last signal sync
- Speed (km/h)
- Fuel Level (l)
- Mileage (km)
- VIN (column displayed if VIN is provided for at least one vehicle)
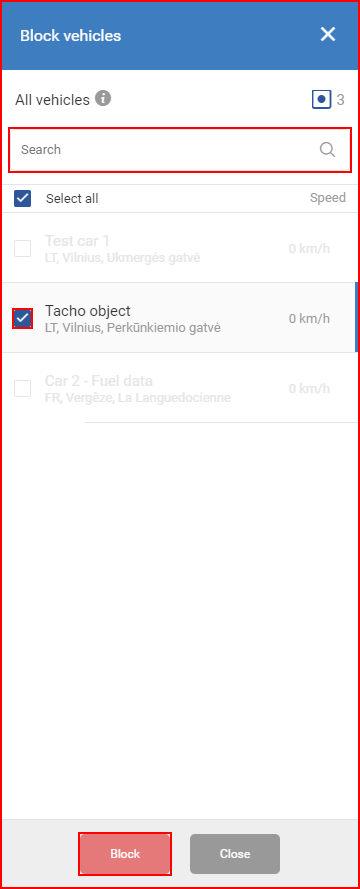
Block/Unblock vehicles – these options allow the user to remotely block/unblock several vehicles at a time. Only vehicles that can be remotely blocked are displayed and only vehicles with a suitable configuration can be blocked/unblocked. In order to select a vehicle, the user has to mark the checkbox next to it. Marking the checkbox next to Select all will select/deselect all available vehicles. There is a search bar to find the needed vehicles quickly, the vehicle list is updated automatically with each entered letter. After selecting the vehicles, the user has to click Block/Unblock. A pop-up confirmation window will appear, the user has to click OK to finalize the action or Cancel to return to vehicle selection. Clicking Close will return the user to the fleet status panel.
History of multiple vehicles – this option allows viewing the history data of several vehicles at once. This functionality is described in detail in the History overview.
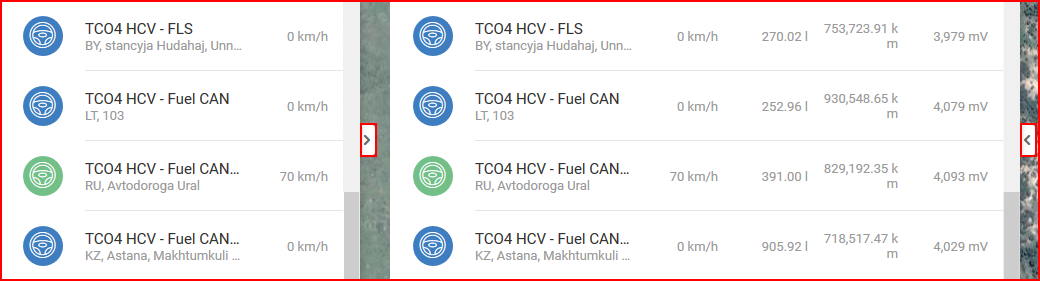
The fleet status panel can be expanded by hovering the mouse cursor over it and clicking the expand button in the middle of the panel. All additional parameters configured previously will now be displayed. Clicking the same button again will return the panel to its previous state.
Clicking on an object in the list will open the summary panel for the selected object, another panel will be displayed next to the already opened fleet status panel.
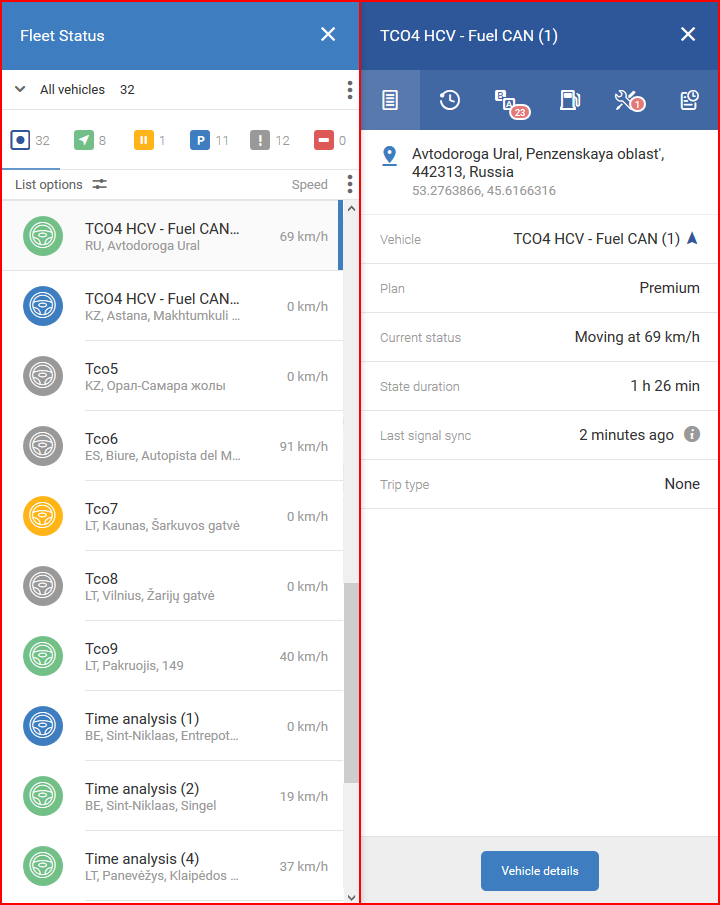
This panel is described in the next section.
Note
Opening the summary panel through the overview panel differs from opening it through the map by clicking on the desired vehicle. The difference is the absence of the fleet status panel when accessing the summary panel through the map. The summary panel is described without mentioning the fleet status panel.