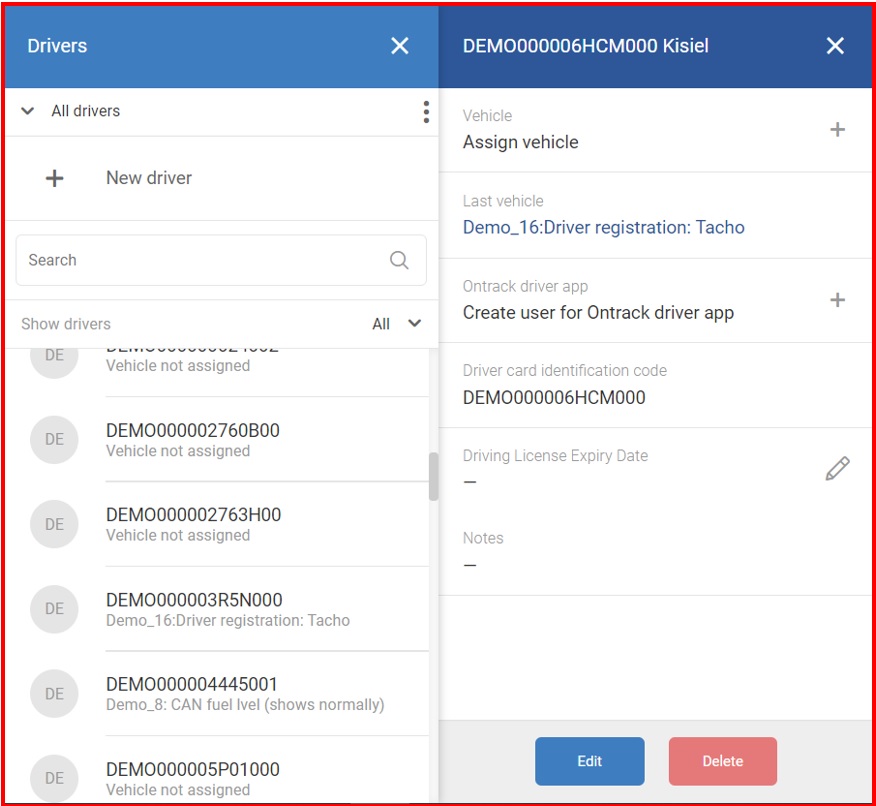
To assign a vehicle or edit/delete any information from the driver, the user must select a driver in the list. Once a driver is selected, a another panel with the drivers’ information will open. The drivers’ information can be modified by clicking the “Edit” button at the bottom of the screen. Pushing this button will open an identical window to the “Add new driver” with fields already filled with the drivers information. After any modifications, the “Save” button must be clicked. If the user decides to delete a driver from the list, he must simply click the “Delete” button. This will open a confirmation window (in case this button was pushed by accident) where the user must confirm that he truly wants to delete the driver. If the user did click “Delete” by accident, then he must simply click the “cancel” button in the confirmation menu.
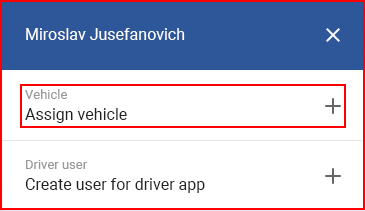
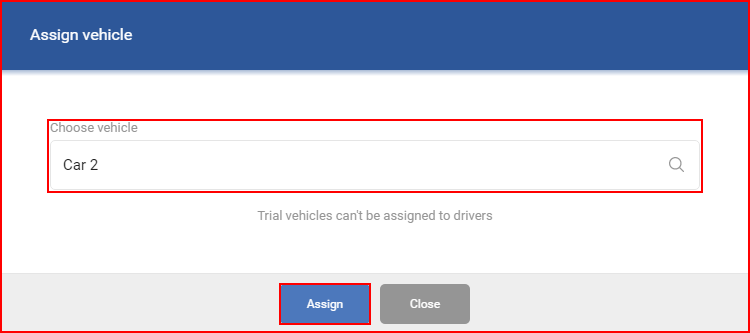
To assign a vehicle the user must click the “Assign vehicle +” field.
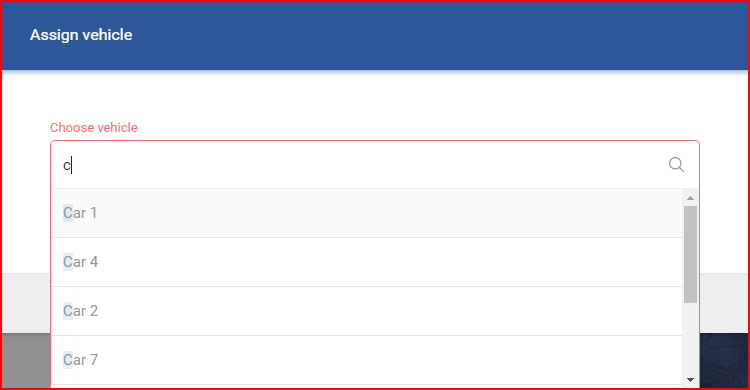
Clicking the “Assign vehicle +” field will open a new window with a search bar. Clicking on the search bar will open a drop-down list of suggested vehicles to filter the suggestions, simply input the desired vehicles name, the list will auto-update with every letter inputted.
Note
Vehicles that are currently on a trial period, cannot be assigned to a driver.
After choosing a vehicle, the user must click “Assign” to assign the vehicle to the user, if the user changes his mind the vehicle filed can be edited over. If the user decides not to assign any vehicle, he must click the “Close” button or simply click anywhere outside the “Assign vehicle” window. After vehicle assignation, the vehicle field in the driver menu will be updated with the selected vehicle.
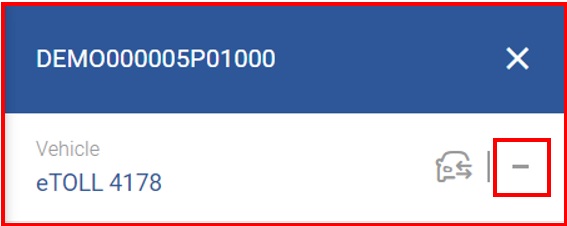
To remove the assigned vehicle, the user must simply click on the minus sign icon located to the right of the vehicle field. There is no confirmation window for removing a vehicle, after one click the vehicle is unassigned.
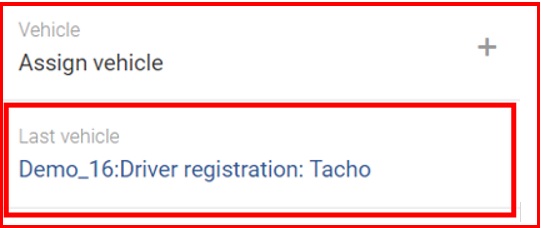
There is a possibility for a user to see last assigned object to a driver in the field called „Last vehicle“
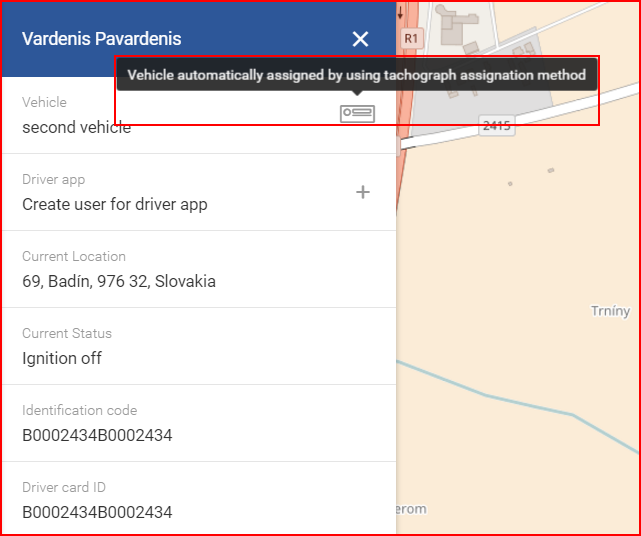
In cases with automatically assigned vehicles, there can be three types of assignations:
- Assigned by iButton or RFID;
- Assigned by Wireless;
- Assigned by Tachograph.
In any case, if the vehicle is assigned automatically, the vehicle cannot be unassigned from the FMS. The assignation will only be removed once the driver deregisters, or the system creates a new assignation for the driver to a different vehicle. This may occur in situations when data is temporarily not received from one vehicle but is received from the different vehicle, to which the driver has transferred. An example of a tachograph assignation is shown below.
In the case of a wireless assignation, it is valid while the driver is connected via the OnTrack app. While the driver is assigned to a vehicle via the wireless method, he cannot be unassigned manually. If the driver connects to a different vehicle while the previous assignation is still valid, the previous assignation will be overwritten with the new assignation.
Note
Each vehicle can be assigned only to one driver. If a vehicle was assigned to a different driver before and is assigned to a new driver now, it will auto unassign from the previous driver.
Note
In the case of tachograph assignation, two drivers can be assigned to one vehicle. This applies only to tachograph assignation and cannot be assigned any other way. The assignations are removed if the driver cards are removed from the tachograph or the driver cards are registered in a different vehicle. Double assignation can be seen in the “Summary overview“.
If a vehicle was assigned to a driver via the previously mentioned methods, additional information will be present in the driver panel, such as the iButton or RFID code that was used for the registration, or the driver name from the card.
To assign credentials for app access for a driver, the user must click the driver user field.
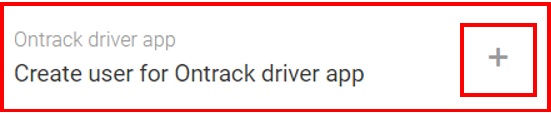
This will open the “Create driver account” window where the user must input the following credentials to create an account for the driver:
- Username;
- Password.
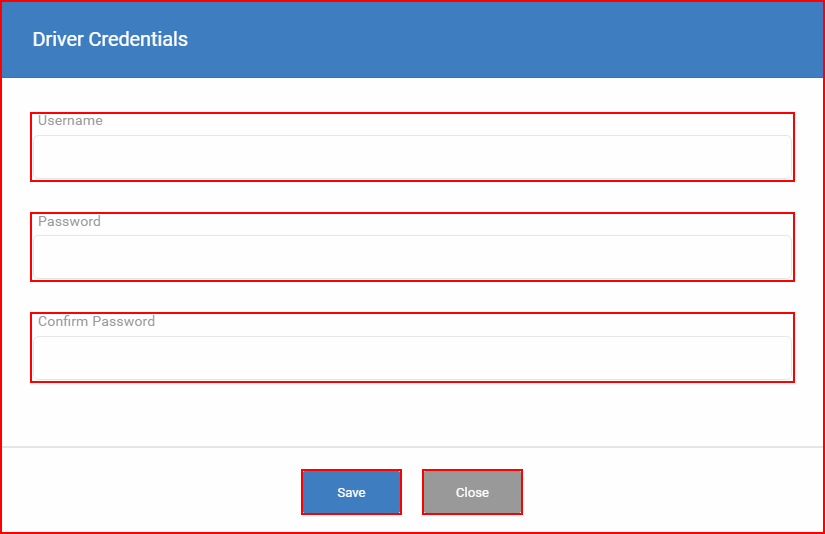
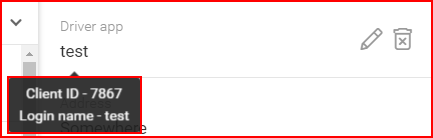
After all the information is inputted the user must click the “Save” button otherwise, the credentials will not be saved. If the user decides not to create the account, he must simply click the “Close” button. After creating an account, the user can edit the credentials by clicking the pencil icon. This will open an identical window to the “Driver credentials” where the user can change the credentials. To delete a driver account, the user must simply click the trash bin icon.

After credentials are assigned, the user can move the mouse over the drive app login name. This will highlight the Client ID number and the login name.
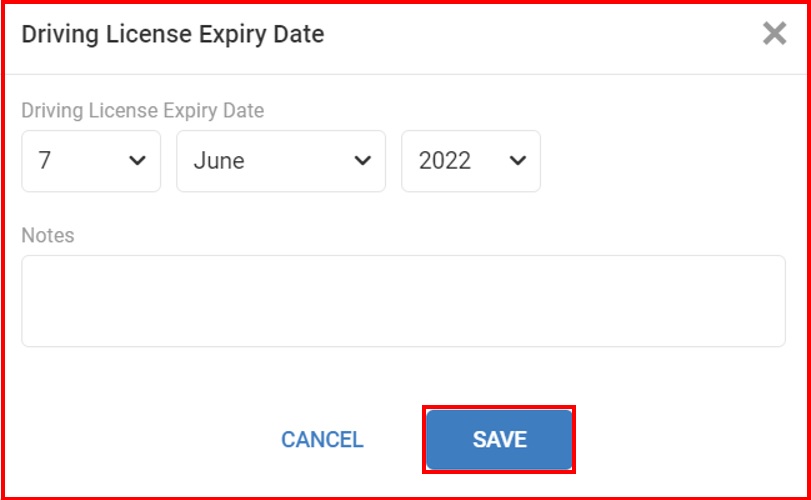
User can add a driving license expiry date of a driver by clicking on a pencil icon located in the top right of the „Driving License Expiry Date“ field.
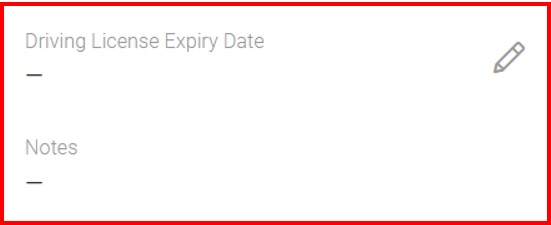
An additional tab will appear where the user can fill in required information. After all the information is inputted the user must click the “Save” button.