1. Overview
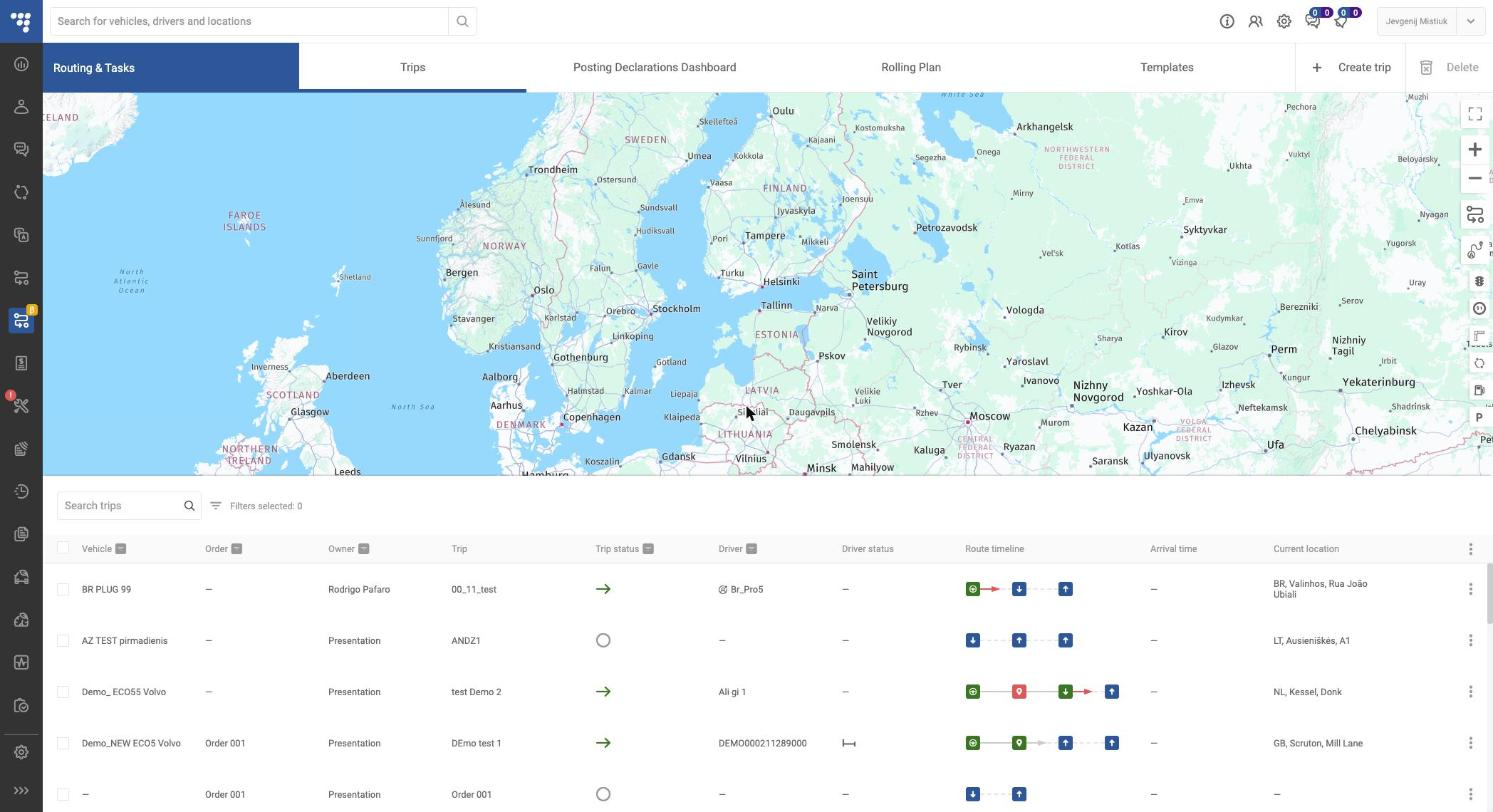
The Routing & Tasks module lets you plan trips, send them to a vehicle and driver, and follow them on the map in real time. Open it from the left menu (route icon); it has four tabs:
| Tab | What it is for |
|---|---|
| Trips | List of all trips with map, status, driver, route timeline, arrival time and current location |
| Posting Declarations Dashboard | Posting declarations for drivers working abroad |
| Rolling Plan | Planning view of vehicles and their trips over time |
| Templates | Saved routes you can reuse when creating trips |
The Create trip and Delete buttons are in the top-right corner. The trip list can be searched by name and filtered (vehicle, order, owner, trip status, driver).
Permissions: every Track user can edit any trip and its tasks, not only the trips they own.
The Route timeline column shows each waypoint as an icon: green = visited, red = visited late, orange = not visited yet. The arrow shows the vehicle’s progress between points. Hover an icon to see the address, arrival time and how late it was (e.g. Arrived at 06/11/2026 08:22 (29 days late)), estimated road, actual road and km left to drive.

2. Create a trip
A trip needs a name and at least two waypoints; everything else is optional.
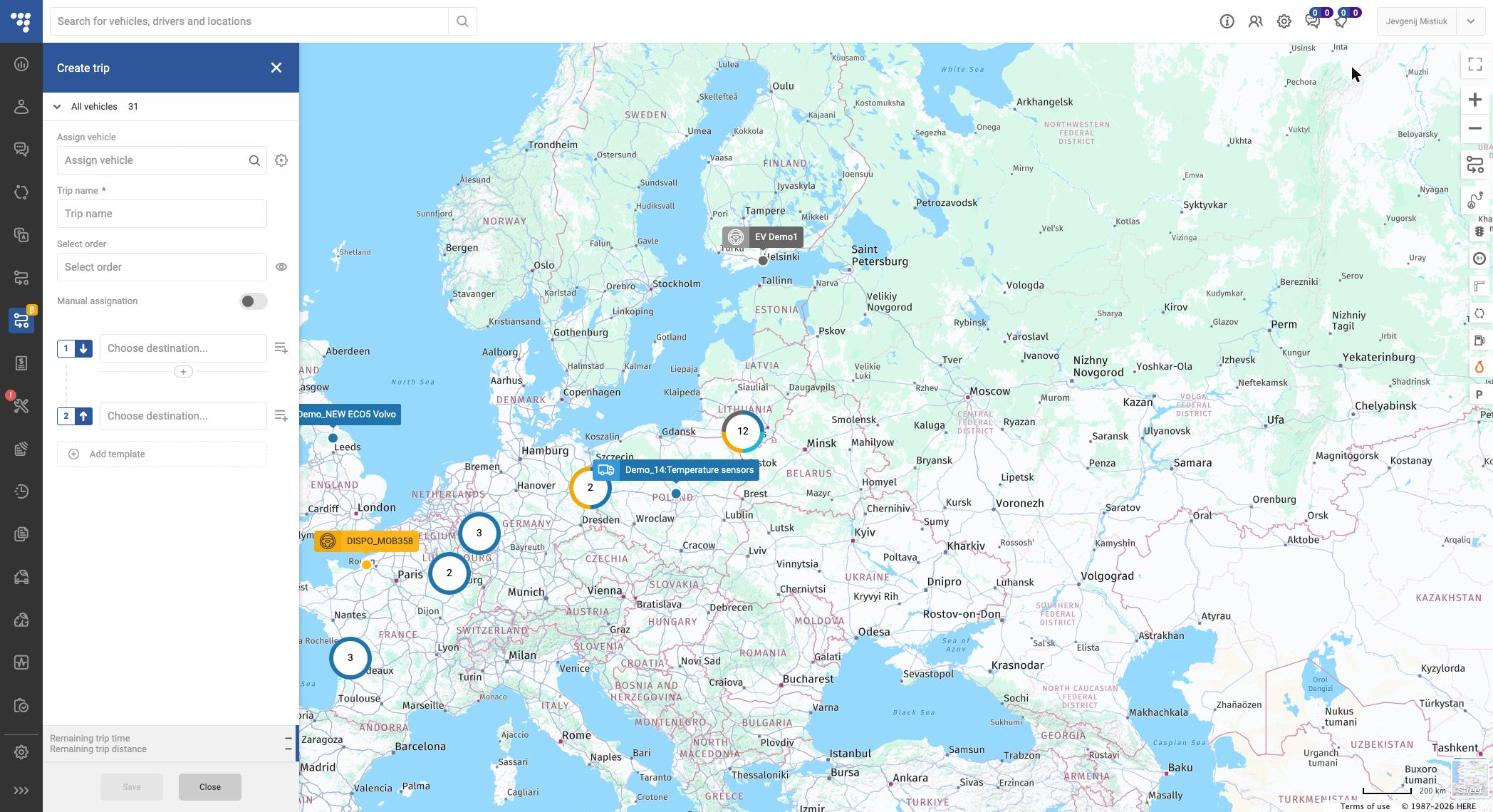
- On the Trips tab, click + Create trip. The form opens on the left, the map on the right.
- Assign vehicle – pick a vehicle from the list (or leave empty and assign later, see section 5). The vehicle’s current position is added automatically as the start point.
- Trip name (required) – e.g. order number or customer.
- Select order (optional) – link the trip to an existing order; the eye icon shows the order.
- Waypoints – type an address or place in Choose destination… and pick a result. Point 1 is Loading and the last point is Unloading by default.
- + between points inserts a stop; Add more points adds one at the end.
- Drag the handle on the left of a point to change the order.
- The list icon on the right opens the waypoint details (section 3).
- Choose a route – TrustTrack calculates up to 3 alternatives. Each card shows remaining time, distance, departure, arrival, driving time, working time and toll costs. Click a card or a route on the map to select it.
- Click Save. The form switches to Edit trip; click View to open the trip summary.
Vehicle and routing settings (gear icon)
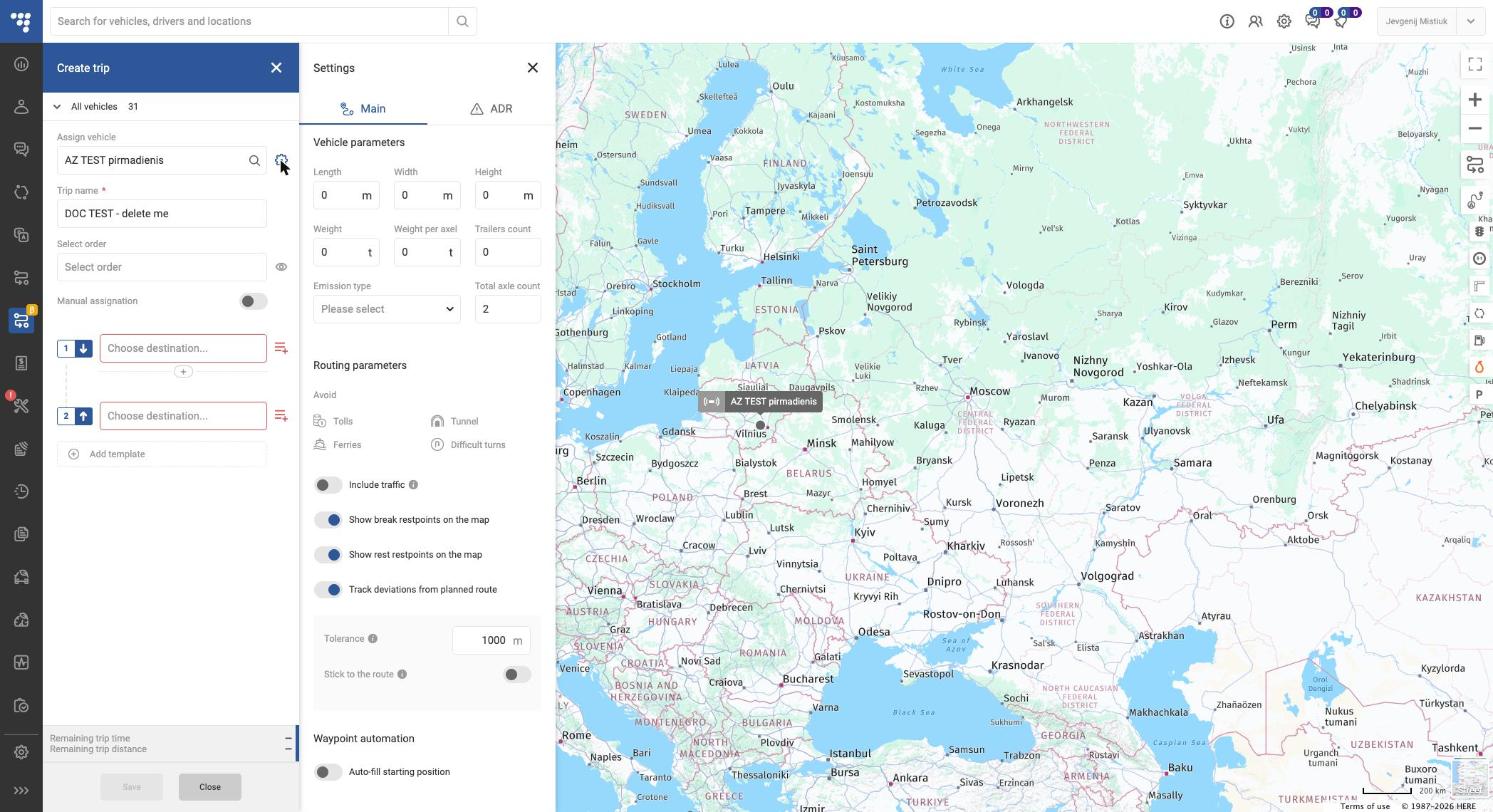
The gear next to Assign vehicle opens settings used to calculate the route:
| Group | Settings |
|---|---|
| Vehicle parameters | Length, width, height (m), weight, weight per axle (t), trailers count, emission type, total axle count |
| Avoid | Tolls, tunnels, ferries, difficult turns |
| Map options | Include traffic, show break / rest restpoints on the map |
| Deviation | Track deviations from planned route, tolerance (m), stick to the route (section 7) |
| Waypoint automation | Auto-fill starting position |
| ADR tab | Hazardous materials (explosive, gas, flammable, radioactive, etc.) and tunnel categories |
Tip
fill vehicle dimensions and ADR for trucks – the route and toll costs depend on them.
Defaults on a new trip:
| Setting | Default |
|---|---|
| Total axle count | 2 |
| Include traffic | Off |
| Show break restpoints on the map | On |
| Show rest restpoints on the map | On |
| Track deviations from planned route | On |
| Tolerance | 1000 m |
| Stick to the route | Off |
| Auto-fill starting position | Off |
3. Waypoints: types, ETA and duration
Waypoint types
Click the coloured icon next to the point number to change its type. Available types:
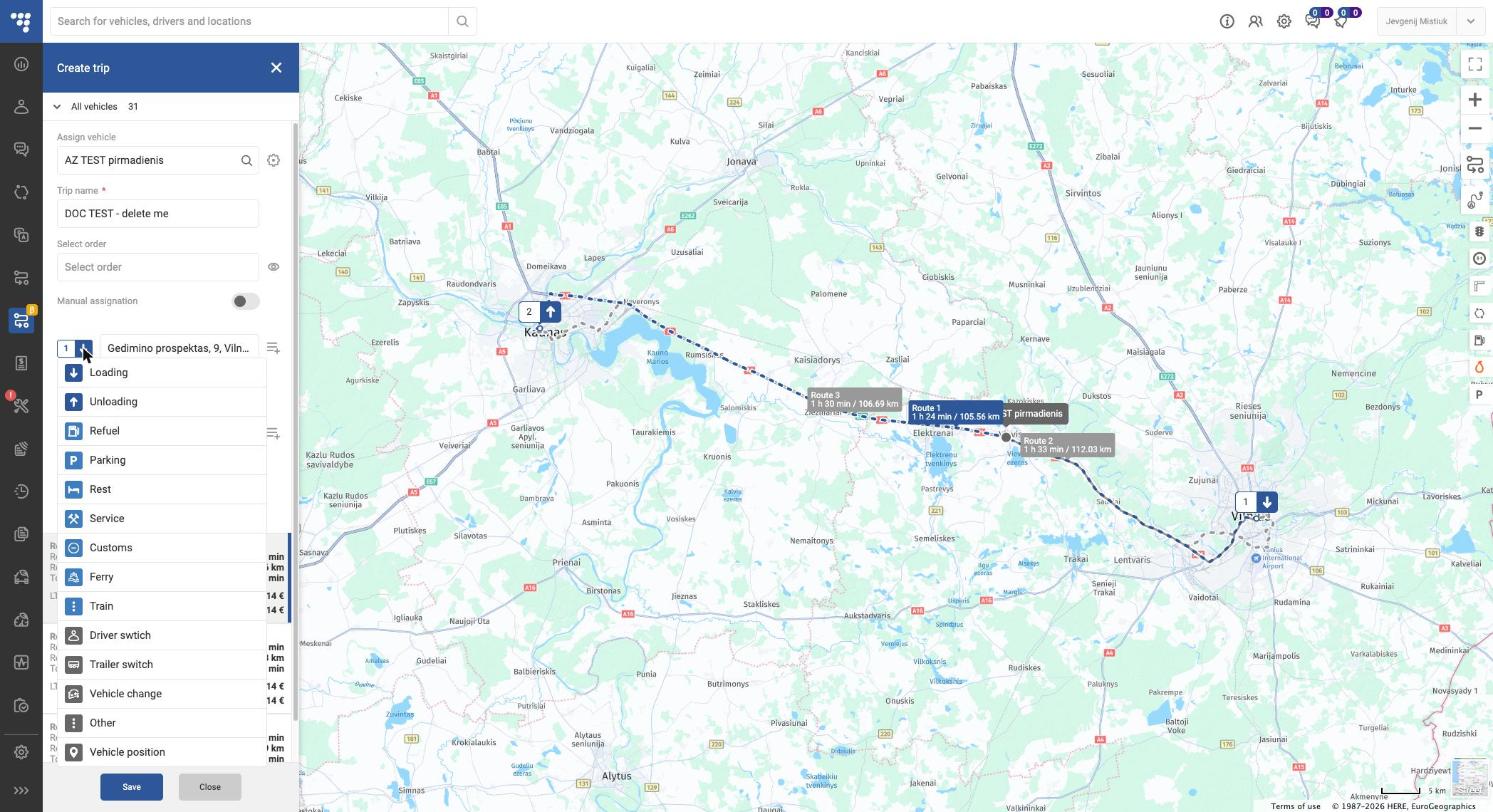
| Type | Use for |
|---|---|
| Loading | Pick-up of cargo |
| Unloading | Delivery of cargo |
| Refuel | Planned fuel stop |
| Parking | Parking place |
| Rest | Driver break / daily rest |
| Service | Workshop or maintenance |
| Customs | Customs point |
| Ferry | Ferry crossing |
| Train | Train / rail crossing |
| Driver switch | Driver change |
| Trailer switch | Trailer change |
| Vehicle change | Cargo moves to another vehicle |
| Other | Any other stop |
| Vehicle position | Current vehicle location (start point) |
Waypoint details
Click the list icon to the right of an address. The panel contains:
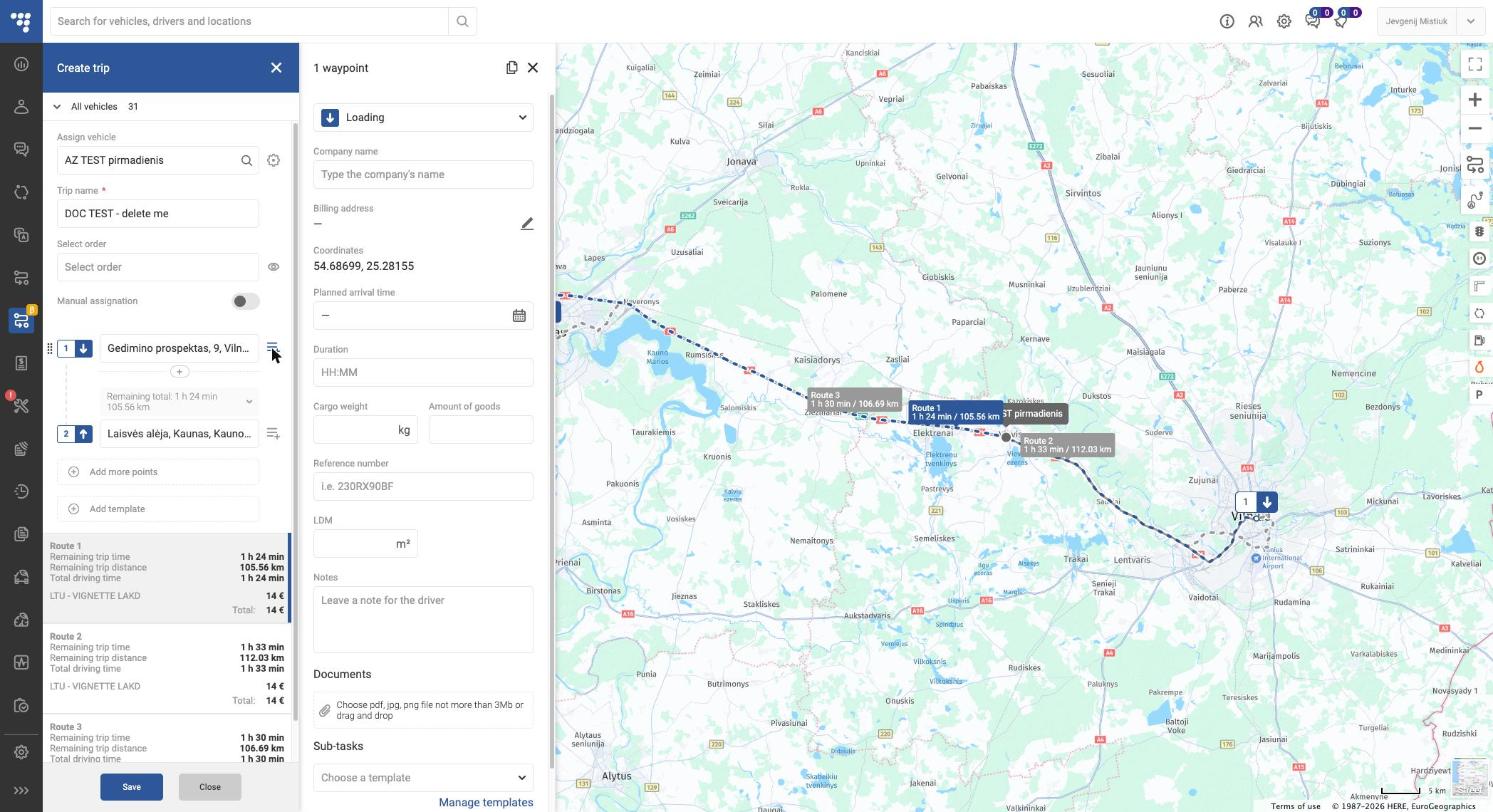
- Type, Company name, Billing address, Coordinates (read-only).
- Posting declarations – link the waypoint to a posting declaration (dropdown under the type).
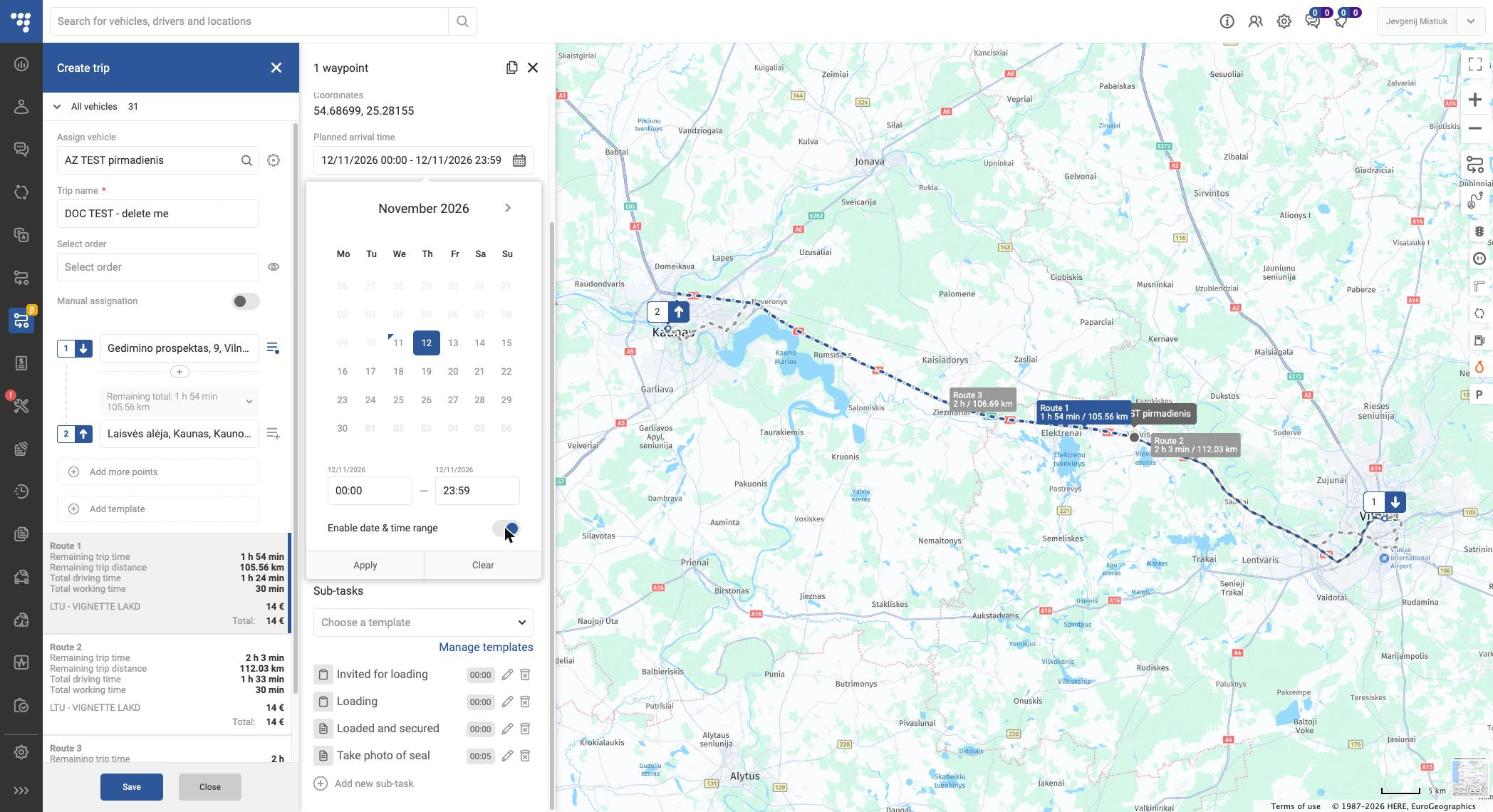
- Planned arrival time – pick a date and time. Turn on Enable date & time range to set a time window (e.g. 12/11/2026 08:00 – 10:00).
- Duration (HH:MM) – how long the vehicle stays at the point. It is added to the trip as Total working time.
- Cargo weight (kg), Amount of goods, Reference number, LDM (m²).
- Notes – message for the driver.
- Documents – attach PDF, JPG or PNG up to 3 MB.
- Sub-tasks – see section 4.
The copy icon at the top of the panel duplicates the waypoint.
ETA
After you set times, every route card shows Departure and Arrival (ETA). Example from our test trip: departure 08:00, arrival 09:53, driving 1 h 24 min + working 30 min = 1 h 54 min. While the trip runs, the Arrival time column in the Trips list shows the live ETA.

4. Sub-tasks and sub-task management
Sub-tasks are a checklist the driver completes at a waypoint in the driver app (e.g. take a photo, sign CMR). They are set per waypoint, at the bottom of the waypoint details panel.
Add sub-tasks from a template
- Open the waypoint details (list icon next to the address).
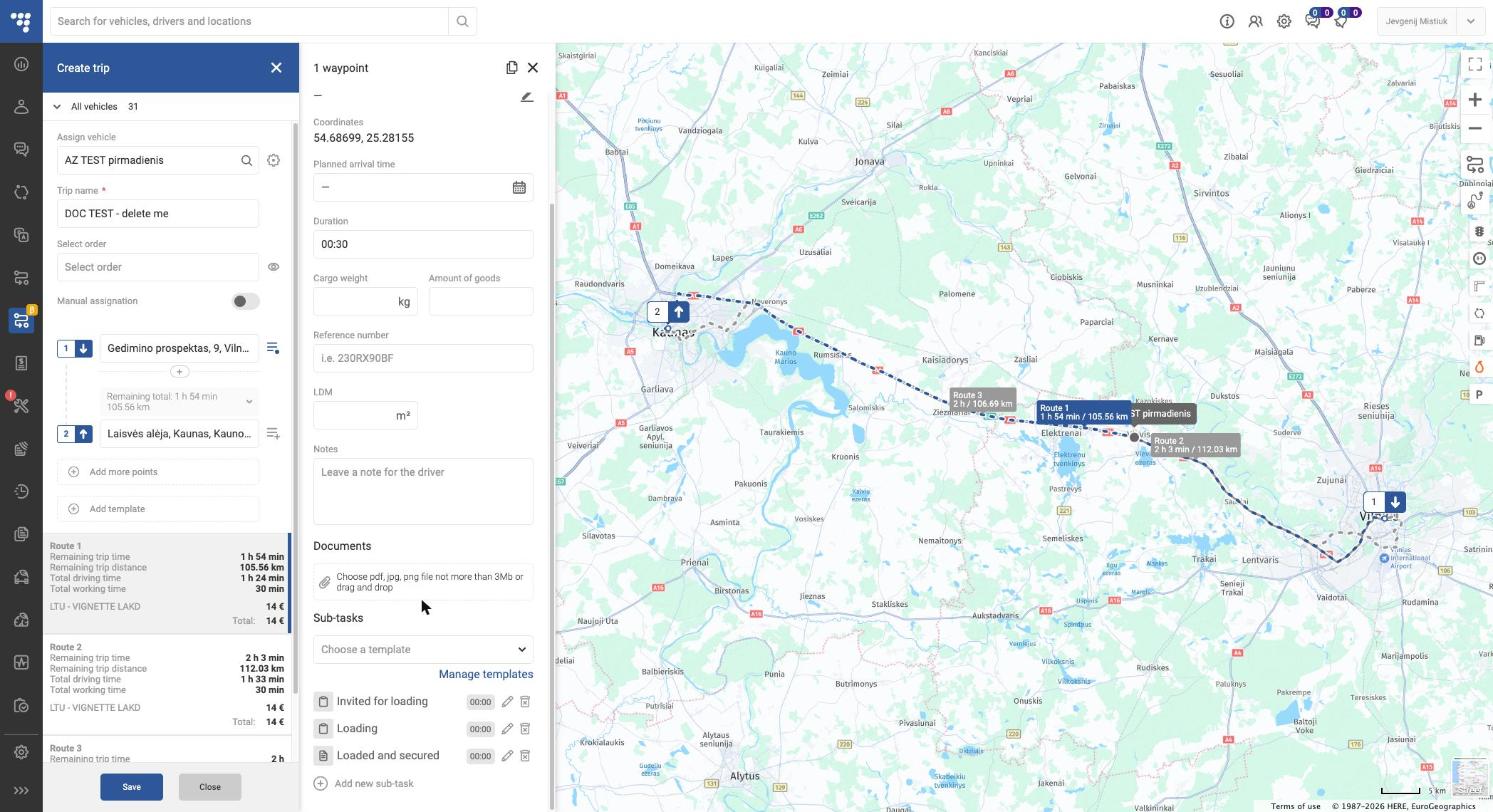
- In Sub-tasks, open Choose a template and pick one (e.g. Loading). All its sub-tasks are added at once – for Loading: Invited for loading, Loading, Loaded and secured.
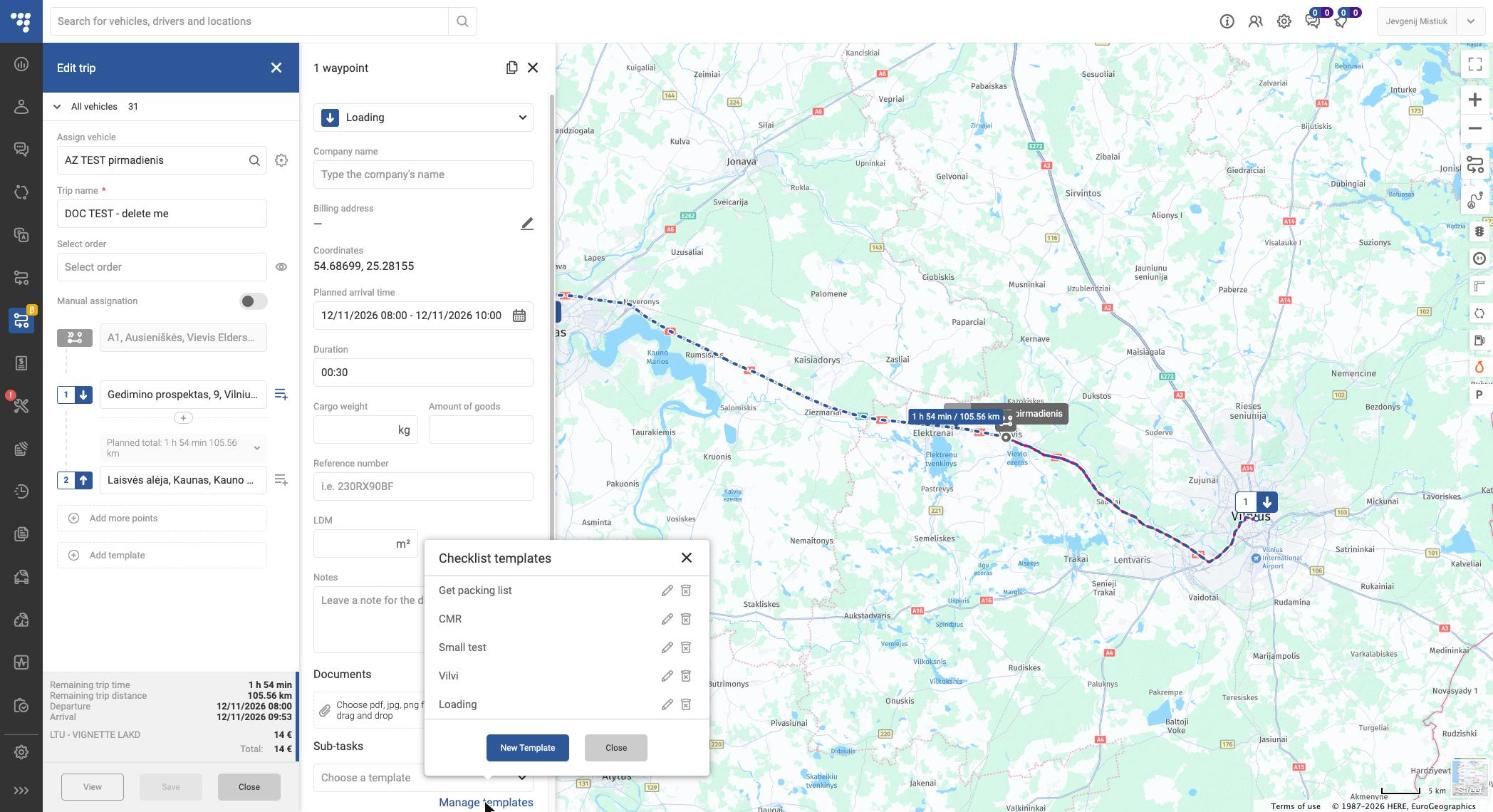
Templates available in the account today: Get packing list, CMR, Small test, Vilvi, Loading.
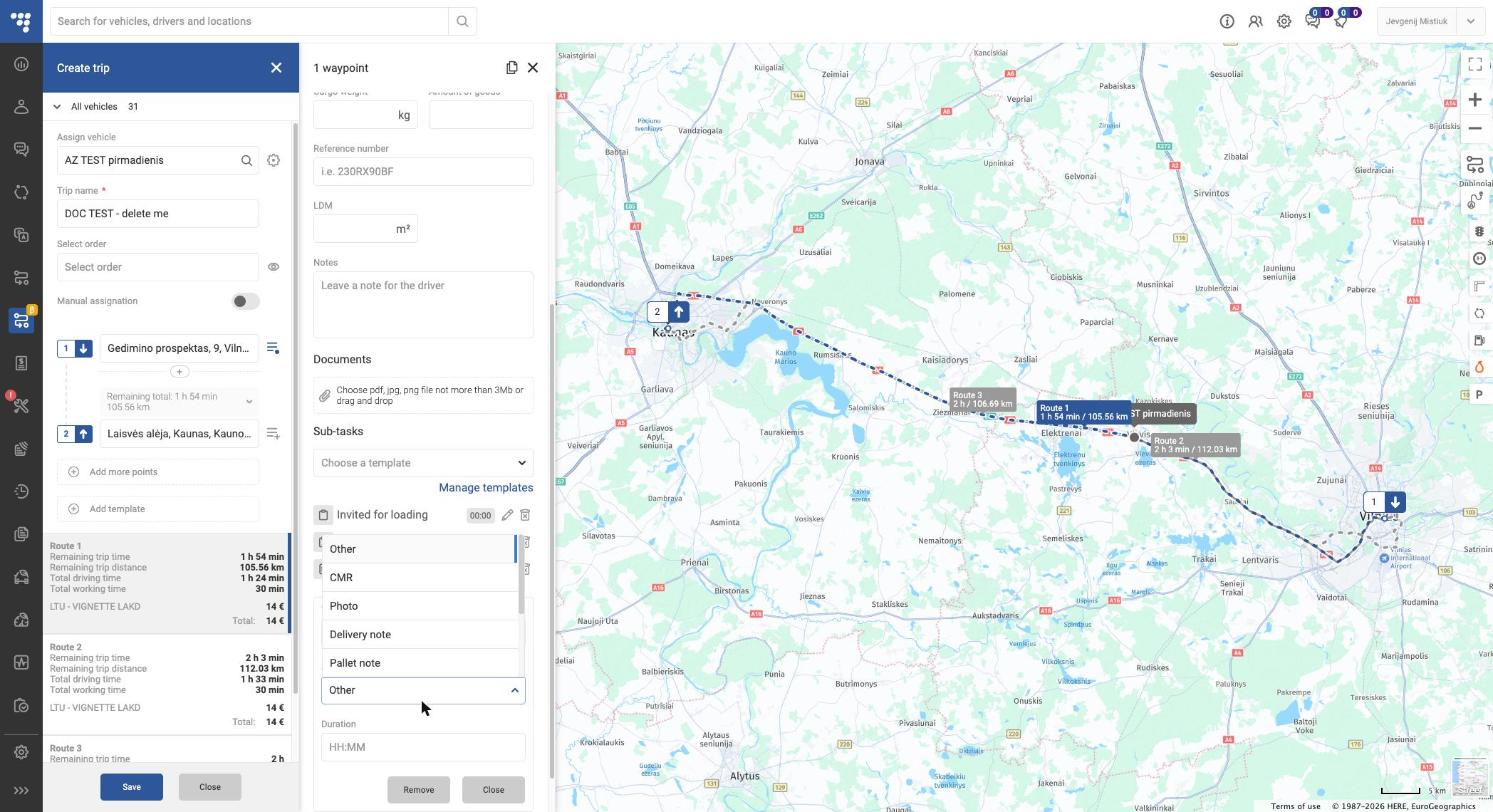
Add a single sub-task
- Click Add new sub-task.
- Enter Task name (required).
- Choose Type: Other, CMR, Photo, Delivery note, Pallet note, Bill note, Packing list, Customs documents, Signature.
- Optional: Duration (HH:MM).
- Click Close to keep it, or Remove to discard it.
Each sub-task in the list has a duration, a pencil (edit) and a bin (delete) icon.
Manage sub-task templates
Click Manage templates under the template dropdown. The Checklist templates window lists all templates with edit and delete icons. To create one, click New Template, enter a Title, add sub-tasks with Add new sub-task, and save. Templates are shared across all trips.
To change a template, click its pencil. The Update Template window shows:
- Title (required).
- Each sub-task with its type icon and duration (e.g. CMR – 00:10), plus pencil and bin icons.
- Add new sub-task to extend the template.
- Save (active only after a change) and Cancel.
The bin next to a template deletes it.
5. Assign a vehicle and driver
You can assign a vehicle in three places:
- When creating the trip – Assign vehicle field at the top of the form.
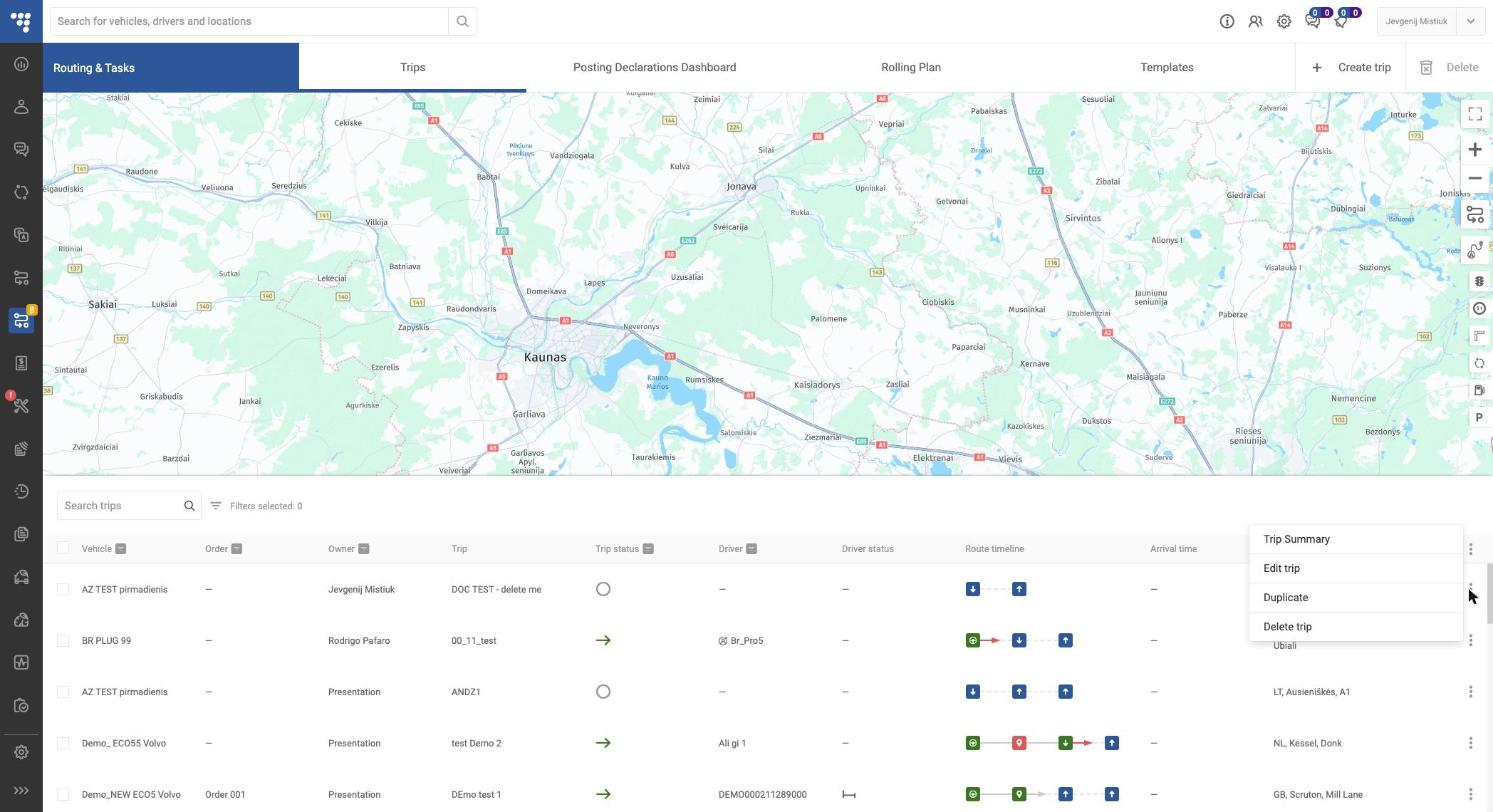
- Later, on an existing trip – in the Trips list open the row menu (⋮) → Edit trip, choose the vehicle and click Save. You can also hover a row and click the pencil icon.
- Reuse the same route for another vehicle – row menu → Duplicate, then pick the new vehicle.
When a vehicle is assigned, its current position is shown as the start point and the route is recalculated from there.
Assign drivers manually
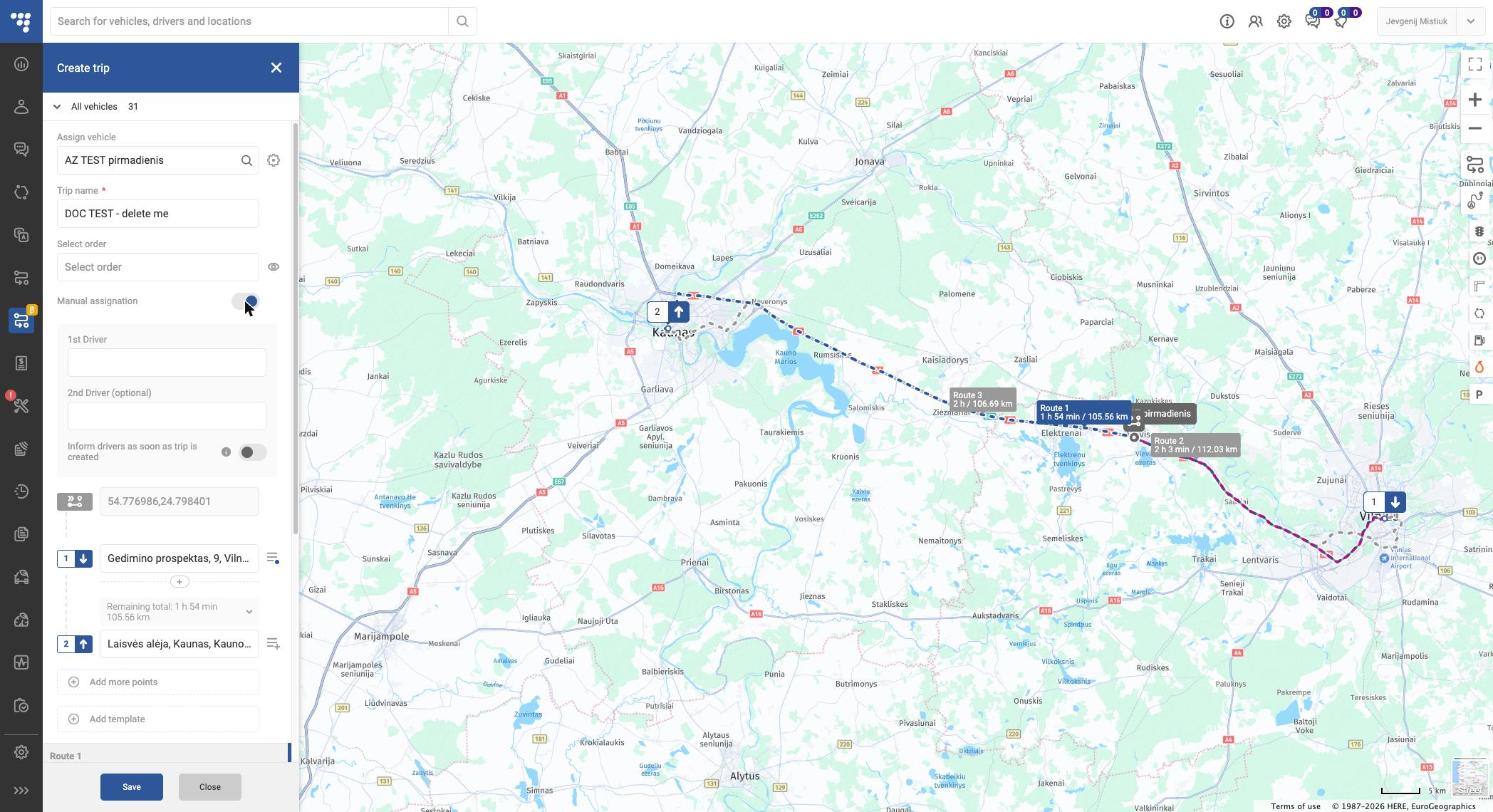
To set the drivers of the trip, turn on Manual assignation:
- 1st Driver and 2nd Driver (optional).
- Inform drivers as soon as trip is created – drivers receive a notification about their assignment to the trip.
6. Trip summary and statuses
Open a trip with row menu (⋮) → Trip Summary, or hover the row and click the eye icon. The Trip information panel shows:
- Trip title, Status, Vehicle, First / Second driver.
- Planned trip distance, Deviated distance, Actual trip distance, Planned trip time. Deviated values are shown in red.
- Tolls – cost per toll system and total (e.g. 428.96 € on a NL → PL trip).
- Waypoints information – expand a waypoint to see coordinates, planned arrival time, estimated road, km left to drive, departure, arrival, sub-tasks and their status. Late arrivals are marked in red, e.g. Arrived at 06/11/2026 07:24 (2 minutes late).
- Done button on a waypoint – mark it as completed manually.
- The map shows the planned route with suggested breaks (45 min, P) and daily rests (9 h, bed icon).
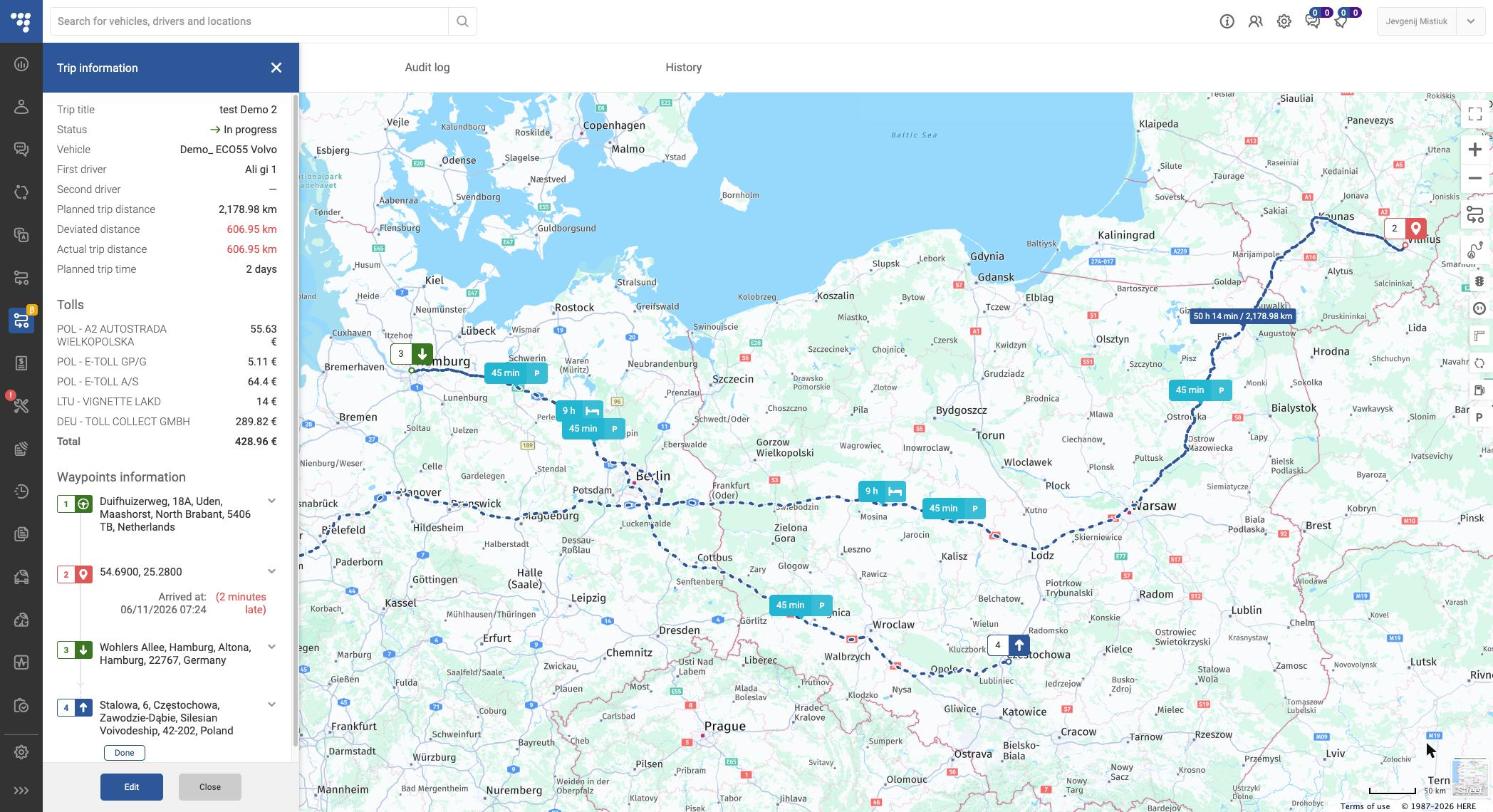
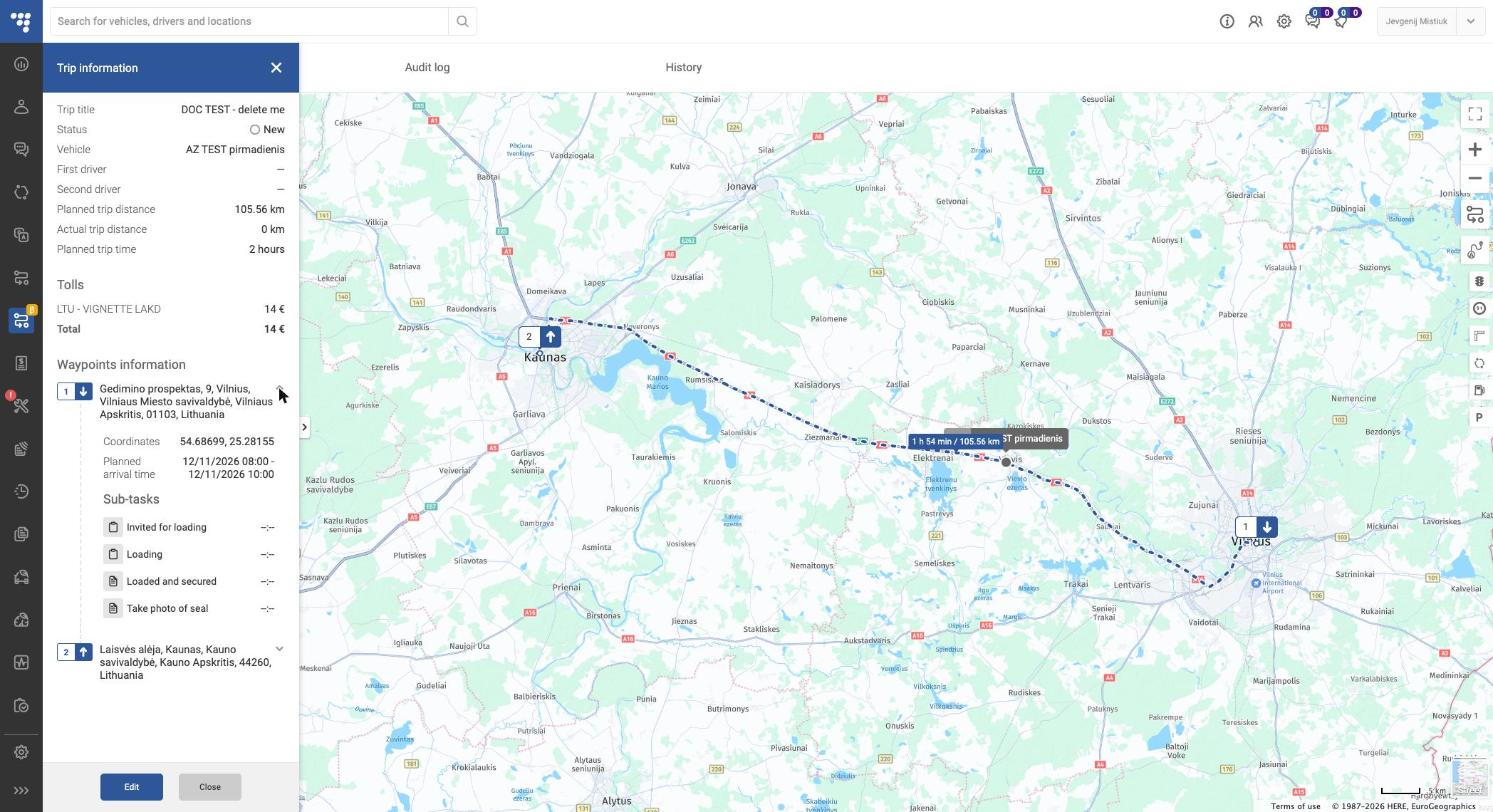
Tabs at the top: Audit log (who created or changed the trip and what was changed) and History. Use Edit to change the trip.
Trip statuses
| Status | Meaning |
|---|---|
| New | Trip created, not started |
| Ready | Trip is prepared for the driver |
| In progress | Vehicle is driving the trip |
| Completed | All waypoints are done |
| Canceled | Trip was cancelled |
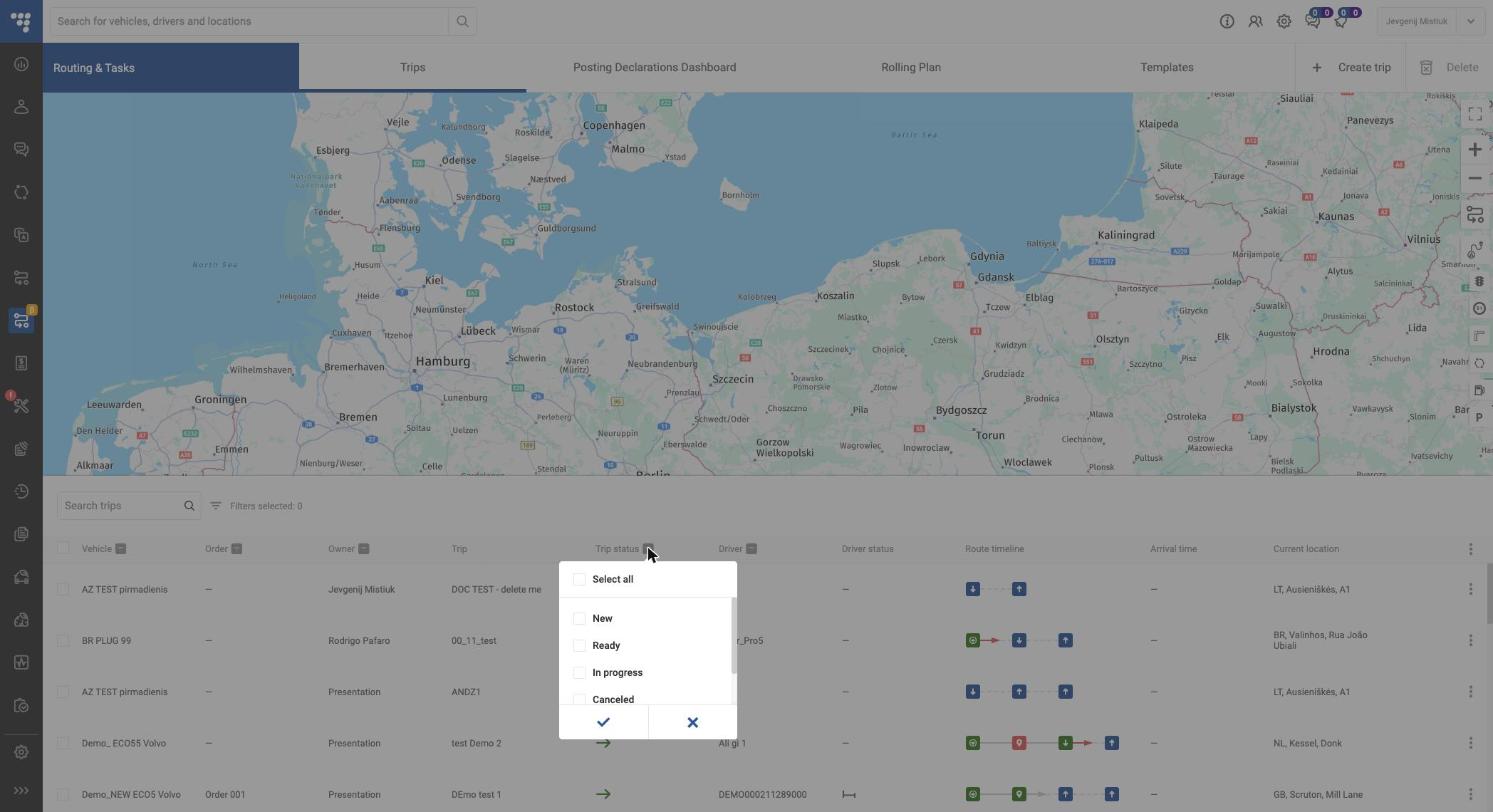
A trip In progress cannot be deleted (Cannot delete while in progress).
7. Route deviation
TrustTrack compares the vehicle’s real track with the planned route and counts every kilometre driven off the route as Deviated distance.
Settings (gear icon next to Assign vehicle)
| Setting | What it does |
|---|---|
| Track deviations from planned route | Turns deviation tracking on (on by default) |
| Tolerance (m) | How far the vehicle may leave the route before it counts as a deviation. Default 1000 m; allowed 100–100 000 m |
| Stick to the route | Locks the route: the driver is guided exactly along the created route. Only exception: a closed road – then the driver is re-directed around it |
| Include traffic | The service applies suitable traffic information to the route |


Where you see deviations
- Trip summary – Deviated distance in red (e.g. 606.95 km).
- Route timeline in the Trips list – red icons for late waypoints.
- Audit log – records the deviation tolerance and rejoin (Stick to the route) settings of the trip.
Tip
use a small tolerance (e.g. 300–500 m) for city deliveries and a larger one (1–3 km) for long-haul trips to avoid false alarms.
8. Route templates
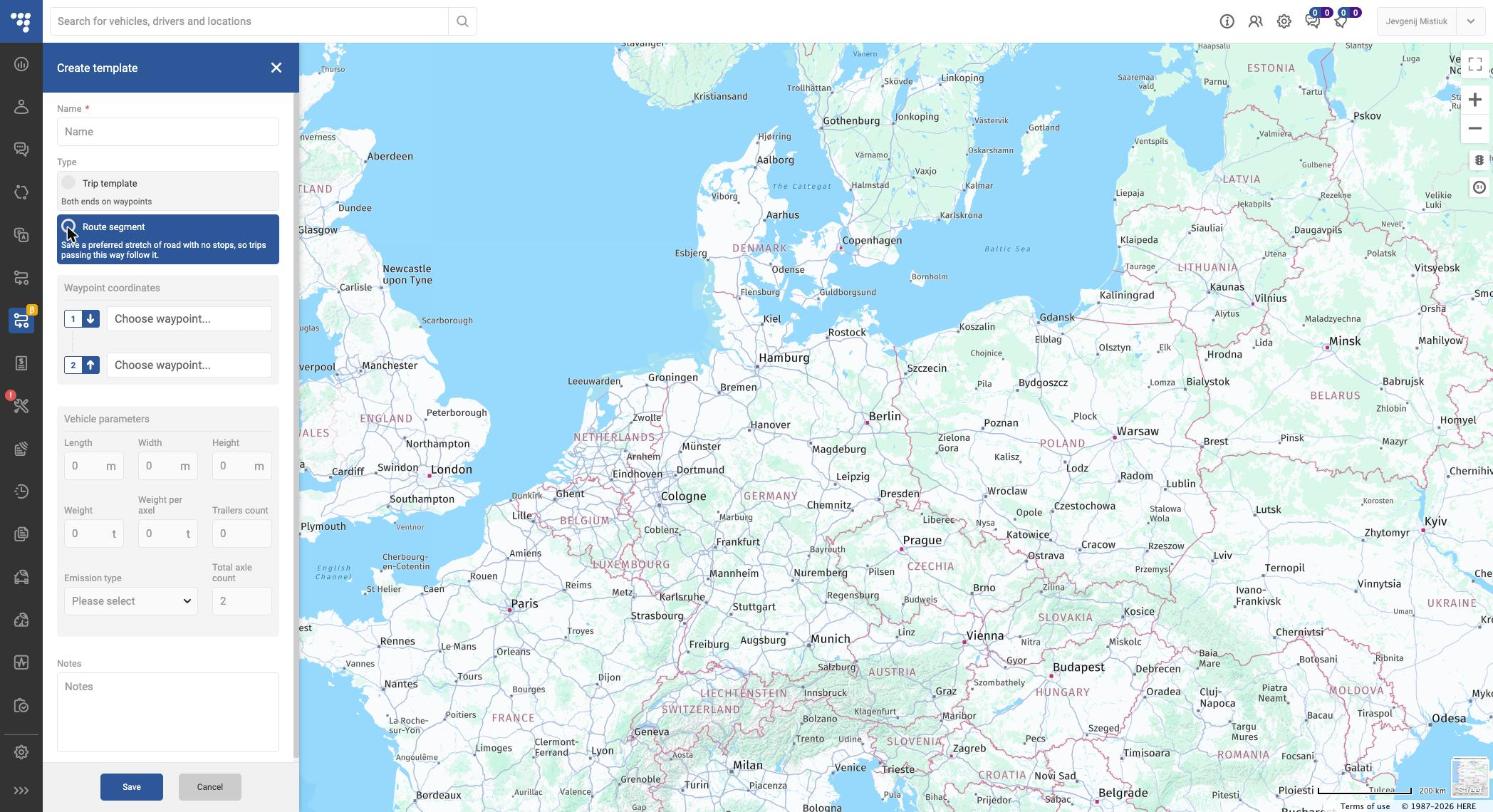
Templates save a route so you do not plan it again. There are two types:
| Type | What it saves | Use for |
|---|---|---|
| Trip template | A full route, both ends on waypoints | Regular trips with the same start and end |
| Route segment | A preferred stretch of road with no stops | Make every trip that passes this area follow your preferred road |
Create a template
- In Create trip, click Add template → + Create new template.
- Enter Name and choose the Type.
- Add the waypoints (start and end).
- Fill Vehicle parameters (length, width, height, weight, axles, emission type) and Notes.
- Click Save.
Use a template in a trip
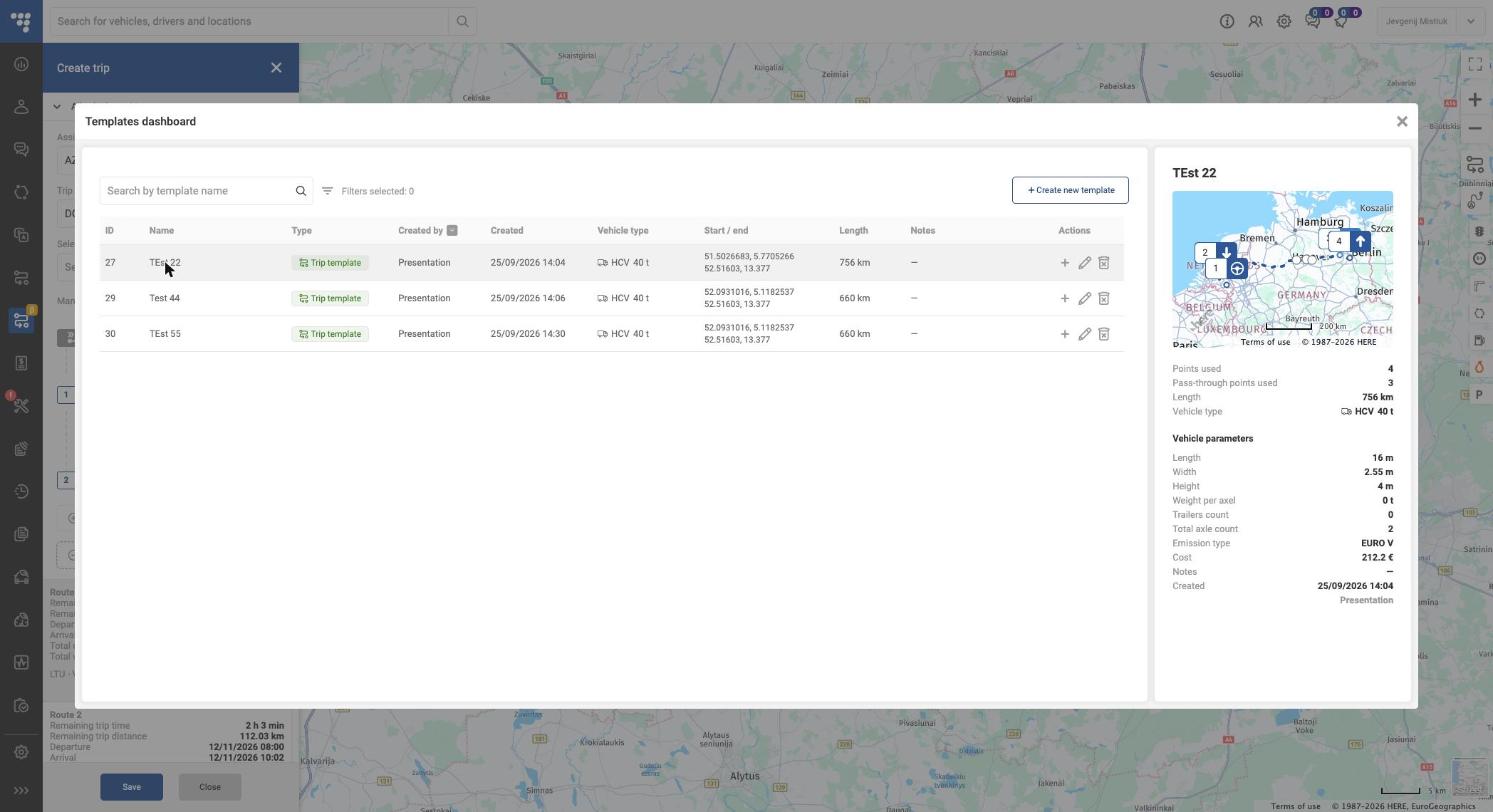
In Create trip click Add template. The Templates dashboard opens. Click a template to preview it (map, points used, pass-through points, length, vehicle parameters, toll cost), then click + in its row to add it to the trip.
Manage templates
Open the Templates tab. The list shows ID, name, type, author, created date, vehicle type, start / end, length and notes. Use the pencil to rename or edit notes, and the bin to delete.

9. Other features and tips
Trip actions (row menu ⋮ in the Trips list)
| Action | What it does |
|---|---|
| Trip Summary | Opens trip information, audit log and history |
| Edit trip | Change vehicle, drivers, waypoints, times, sub-tasks |
| Duplicate | Copy the trip, e.g. for another vehicle or date |
| Delete trip | Removes the trip (not possible while In progress) |
To delete several trips, tick them in the list and click Delete in the top-right corner.
Rolling Plan
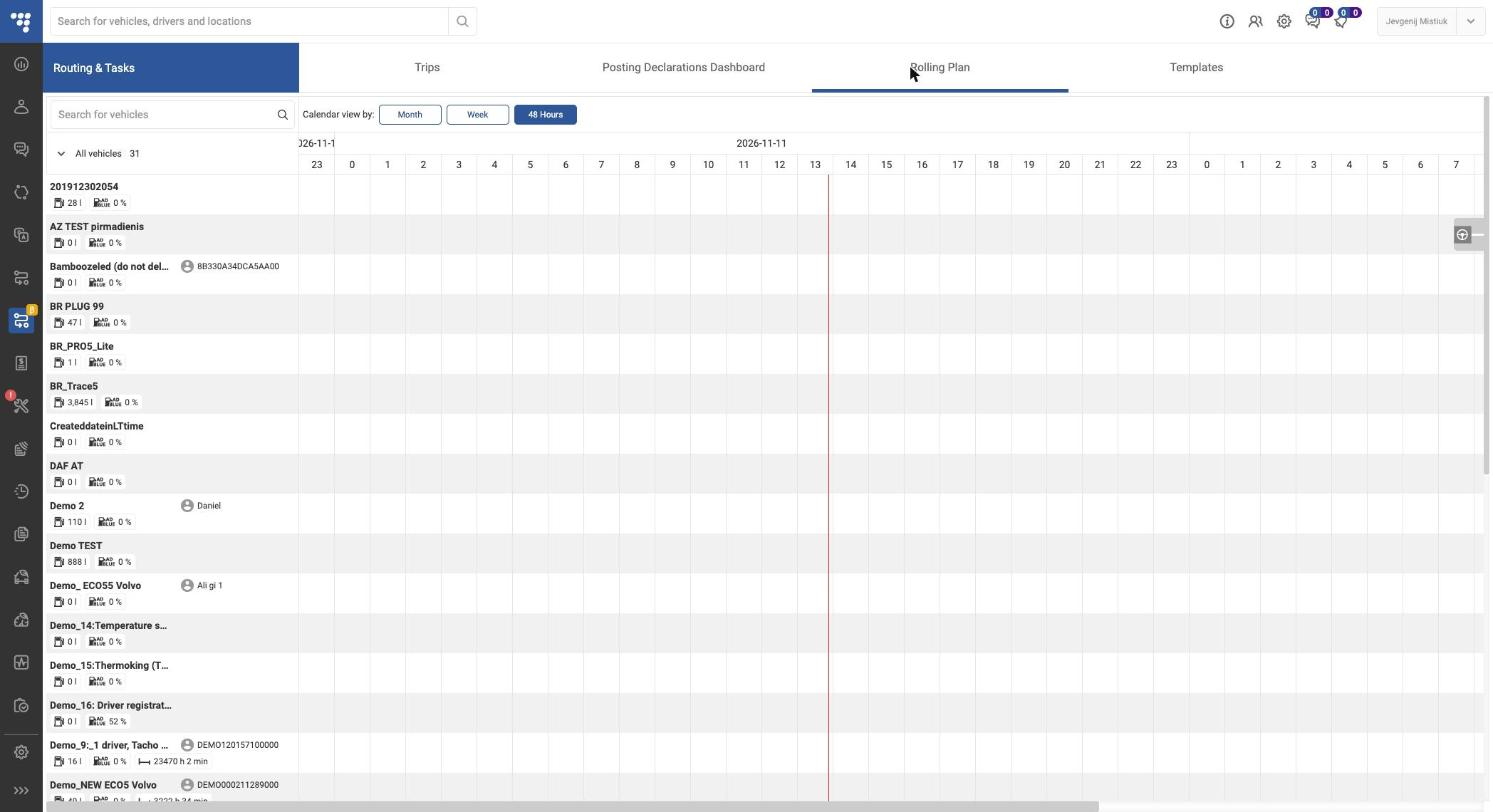
A calendar of all vehicles and their trips, used to see who is free and plan the next trip.
Views and navigation
- Calendar view by: Month (days of the month), Week (days with week numbers, e.g. 46th, 47th) or 48 Hours (hour by hour). Use the arrow on the left of the timeline to move to the previous period.
- The red vertical line marks the current time.
- Search for vehicles filters the list by name.
- All vehicles (with count) opens the vehicle groups list, e.g. LTsales (10), DemoPolska (6). Pick a group to show only its vehicles.
Vehicle row
- Vehicle name and assigned driver (person icon).
- Fuel level (l) and AdBlue (%).
- Remaining driving time, when driver-card data is available (e.g. 3242 h).
Trips on the timeline
- In 48 Hours a trip is a bar with its waypoint icons (start, loading, unloading). The bar is placed by the planned arrival times of its waypoints: change them in Edit trip, Save, and the bar moves to the new slot. Example: a trip with loading set to 13/11/2026 14:00–16:00 shows on 13/11 in the 13:00–18:00 range. Scroll the timeline sideways to reach later hours. Hover an icon to see the address, estimated road, actual road and km left to drive.
- In Week and Month trips are shown as coloured blocks over the days they run.
Planned List (click a vehicle)
- Click a vehicle name. A panel opens under the calendar: Planned List on the left, map on the right.
- Each trip shows its name, status (e.g. Ready, In progress) and an Edit trip button.
- Click the arrow on a trip to expand it: Driver, Object name, Current position (address and coordinates) and ETA to first waypoint. The map draws that trip’s route.
- Edit trip opens the same edit form as in the Trips tab.
- Create new trip starts a new trip from the Rolling Plan.
Tips
- Set planned arrival time windows on loading and unloading points – ETA and lateness are calculated against them.
- Add Duration to waypoints so the plan includes loading time, not only driving.
- Use sub-task templates so drivers always get the same checklist (CMR, photo, signature).
- Check the Audit log if someone changed a trip.