Analysis by vehicle displays a more detailed analysis of vehicle parameters during the selected time period. This TAB is divided into two parts:
- Graph;
- Statistics.
Graph – displays the analyzed data in a graph format. Only one type of data can be displayed at once on the graph. The currently displayed data name is displayed on the top left corner of the graph section. Displayed data can be changed in the statistics section.
Scales – The Y axis of the graph represents values for the select data, while the X axis always represents time. By default X axis scale is in days. This can be changed in the top right of the graph section. The following scales are available:
- Day;
- Week;
- Month;
The currently selected scale will be highlighted in blue and under marked by a blue line.
Fleet average – Next to the axis selection, the user can select do display the average value for the currently selected data. This is turned off by default. If on, the grey dot will be highlighted in blue and a straight dotted line will appear on the graph.
Note
If in the statistics section cars are present in the list, but the user has chosen not to display their data in the graph. The fleet average will still include them in the calculation. To prevent this, undesired vehicle must be fully removed from the statistic display. This is described further below in this section.
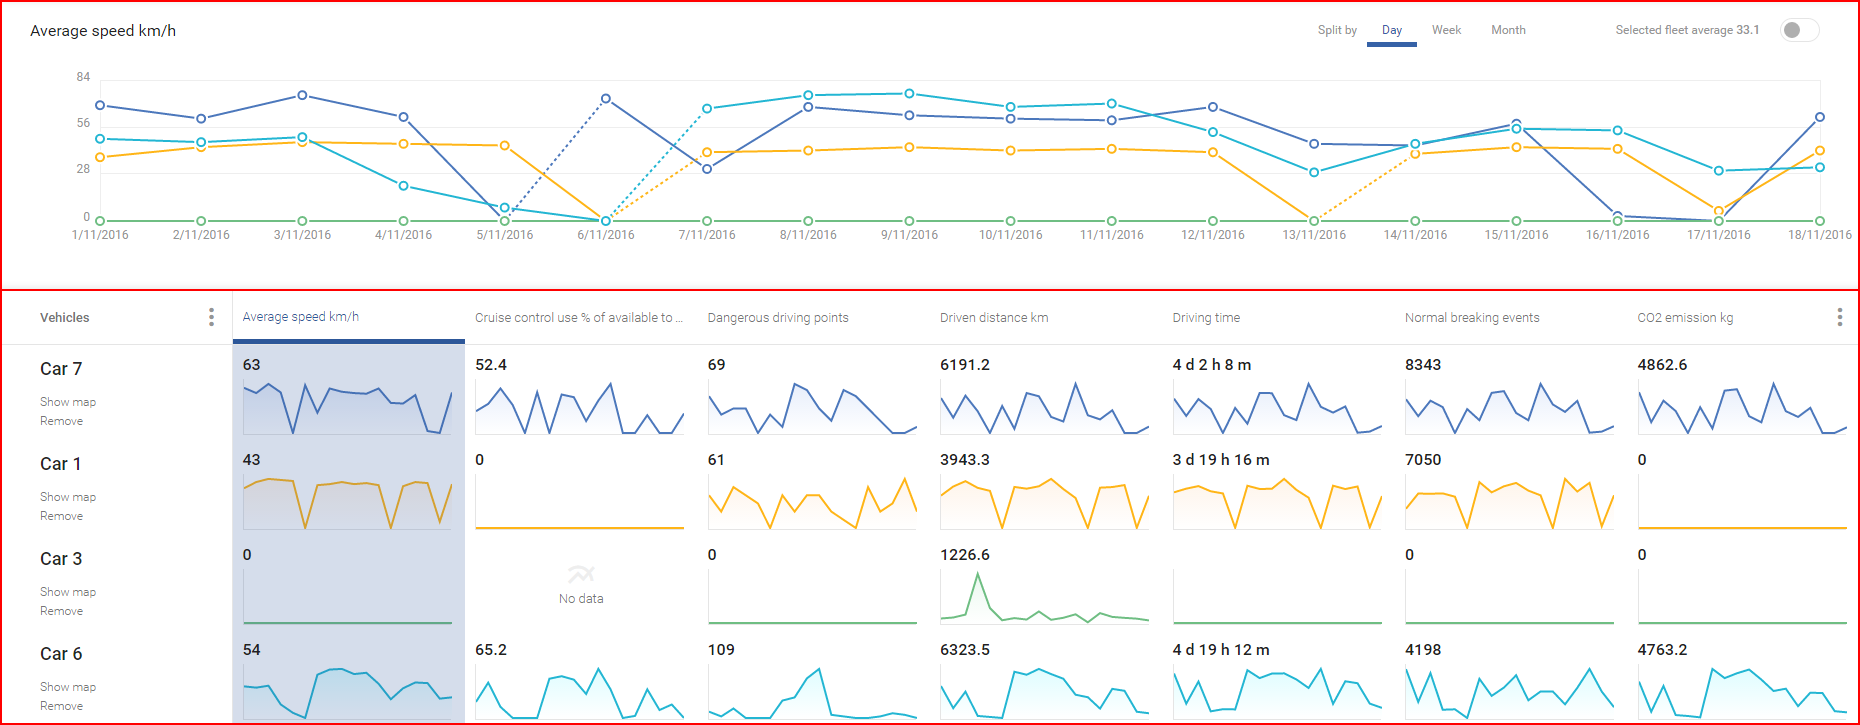
Coloring for every graph line is auto selected by the fleet management system, and is displayed in the statistics section next to every vehicle. When adding or removing vehicles in the statistics section, the coloring of the graphs will be auto formatted by the system.
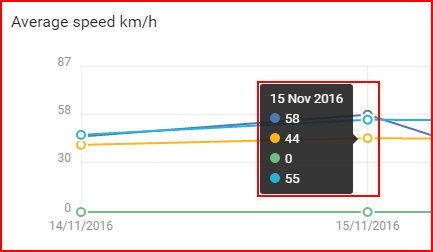
Each graph line has an information dot on every day (this changes if the scale is changed, if week is selected, then the information dot is displayed for each week) moving the mouse over the information dot will display statistical information for that day.
Statistics – consist of a list of selected vehicles and an information table of selected parameters. Vehicle list is generated automatically by displaying the 5 most active vehicles for the selected time period. In the below example only 4 supported vehicles exist for the user and so only 4 vehicles are displayed.
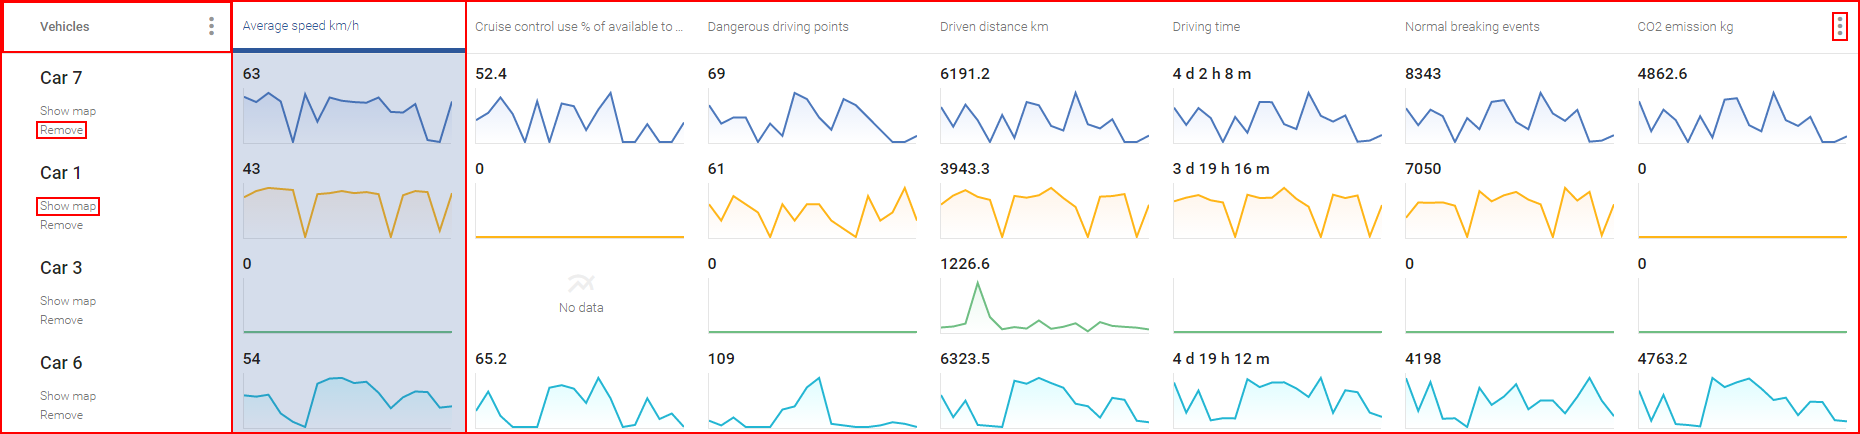
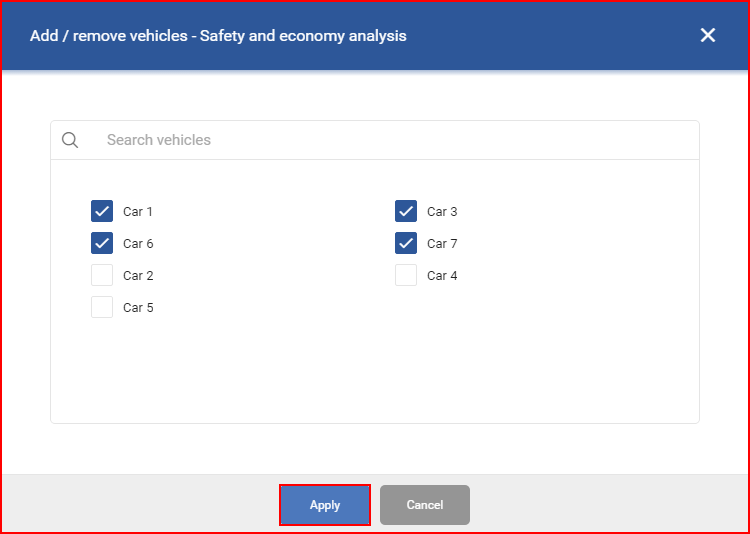
Vehicles – To select vehicles for display, click the three grey dots next to the “Vehicles” in top left corner in the section. A new window will appear with a list of all vehicles for the current web user. Currently selected vehicles will be marked with a blue highlighted tick next to the vehicles name. For big fleets, a search option is available just above the vehicle list. After making any alterations the “Apply” button must be clicked, otherwise the changes made will not be saved. The maximum number of vehicles selected at one time is 5. Vehicles can be quickly removed from the list by clicking the “Remove” button just under the vehicles name.
Note
If all vehicle are removed from the list, either by clicking the “Remove” button or by opening the custom select list and unselecting every vehicle, all the data will disappear from display. To re enable the vehicle list the user must switch to any TAB and then back again.
Show map – under every vehicle name there is a “Show map” button, clicking on this button will display a map with the selected vehicles route during the selected time period.
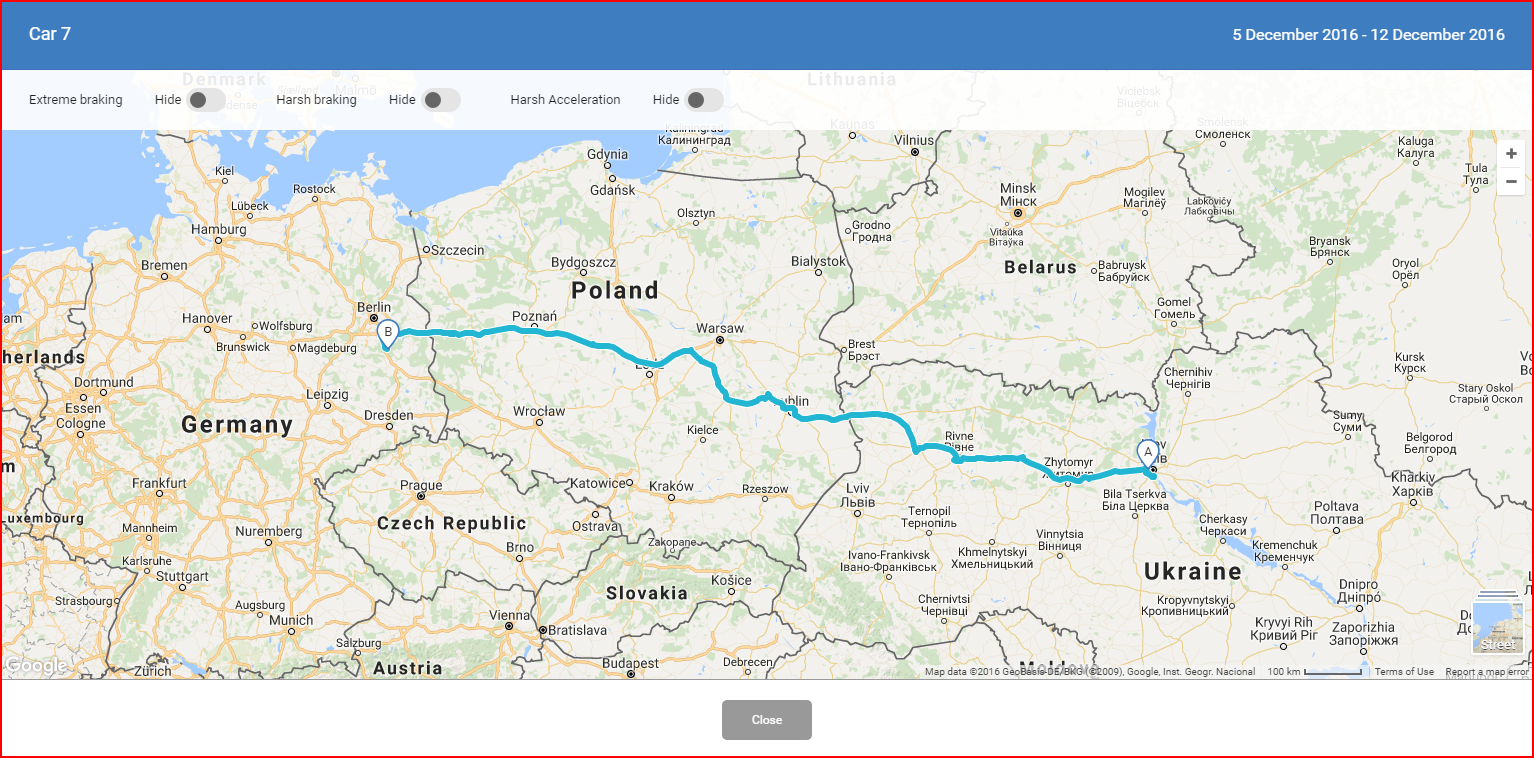
At the top of the map the user can select to either show or hide the following events on the map:
- Extreme braking;
- Harsh braking;
- Harsh acceleration.
These events are turned on by clicking the small slide bar next to every event type. Multiple event display can be enabled at one time. These events will be marked as red circles with exclamation points inside of them.
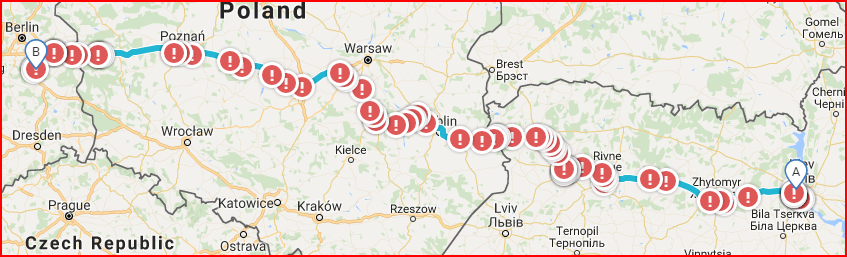
Clicking on a red circle will display additional information about the event.
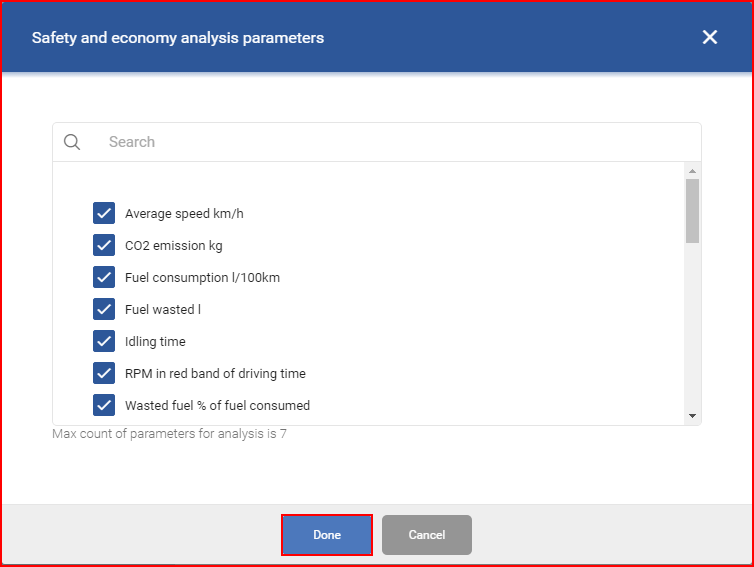
Displayed parameters – displayed parameters can be changed by clicking the three gray dots on the top right corner of this section. This will open a new window with a list of all available parameters to display. The currently selected parameters will be highlighted with a blue tick next to the parameter name. A quick search is available just above the list. A maximum of 7 parameters can selected at once. After making changes, the “Done” button must be clicked, otherwise the parameters will not be saved.
Display for graph – Only one parameter (data from one column) can be displayed at one time on the main graph (This is done because of scaling complications). The currently displayed parameters will have their header highlighted in blue. The user can adjust which parameters (from the selected column) he wants to be displayed on the main graph. This can be done by clicking the parameter graphs in the column to un-highlight them. Only highlighted parameters are displayed in the main graph. If one column is highlighted and the user clicks on a parameter from a different column, the previous column will un-highlight fully and only the parameter from the other column will be displayed. The user can select a whole parameter column by simply clicking on the header.
