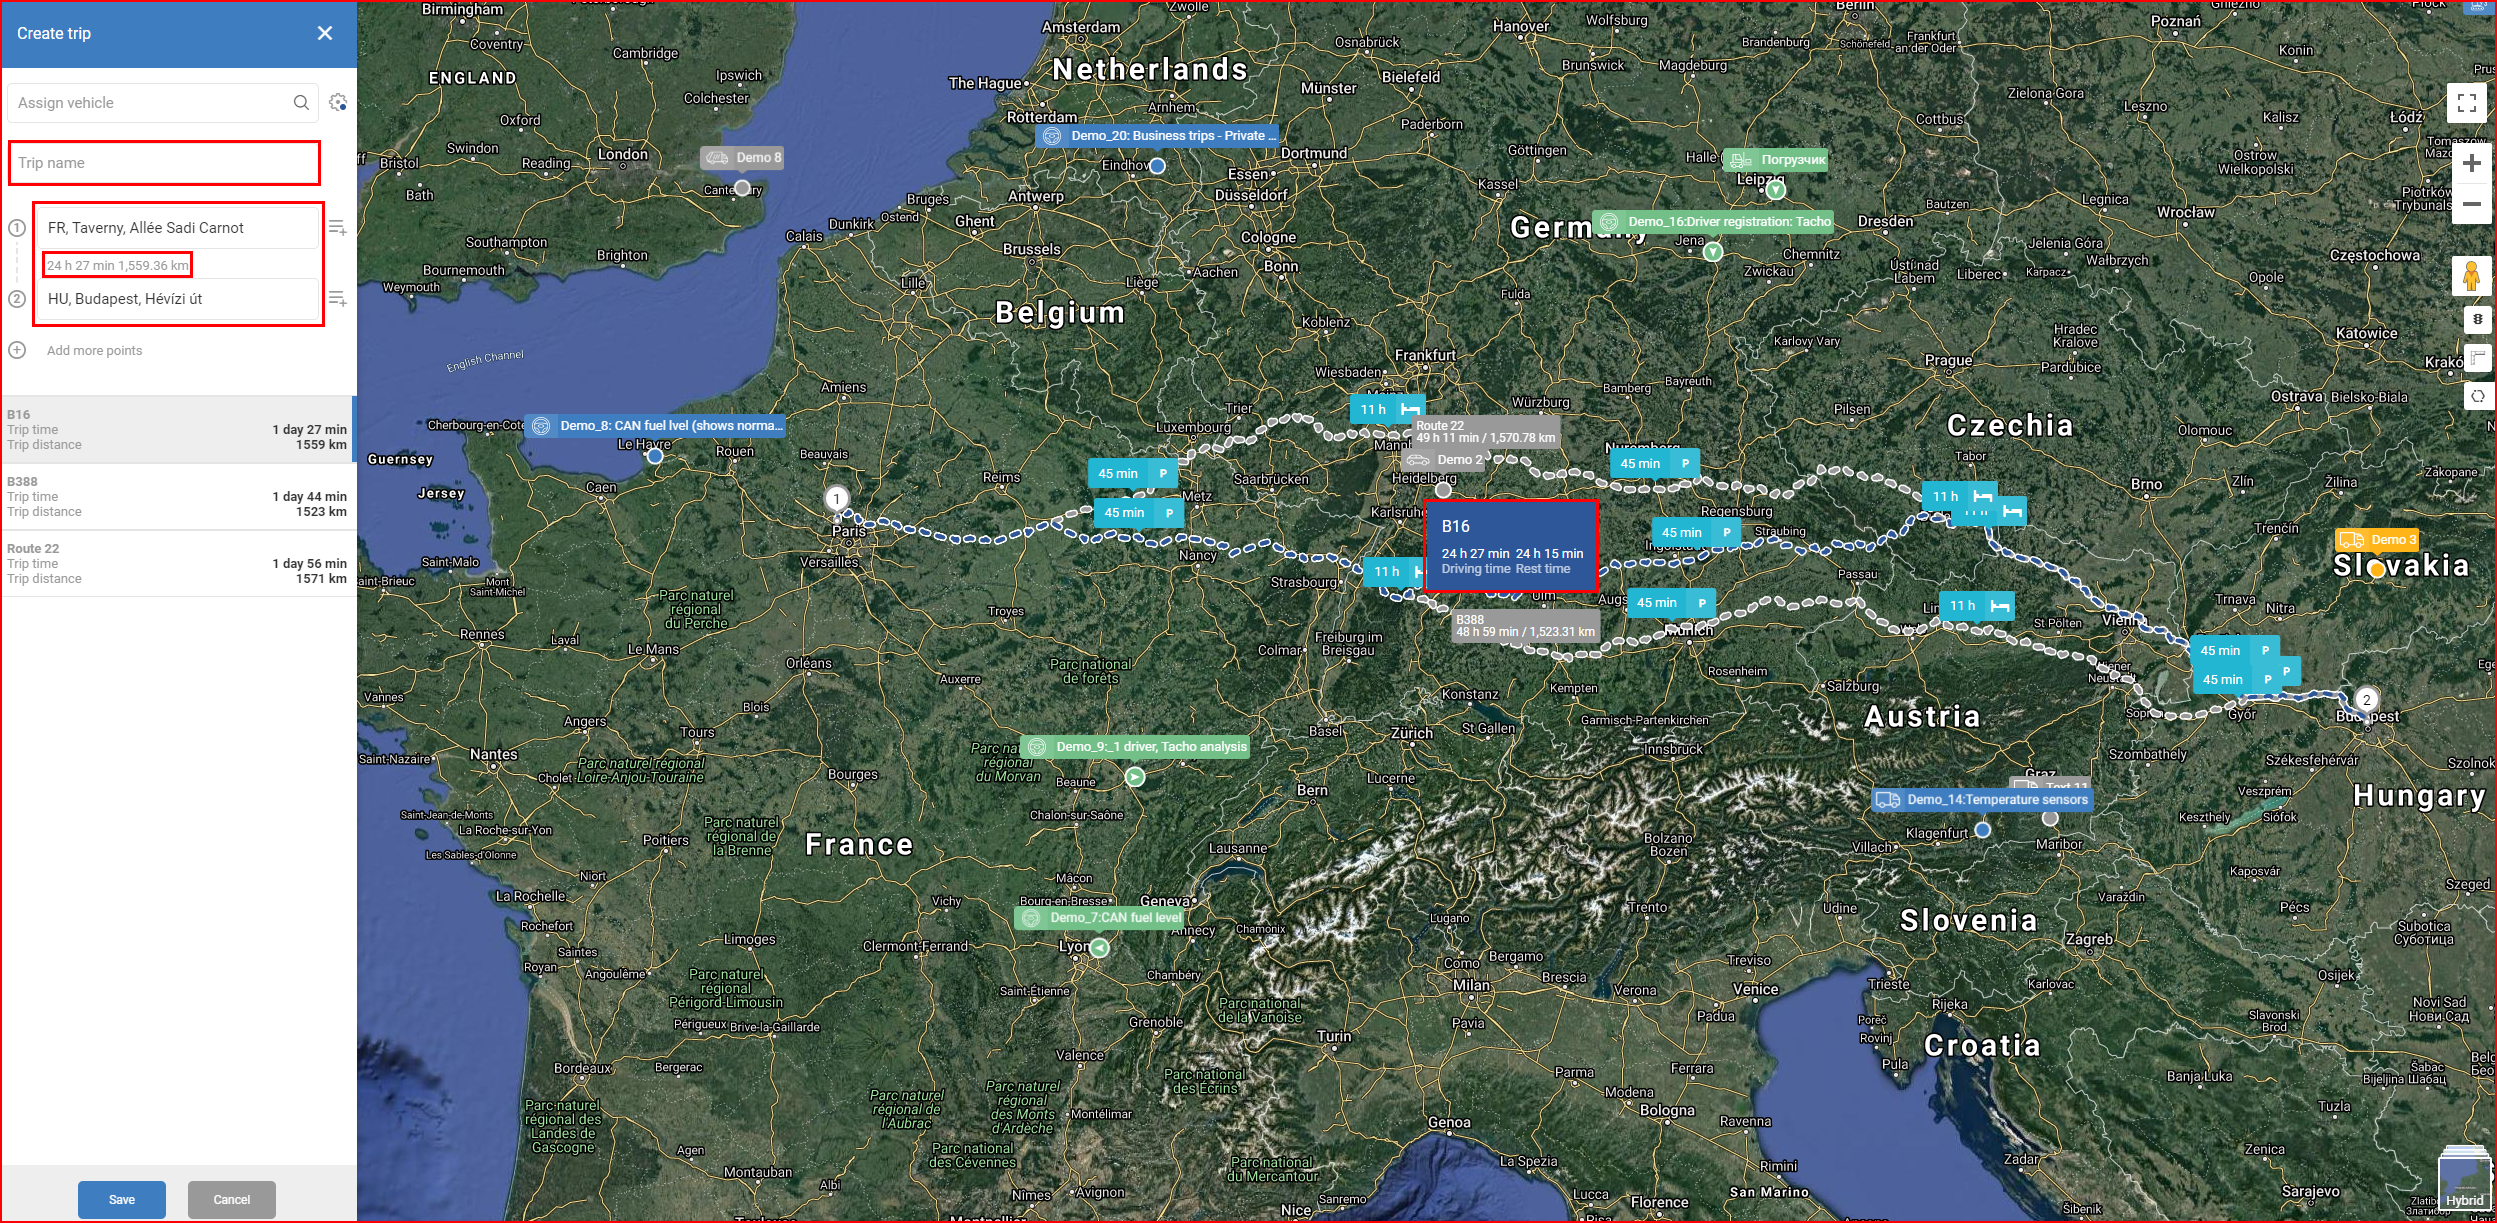
To start using the Routing & Tasks module, you need to create a trip. Click Create trip in the upper right corner of the window to create a new trip. You will be directed to the trip creation panel.

Routing and tasking Trip editor:
During trip creation you must Assign vehicle and type Trip name.
Secondly you may manualy assign driver from drop down list (in case if driver not yet in a vehicle at the moment). To do so please toggle “Manual assignation”.
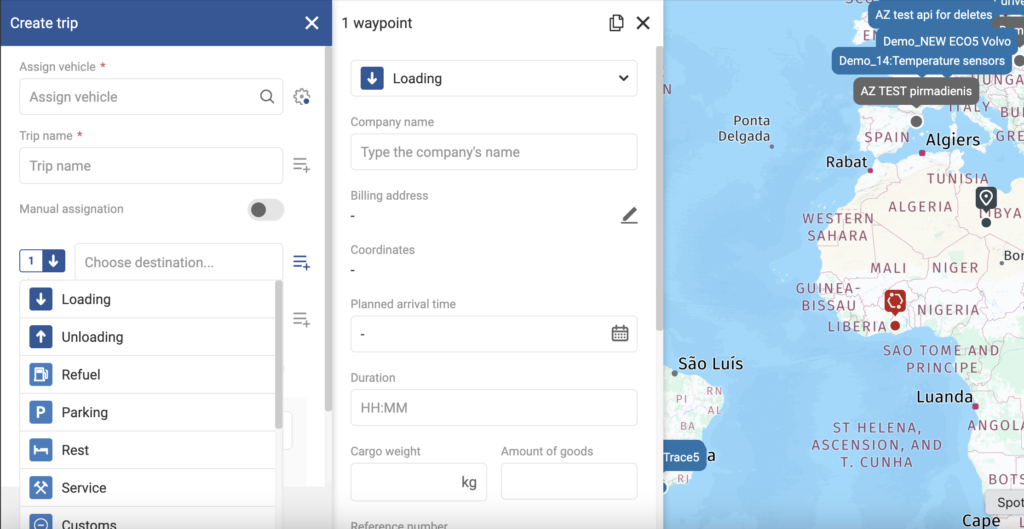
By default you have 2 waypoints. 1st loading point and 2nd unloading point. You may change types by clicking on waypoint icon. Also by clicking on (Extra icon) icon you opening waypoint details window. Additional details are optional, but highly recommended.
Loading – type of waypoint where you as dispatcher pointing driver where he should pick up goods. In additional info note important fields as: “Company name” driver will know what to seek when he arrives.
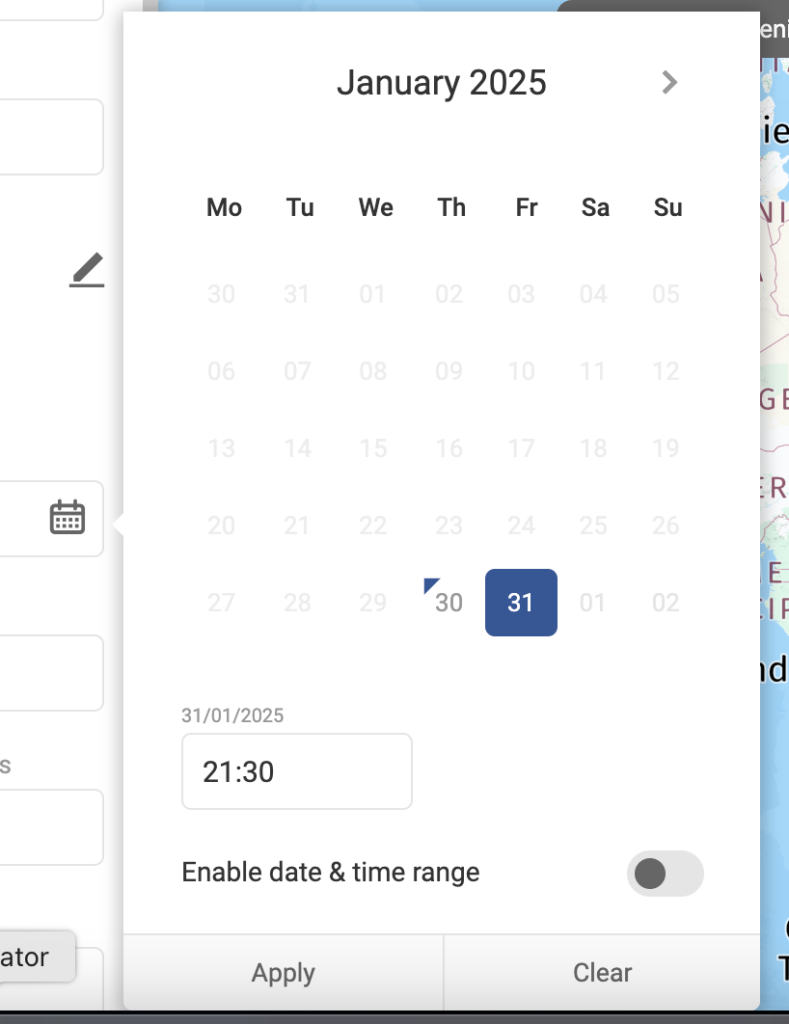
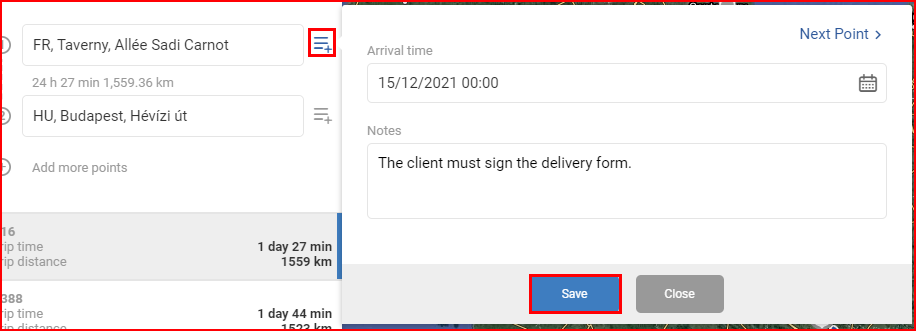
Arrival time – when driver supposed to be at waypoint. Could be selected fix arrival time or time range. After selected click Apply.
Duration – important parameter which is used for correct ETA calculation. Here you should mark how much time supposed to spend at specific waypoint.
Unloading – type of waypoint where you as dispatecher pointing driver where he should deliver goods.
Refuel – type of waypoint where you selecting detalis about refuiling.
Parking – type where
Routing type and settings
Assign a vehicle at the top of the Create trip window. Click the Settings icon to open the route settings.
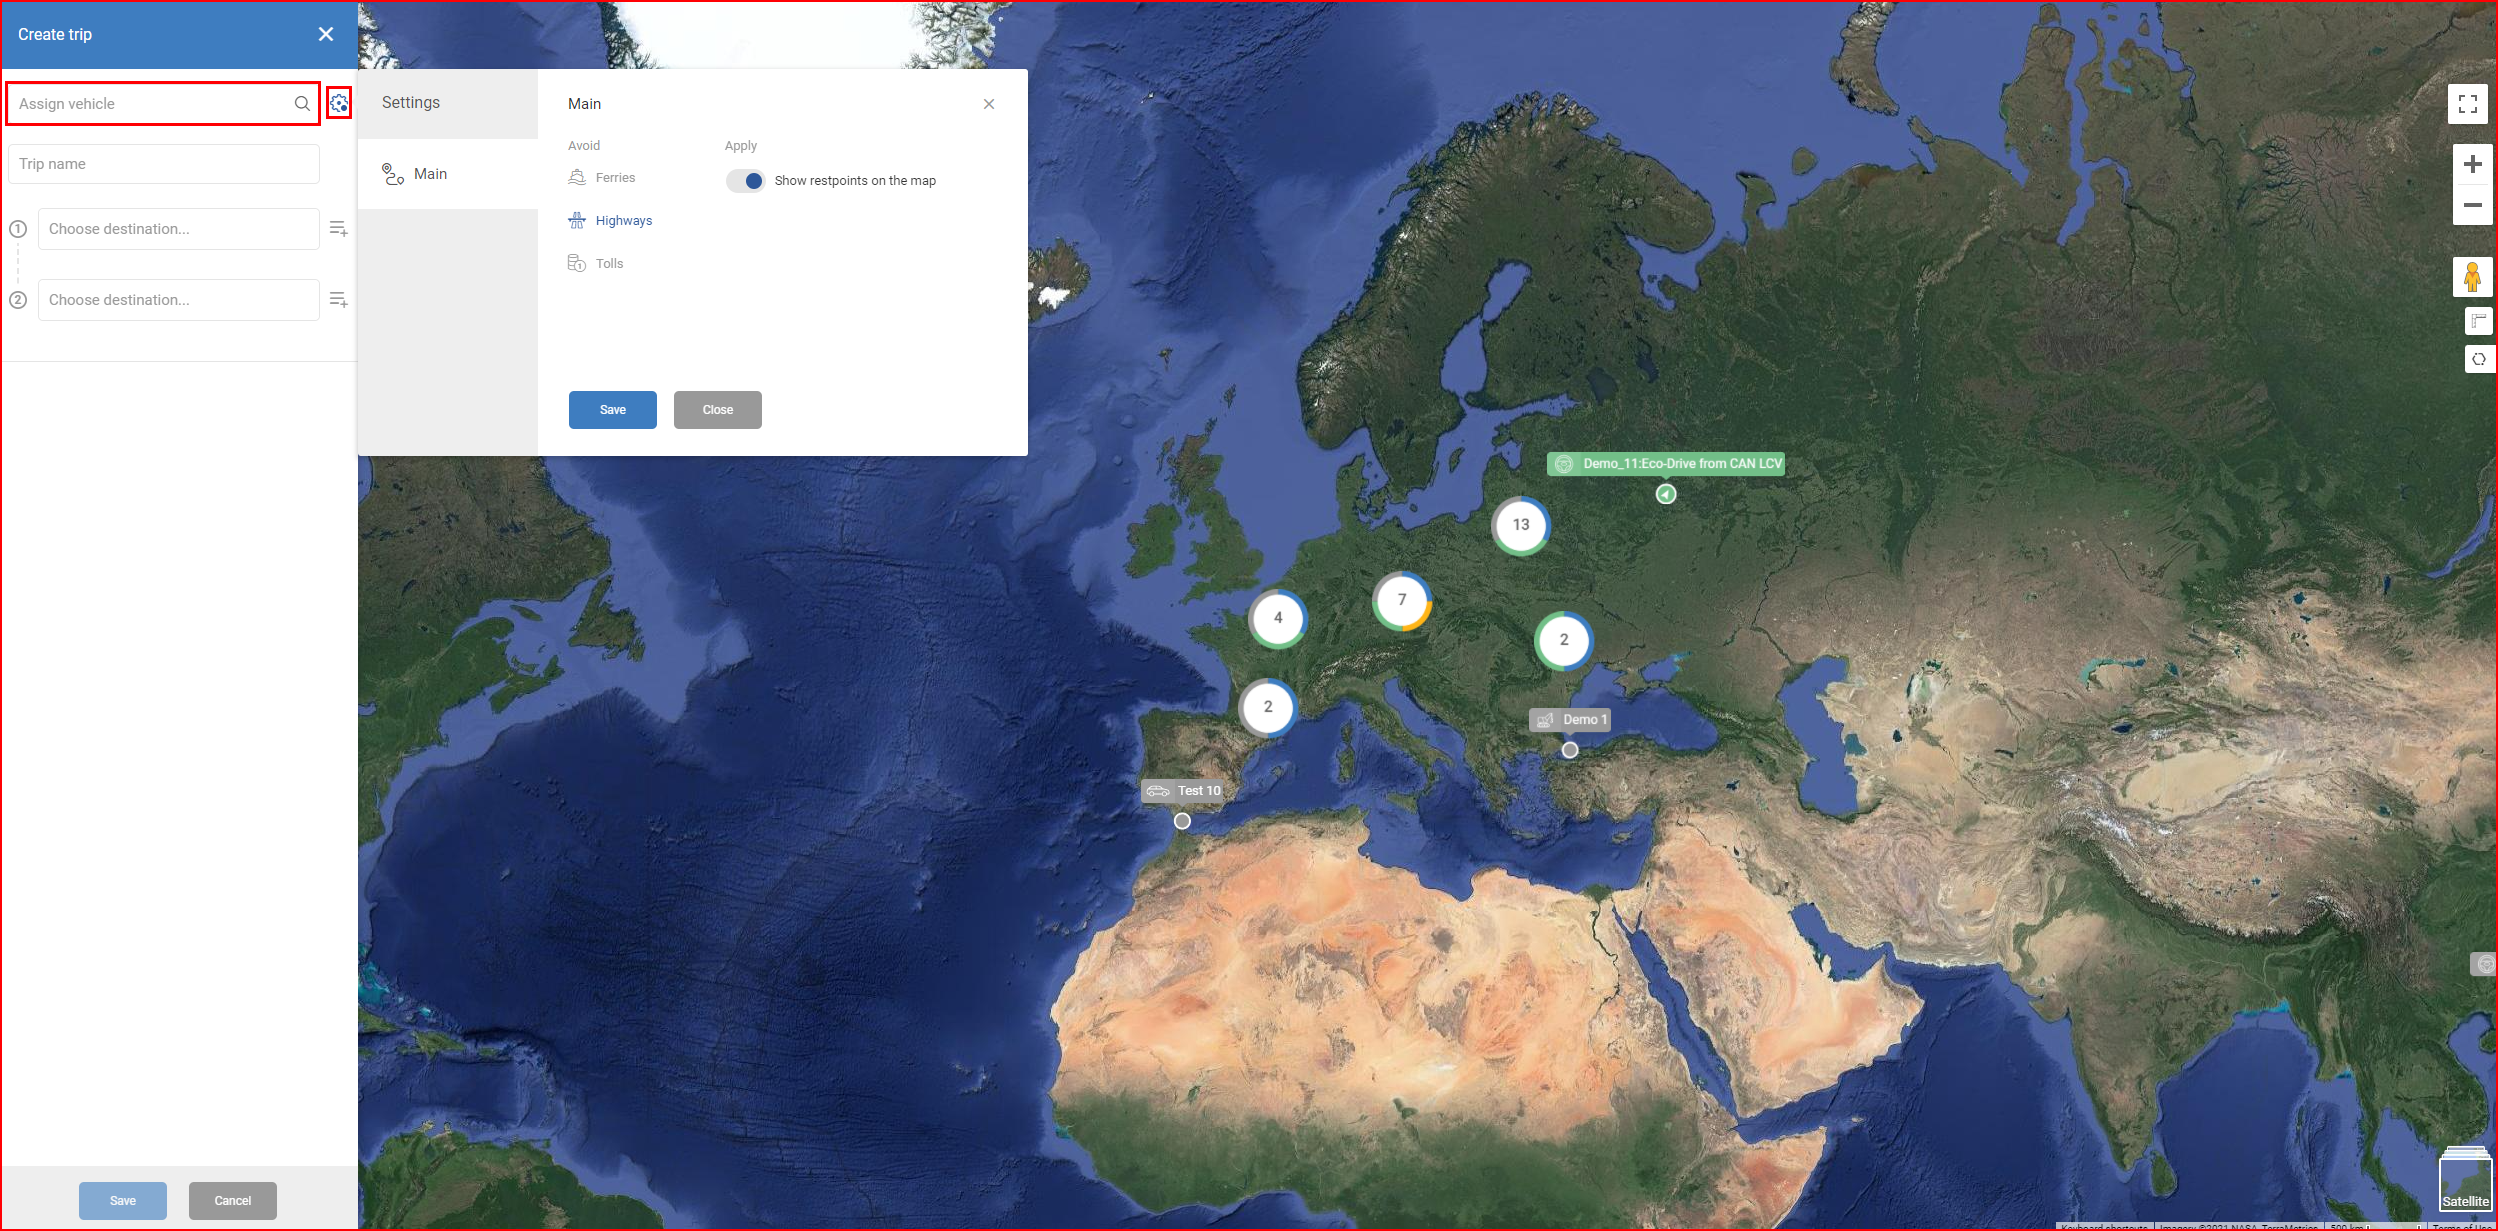
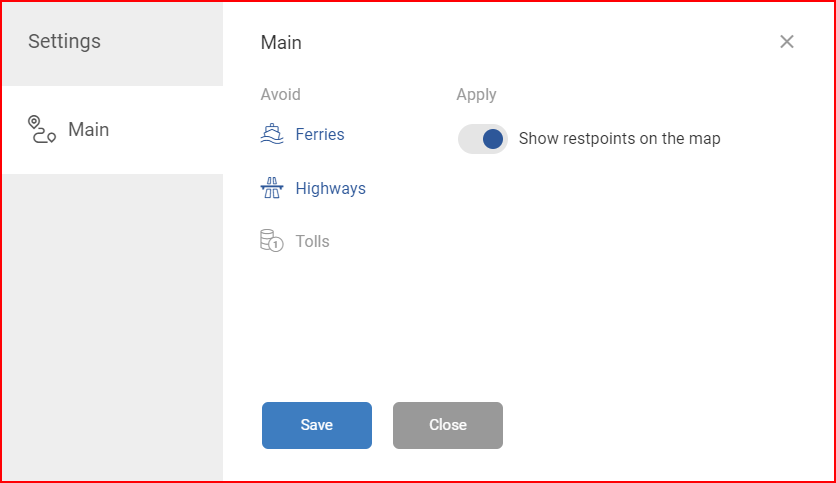
For light commercial vehicles, select whether you wish to avoid ferries, highways, and tolls in the route. Choose whether to show restpoints on the map or not. The routes are recalculated after each change has been saved.
For heavy commercial vehicles you can select the following:
Main
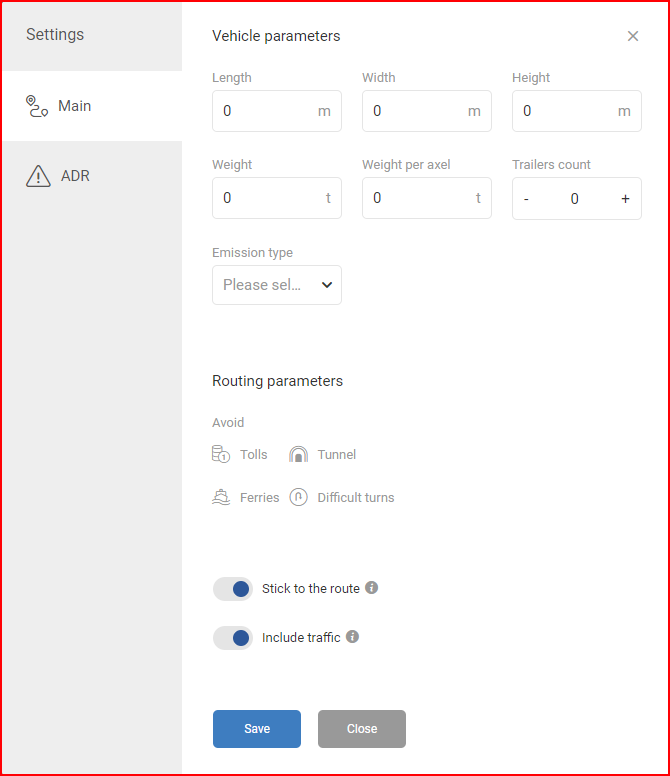
- Vehicle parameters:
– Length in meters
– Width in meters
– Height in meters
– Weight in tons
– Weight per axle in tons
– Trailers count
– Emission type - Route parameters:
– Avoid – tolls, tunnels, ferries, difficult turns
Select the Stick to the route parameter to lock the route so the driver is guided exactly according to the created route. Select Include traffic to apply traffic-related information where available.
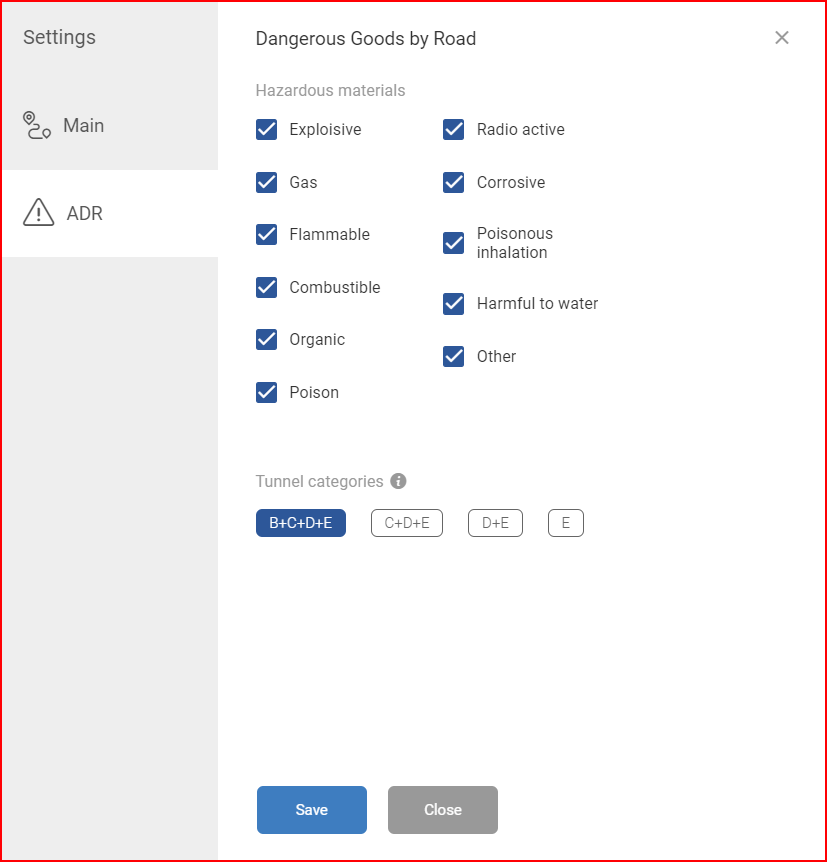
ADR
- Hazardous materials – tick the checkbox for each hazardous material the cargo contains. These restrictions exclude roads on which hazardous materials are prohibited from being transported.
- Tunnel categories – specify which tunnel categories must be avoided. Tunnel categories specify which dangerous goods are not allowed to enter the tunnel.
The routes are recalculated after each change has been saved.
Defining and selecting routes
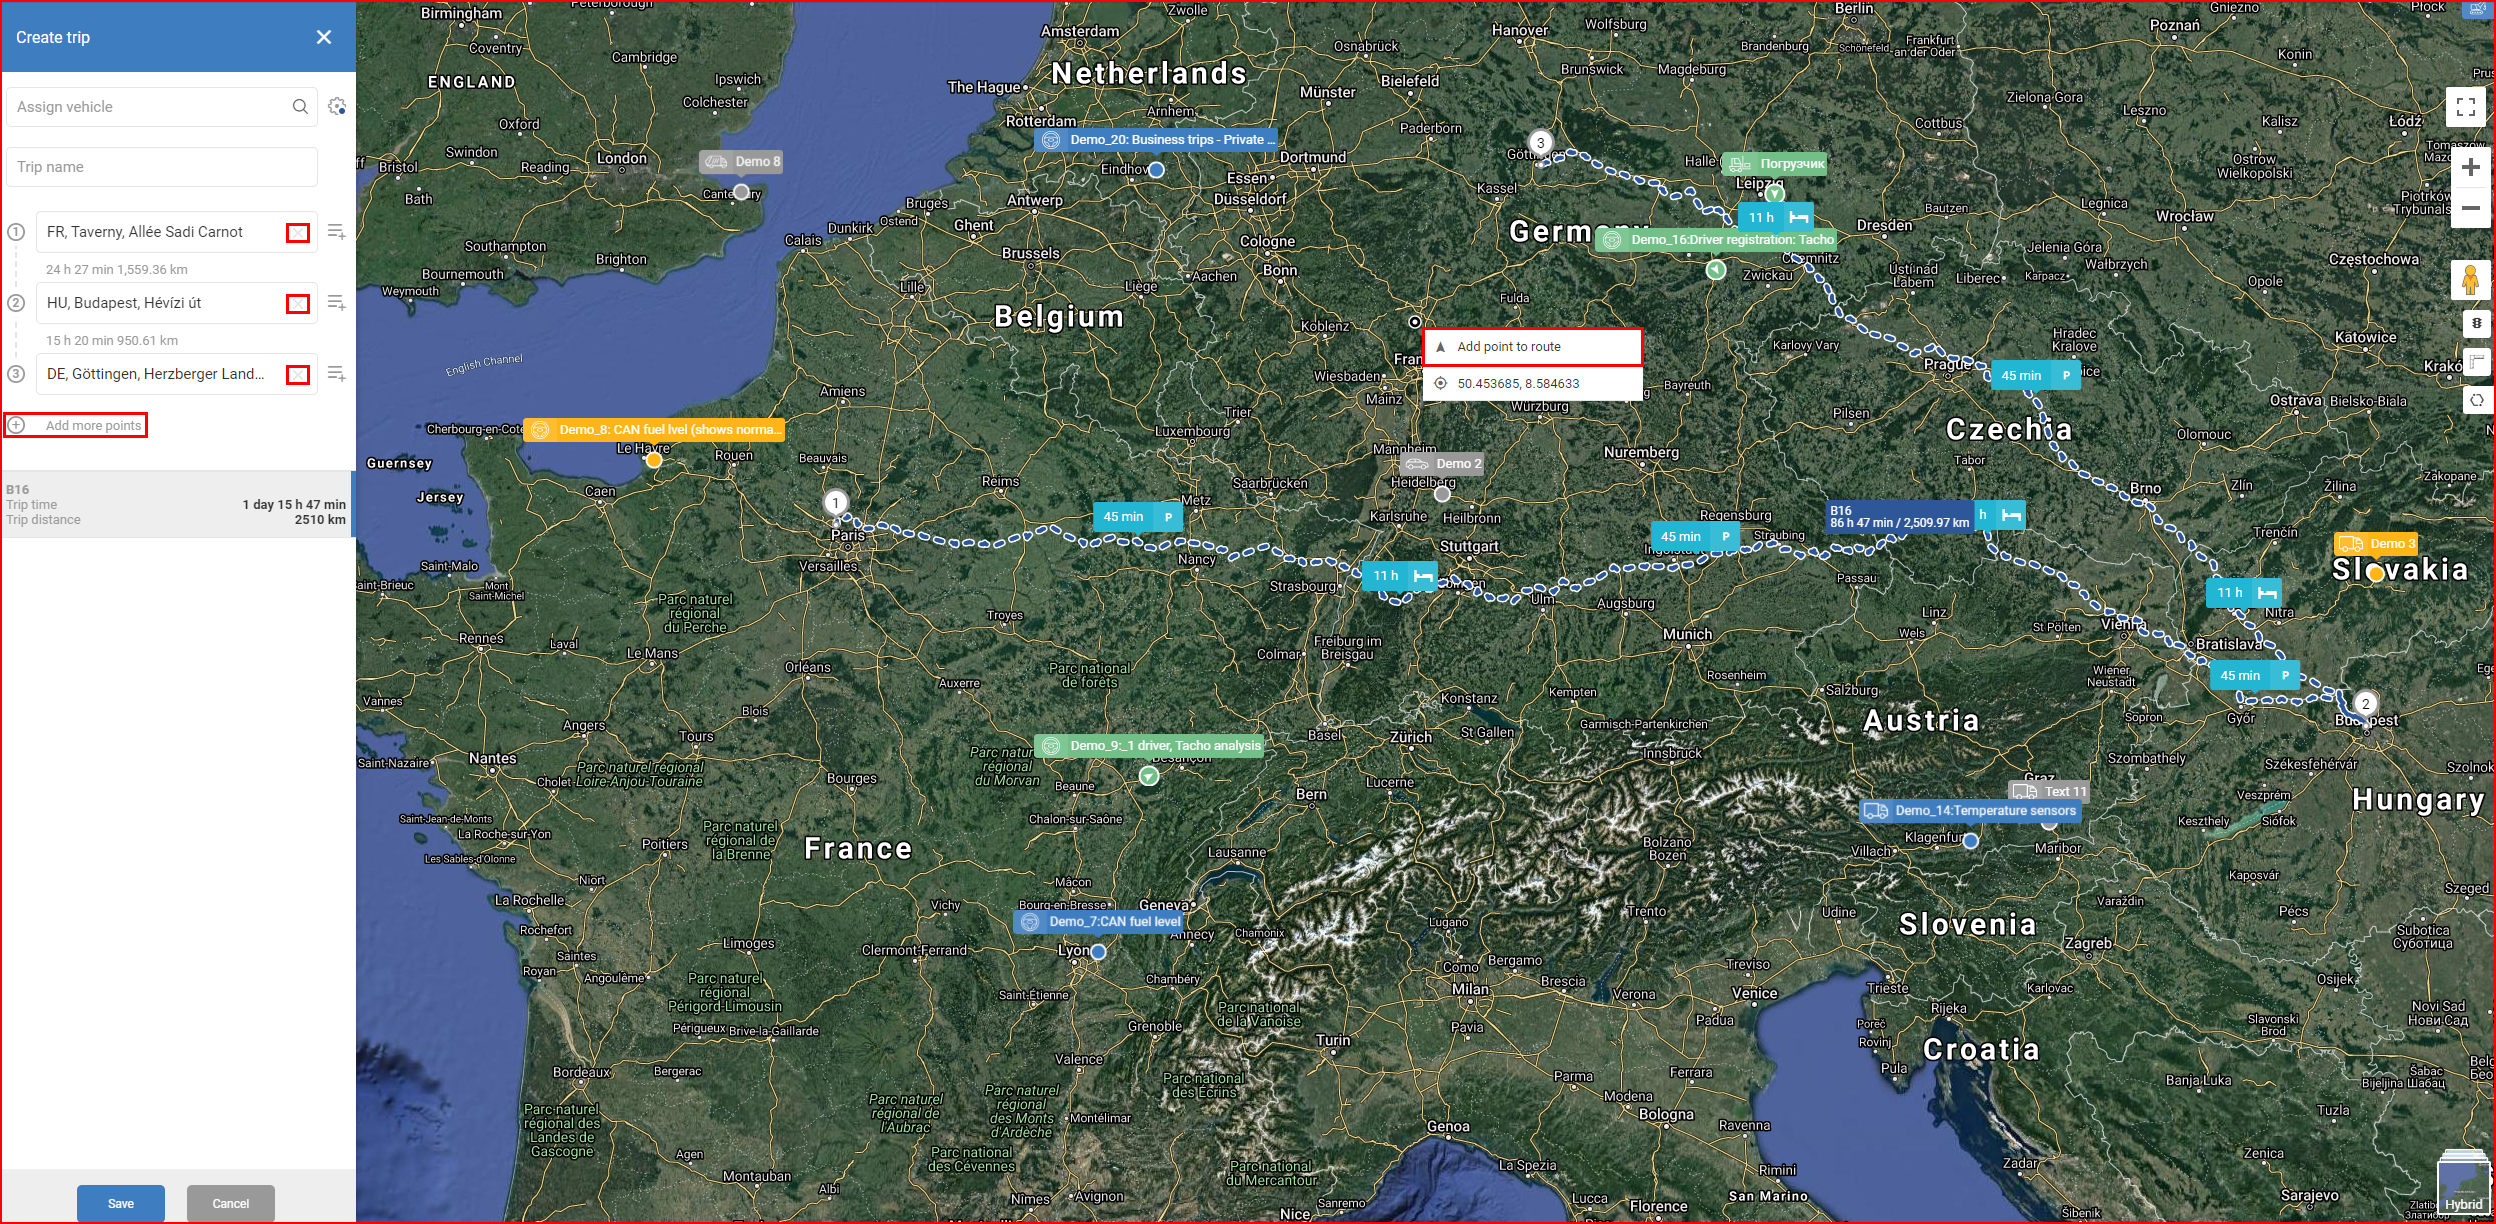
A trip must have a name and route. Enter a chosen trip name and define the start (1) and end (2) points of the route. You can define the points by entering them into the fields or by clicking on the map. You may use an address, coordinates, a geozone, or the location of an object as a point. The system then calculates several possible routes between the two points. The routes are displayed both in the trip creation panel and on the map.
Select a route by clicking it either in the panel or on the map. The total duration and length of the route are displayed between the points on the panel and on the map.
Note
Hover over the route summary on the map to display additional information about the route. Click and drag a point on the route to change it.
You may also add a note of information to each point of the route. To do this, click the icon located on the right of the field in which the point was entered. Set a scheduled arrival time by picking a day and an hour in the calendar. Include any information for the driver to see in the Notes section. Click Save to add this note to the point.
Adding additional points
A route can have up to 20 points. You can add additional points to the route by:
- Clicking Add more points in the panel and defining the new point
- Left or right-clicking on the route in the map and dragging the cursor to the location where you wish to add a point
- Right-clicking on the map and clicking Add point to route
You can rearrange the point order by dragging and dropping them in the panel. Click X to remove a point.
Note
A grey line displays the route the vehicle must travel to the starting point. This route is not included in the final route.
Click Save to save the trip and return to the trip list. Click Close to discard the trip and return to the trip list.