The account settings allow changing some of the general settings that affect some of the data shown within the fleet management system. The following settings can be modified:
Account
The account page allows you to view your email and change your password.
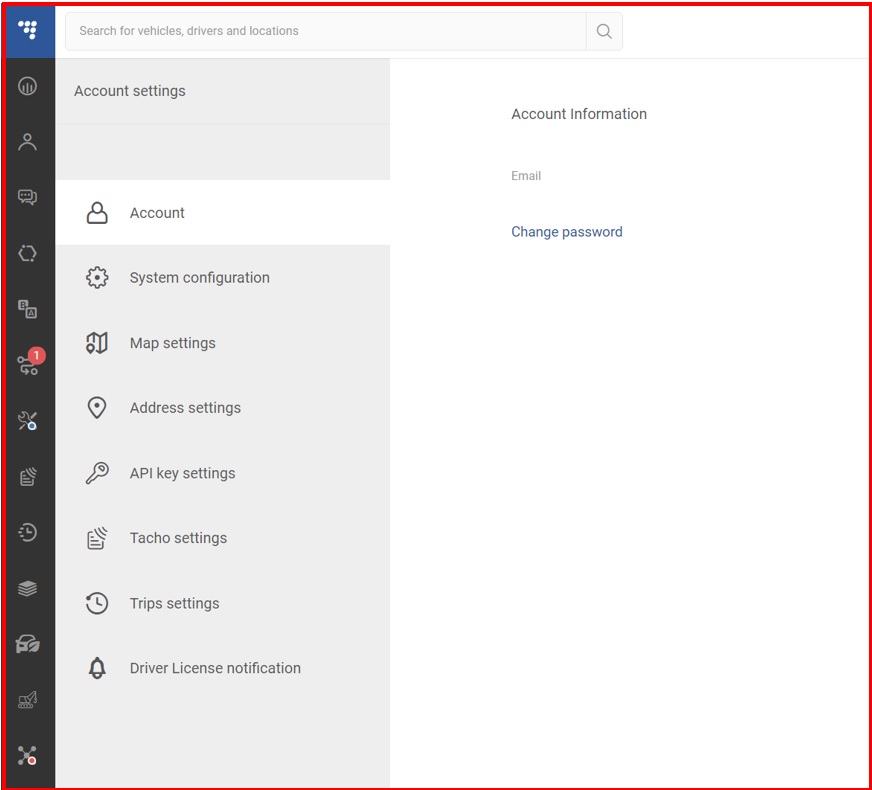
To change your password, click the Change password link. A new window will appear prompting to fill in your current and new passwords.
- Current password – enter the current password you are using to log in.
- New password – enter a new password for your account. It cannot match your current one and must meet the password requirements listed below.
- Retype new password – enter your new password again. It must match the previously entered password.
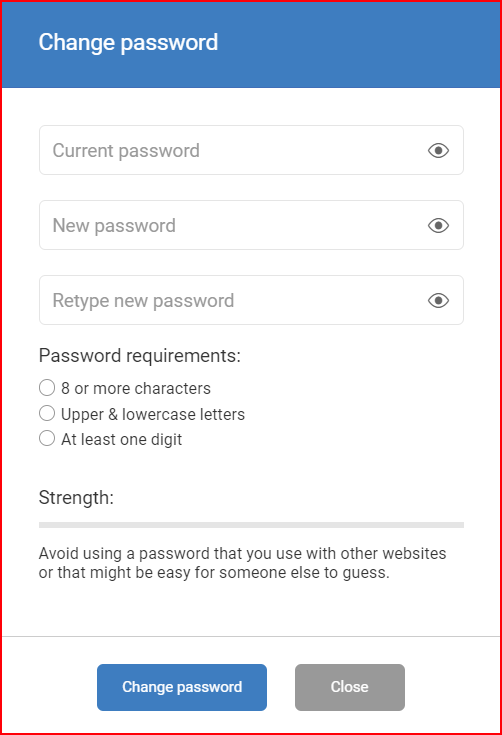
After filling in all three fields, click the Change password button. If all information entered is correct, your password will be changed. To stop making changes, click Close.
System configuration
- System localization – can be set by country. A search bar is implemented to help quickly locate a country. This localization is used mostly for Google Maps to assure that the setting complies with the selected countries laws and regulations. If this setting is not set, the system will automatically synchronize localization settings from the login computer on each login. Once the localization is selected, the auto-synchronization will stop.
- Timezones – this setting allows the user to select his current timezone. With a set timezone, the system will automatically adjust received records to match the selected time zone.
- System language – the user can select the system language. The system will automatically display the respective date format according to the selected language.
- Units of measurement – here the user can select in what format will the units be shown within the system. Imperial, metric units, metric units with consumption shown in km/l, or US customary units can be selected.
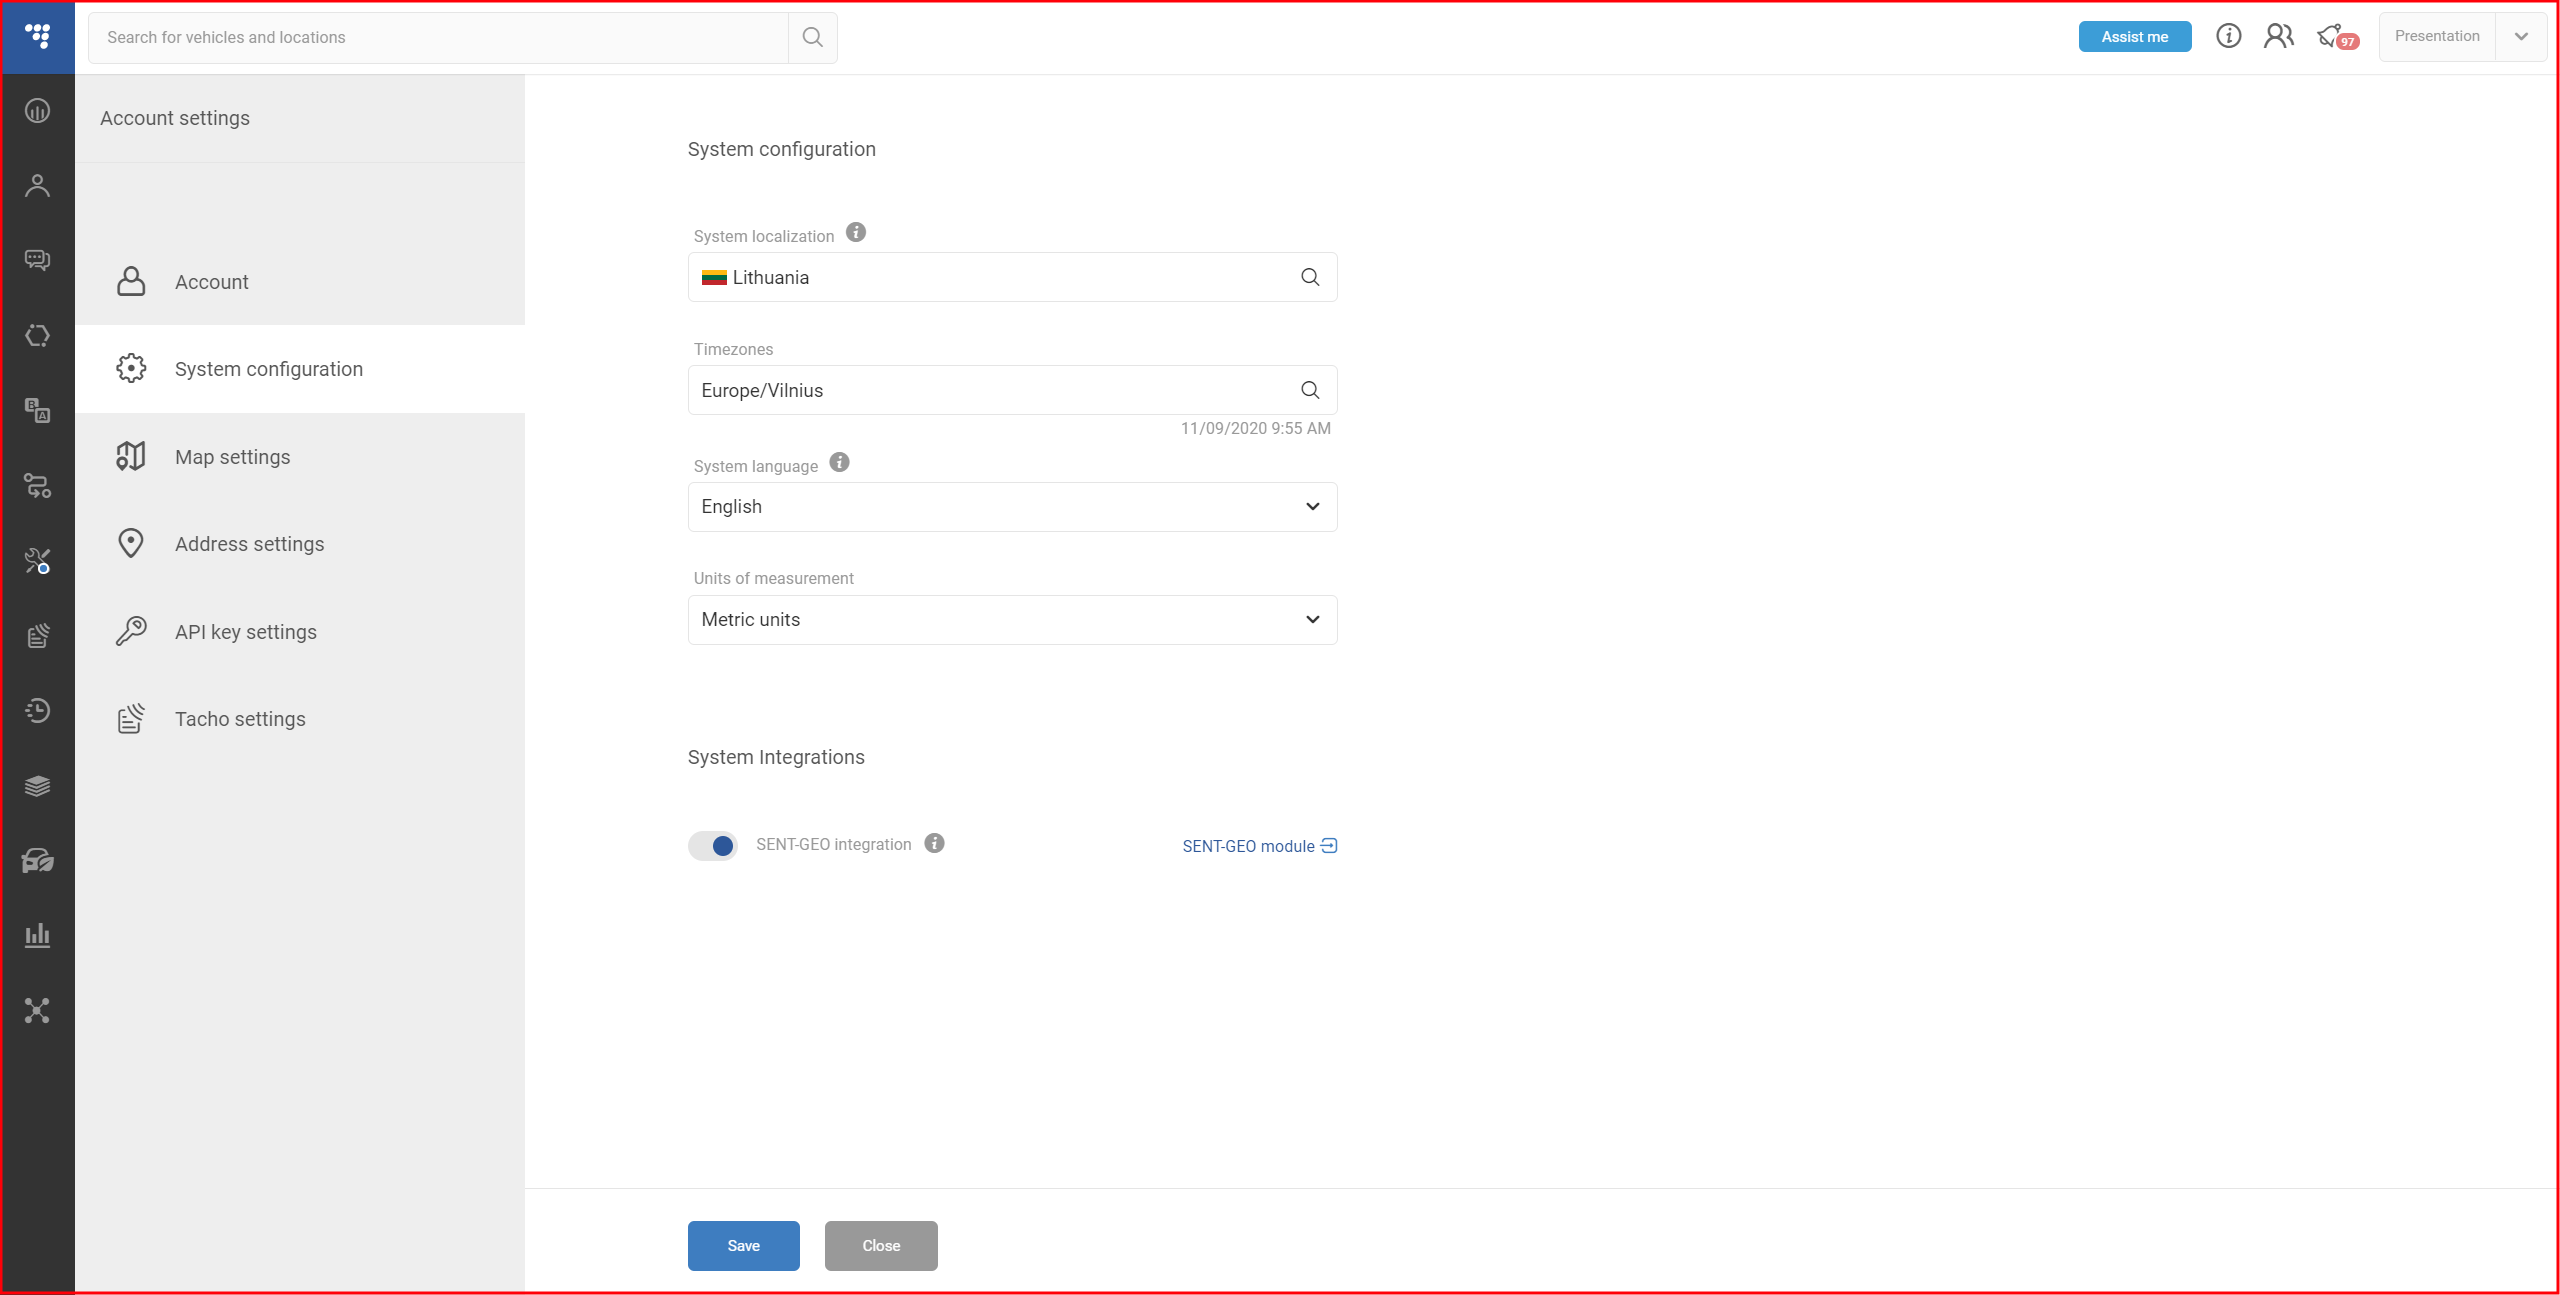
After any changes are made, the Save button must be clicked, otherwise, the changes will be discarded once the user leaves this page. If the user tries to leave the page after making some changes without saving them, a pop-up window will appear, informing the user about unsaved changes.
Map settings
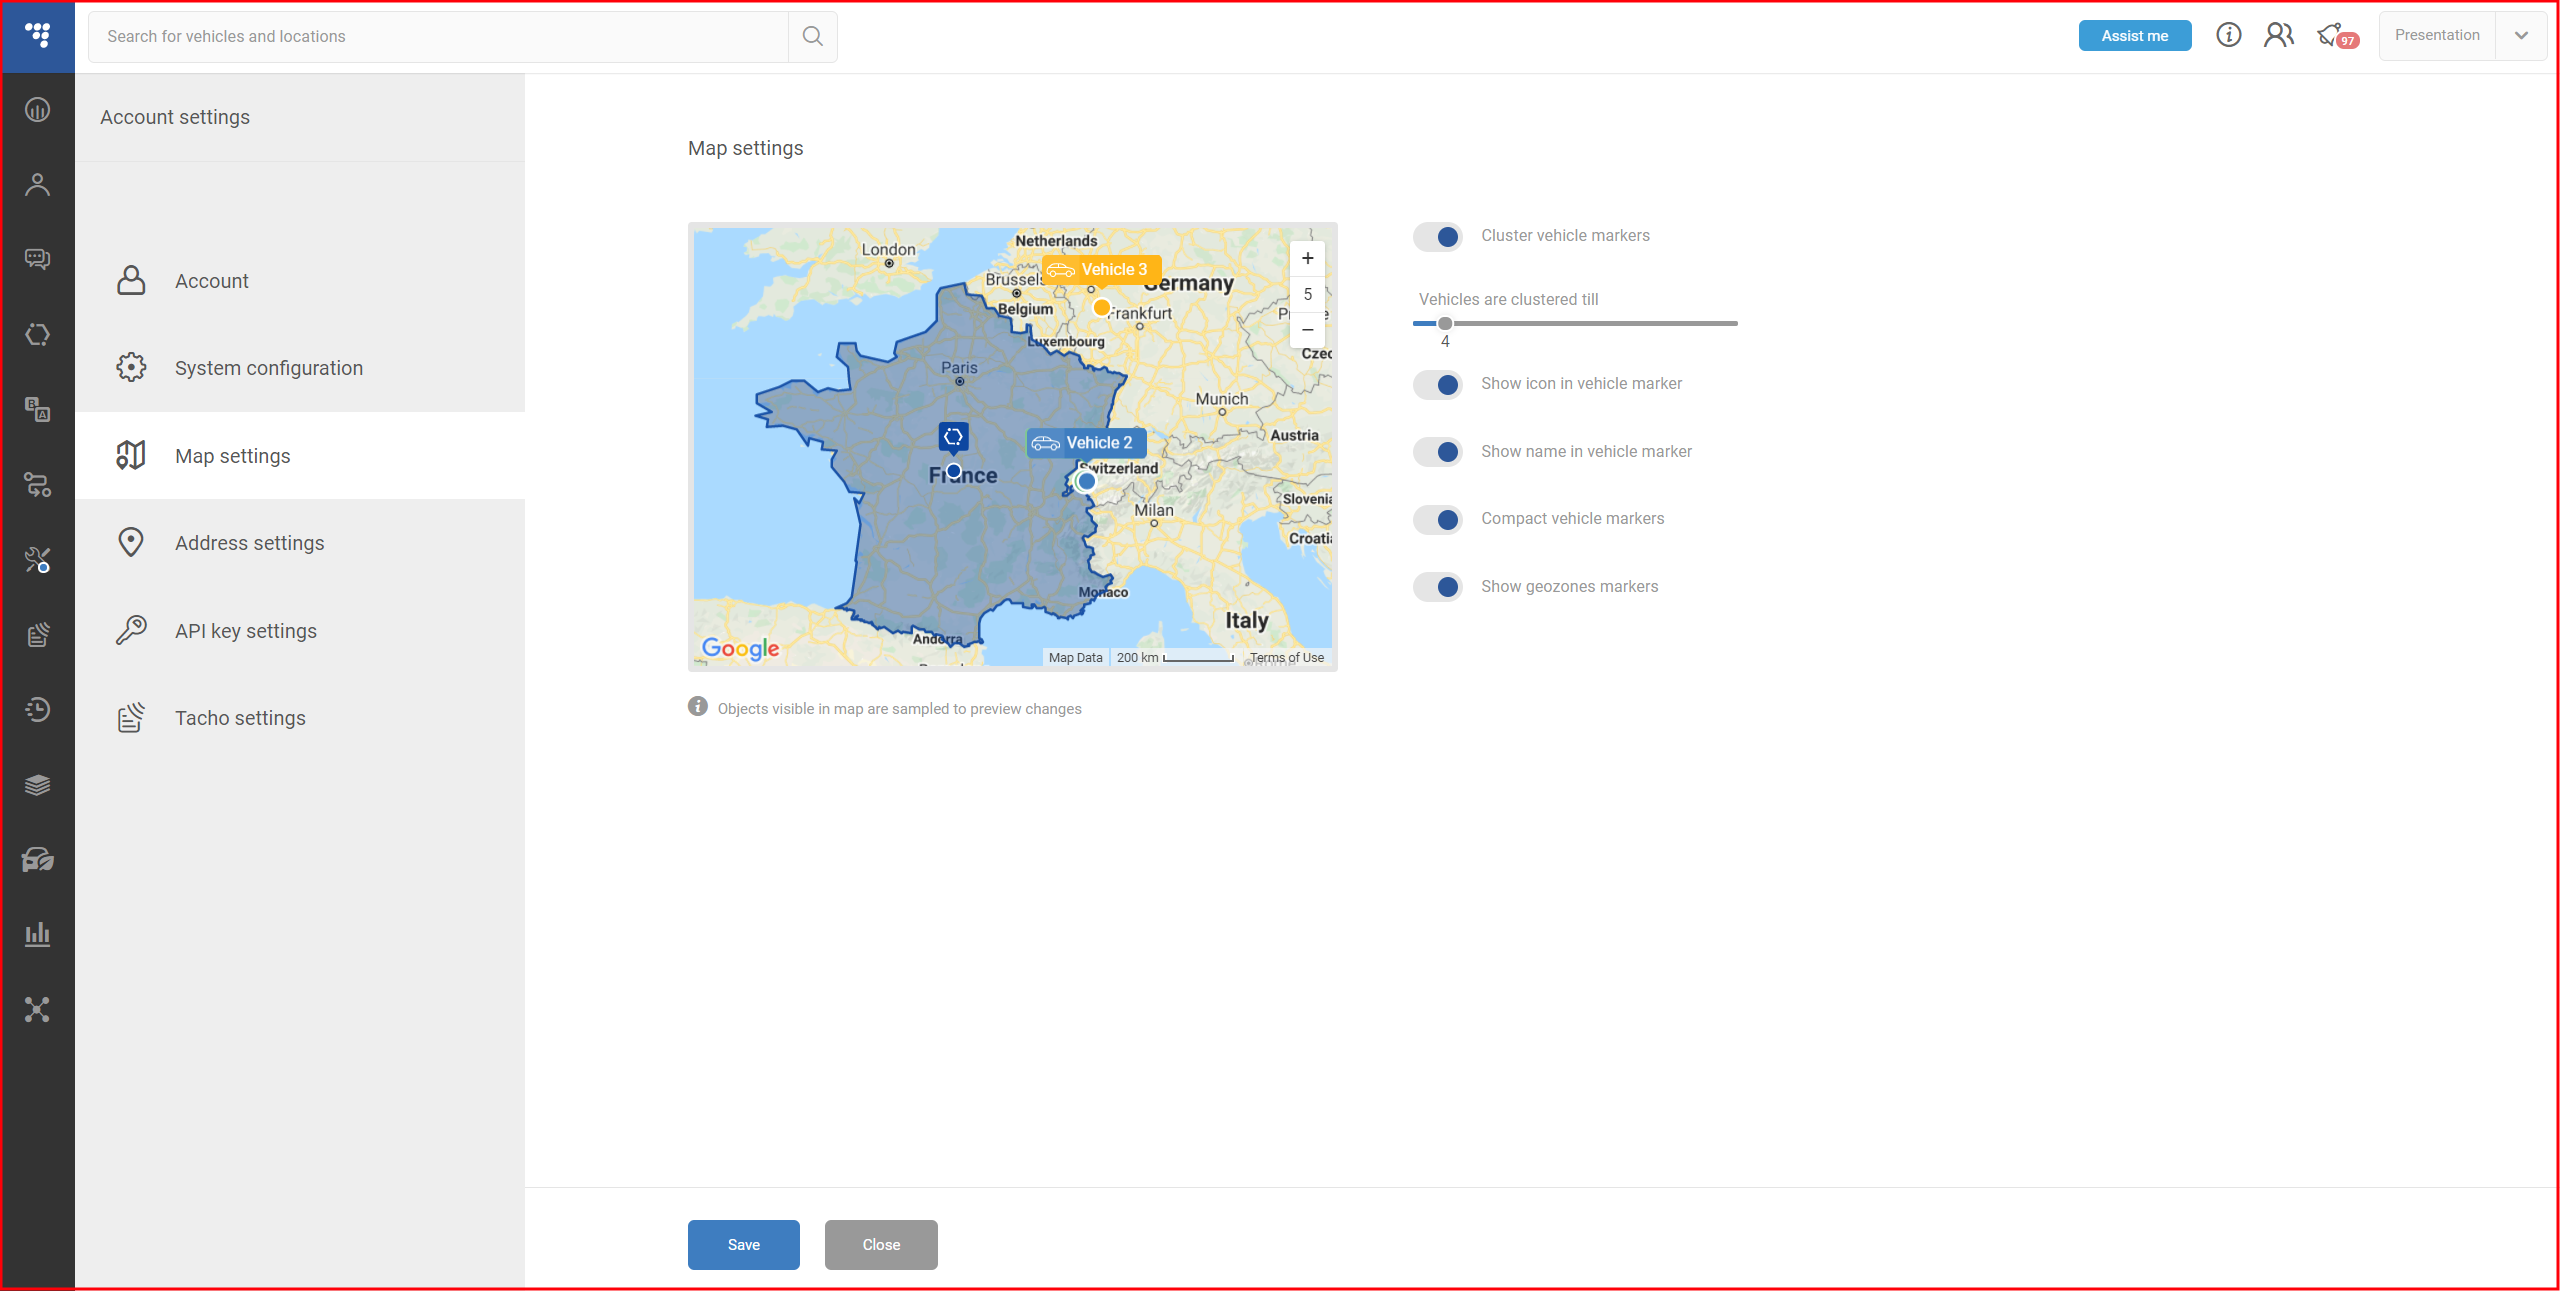
The map settings allow changing some of the display features on the map. The following options can be modified:
- Cluster vehicle markers – enables/disables the display of clusters on the map;
- Vehicles are clustered till – this setting defines at which zoom level the objects are shown as a cluster, the smaller the number the closer the zoom level. The example window next to the setting display the number of the current zoom level, which allows the user to set the zoom level;
- Show icon in vehicle marker – enables/disables the display of the vehicle type on the map;
- Show name in vehicle marker – enables/disables the display of the vehicle name on the map;
- Compact vehicle markers – enables/disables the display of smaller and more compact vehicle icons on the map.
- Show geozones markers – enables/disables the display of selected geozones on the map.
Note
All changes are previewed on the mini-map next to the settings.
After any changes are made, the Save button must be clicked. If changes are made and the user decides to leave the page, a warning window will appear, informing the user about unsaved changes.
Address settings
The Address settings allow changing how some of the address information is displayed in the system.
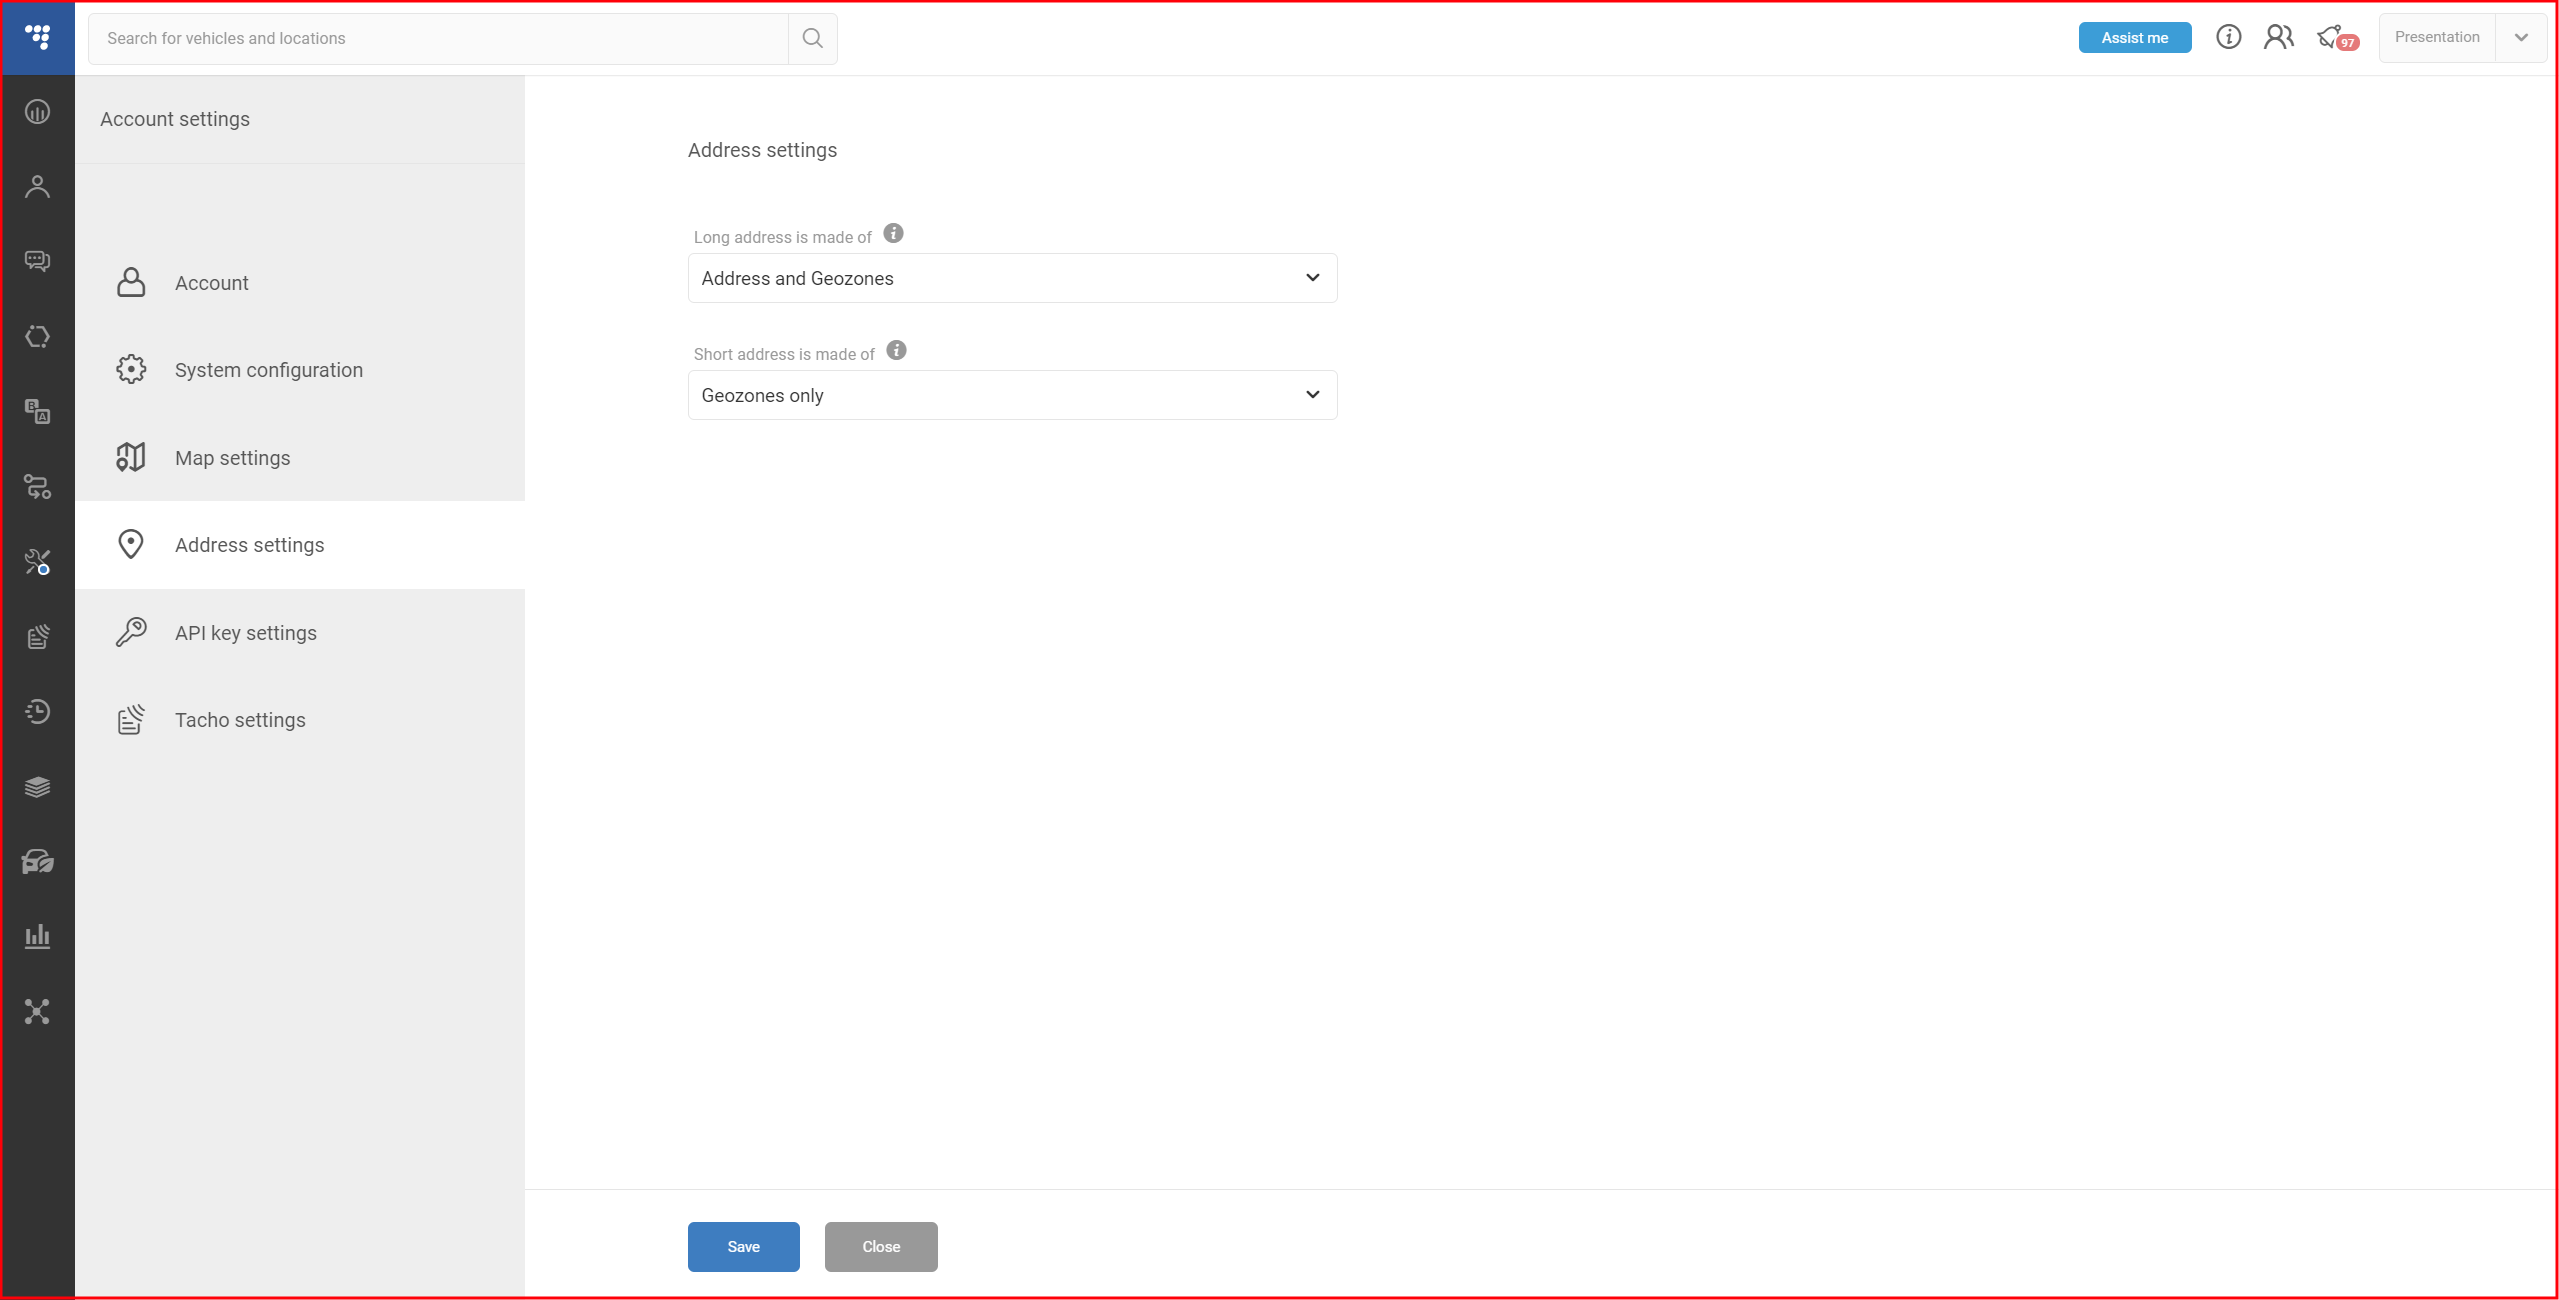
Specifically, the user can select how the vehicles current location is displayed in reports (long address) and the vehicle list (short address).
A long address can consist of:
- Address only – will display only the address of the vehicle in reports;
- Geozones only – will display only the geozone(s) of the vehicle in reports. It the vehicle was not in any geozone, the field will be blank;
- Address and Geozones – will display both addresses and geozones in reports.
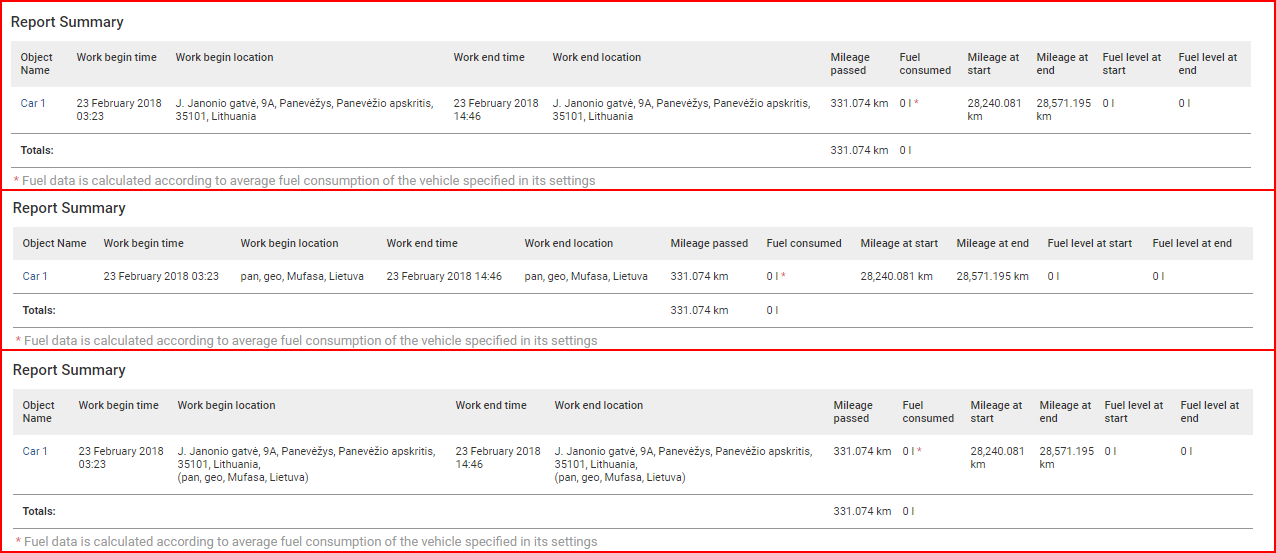
Display examples for the same report: address only display on the top, geozone only display in the middle, address and geozone display on the bottom.
A short address can consist of:
- Address only – will display the address of the vehicle in the vehicle list in the fleet status menu
- Geozones only – will display the geozone name in which the vehicle is currently located. If the vehicle is not in a geozone, the field will be blank
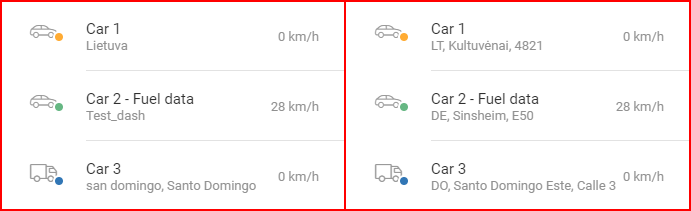
Display examples for the same vehicles: geozone only display on the left, address only display on the right.
API key settings
The API key settings allow generating API keys that can be used in integrations.
Note
API key generation must be enabled for each user individually or else the settings will not be available. This is described in the Webusers admin panel. The settings are available for administrators by default.
The user can generate a new API key by clicking the New API key button on the top right of the window. The New API key window will open, in which the user has to name the new API key. The Save button must be clicked to save the key.
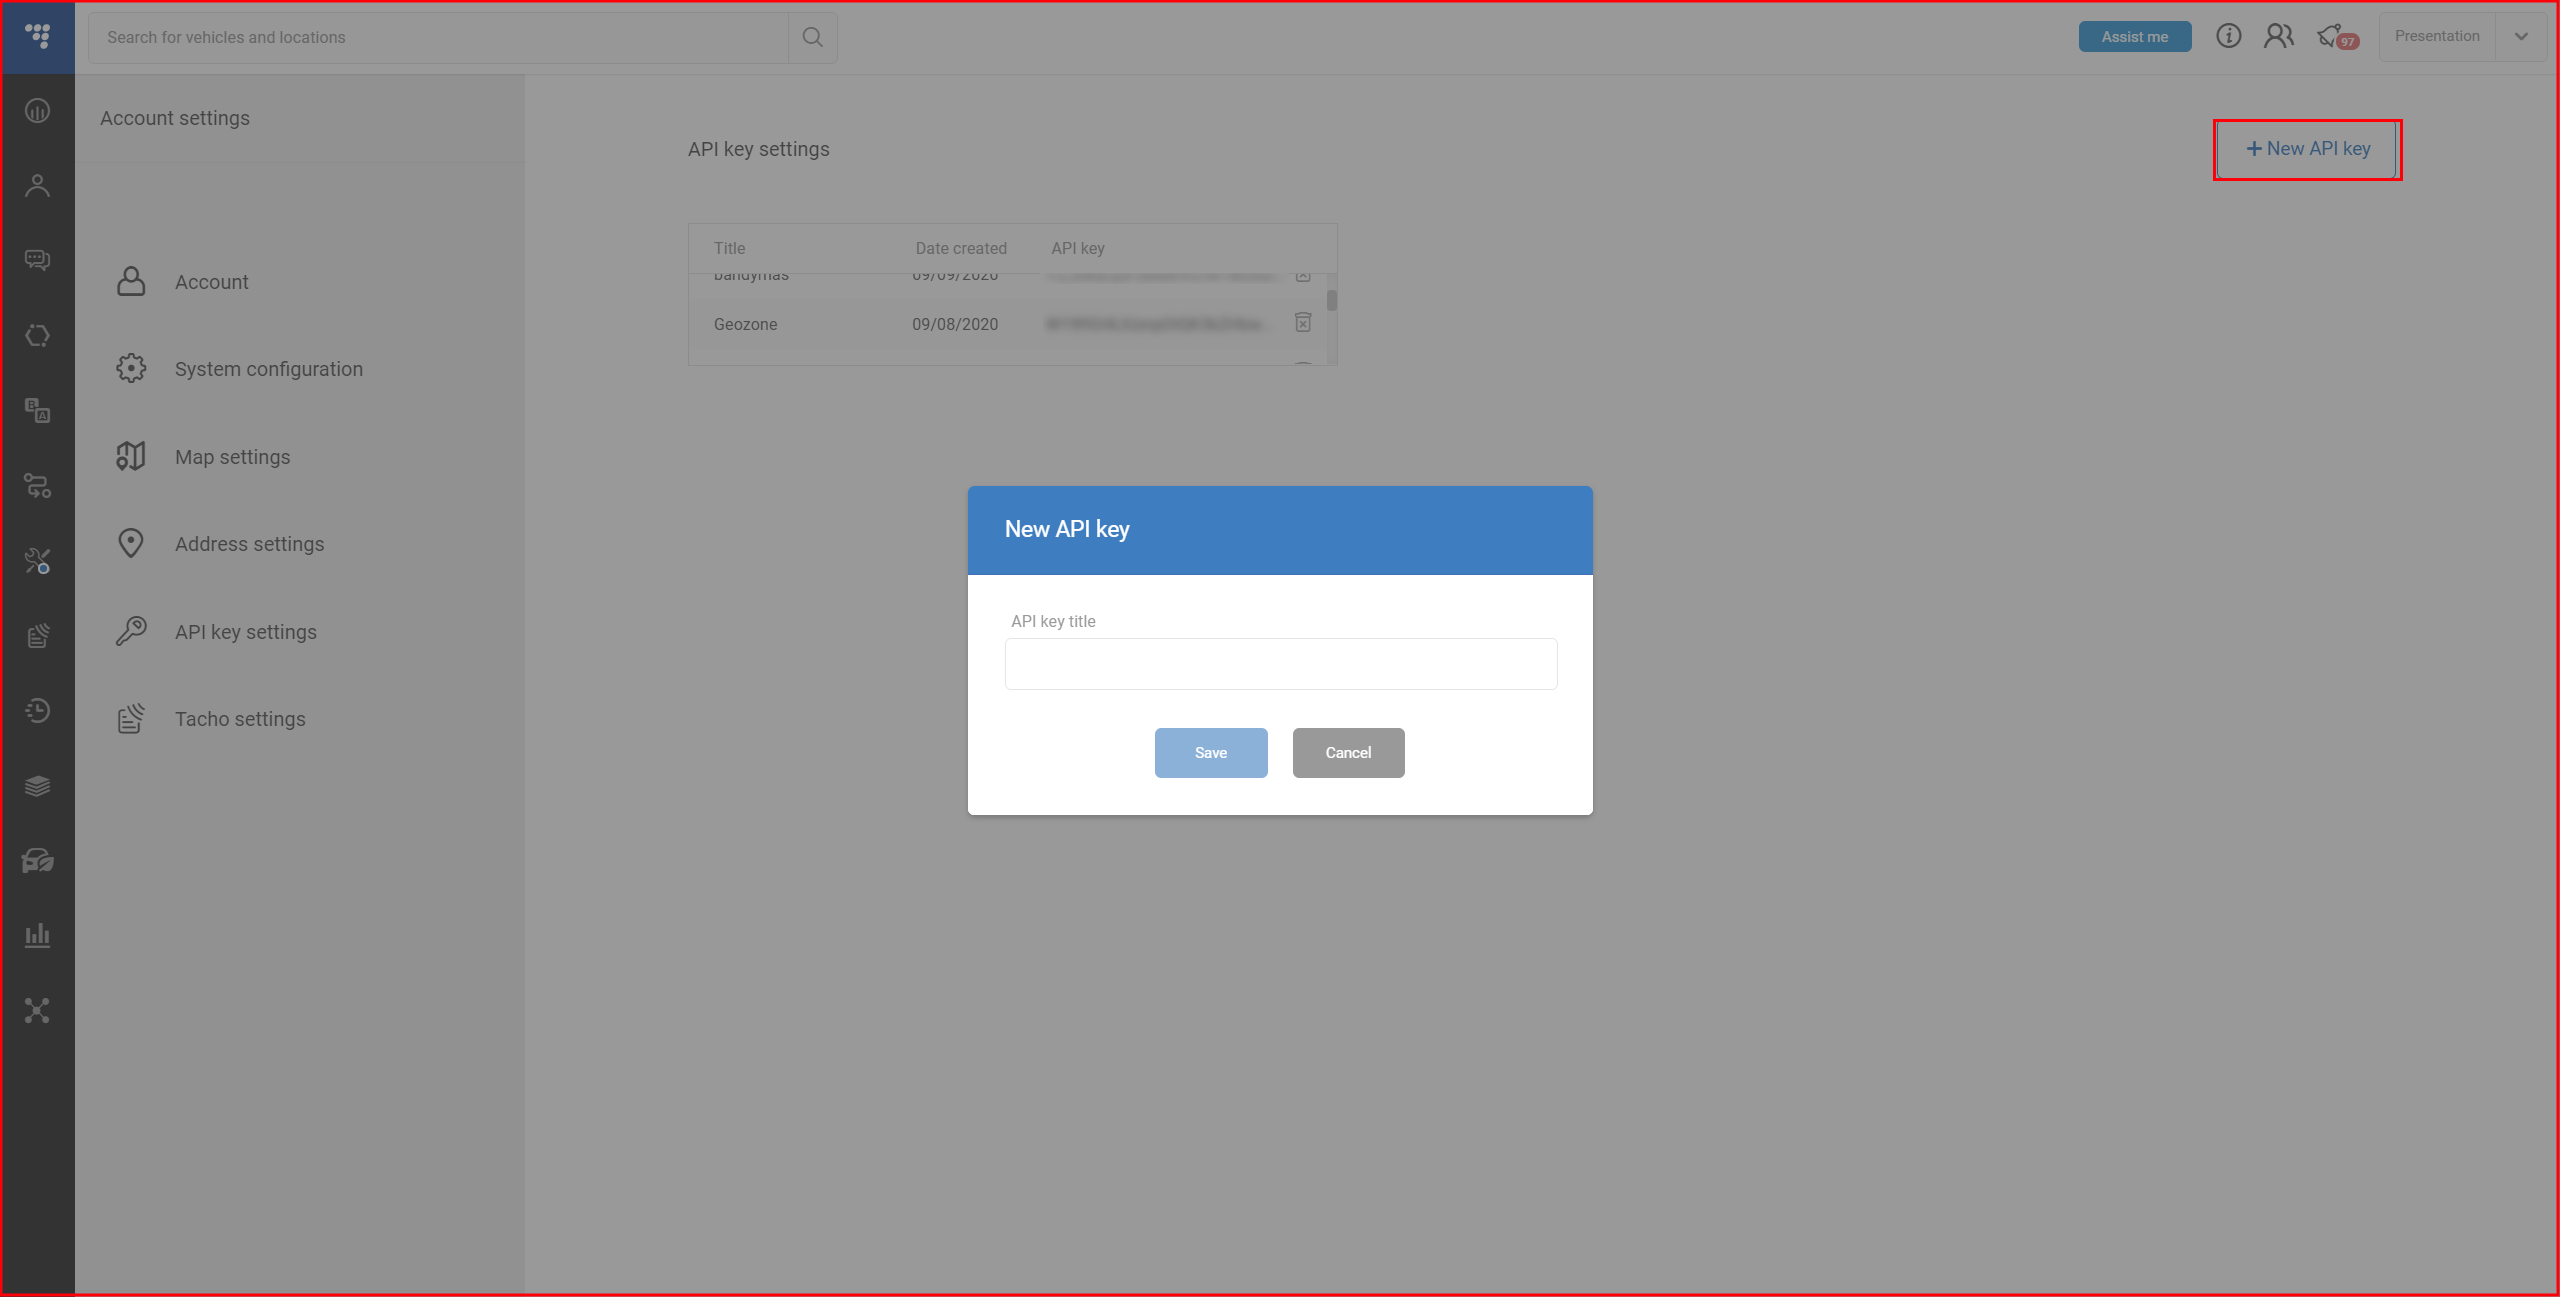
All API keys generated by the user are displayed in a table. Clicking on the key itself will show the full key in a pop-up. Clicking the key in the pop-up will copy it. Keys can be deleted by clicking the trash bin icon. A warning message will appear, the user must click Delete to delete the key.

Tacho settings
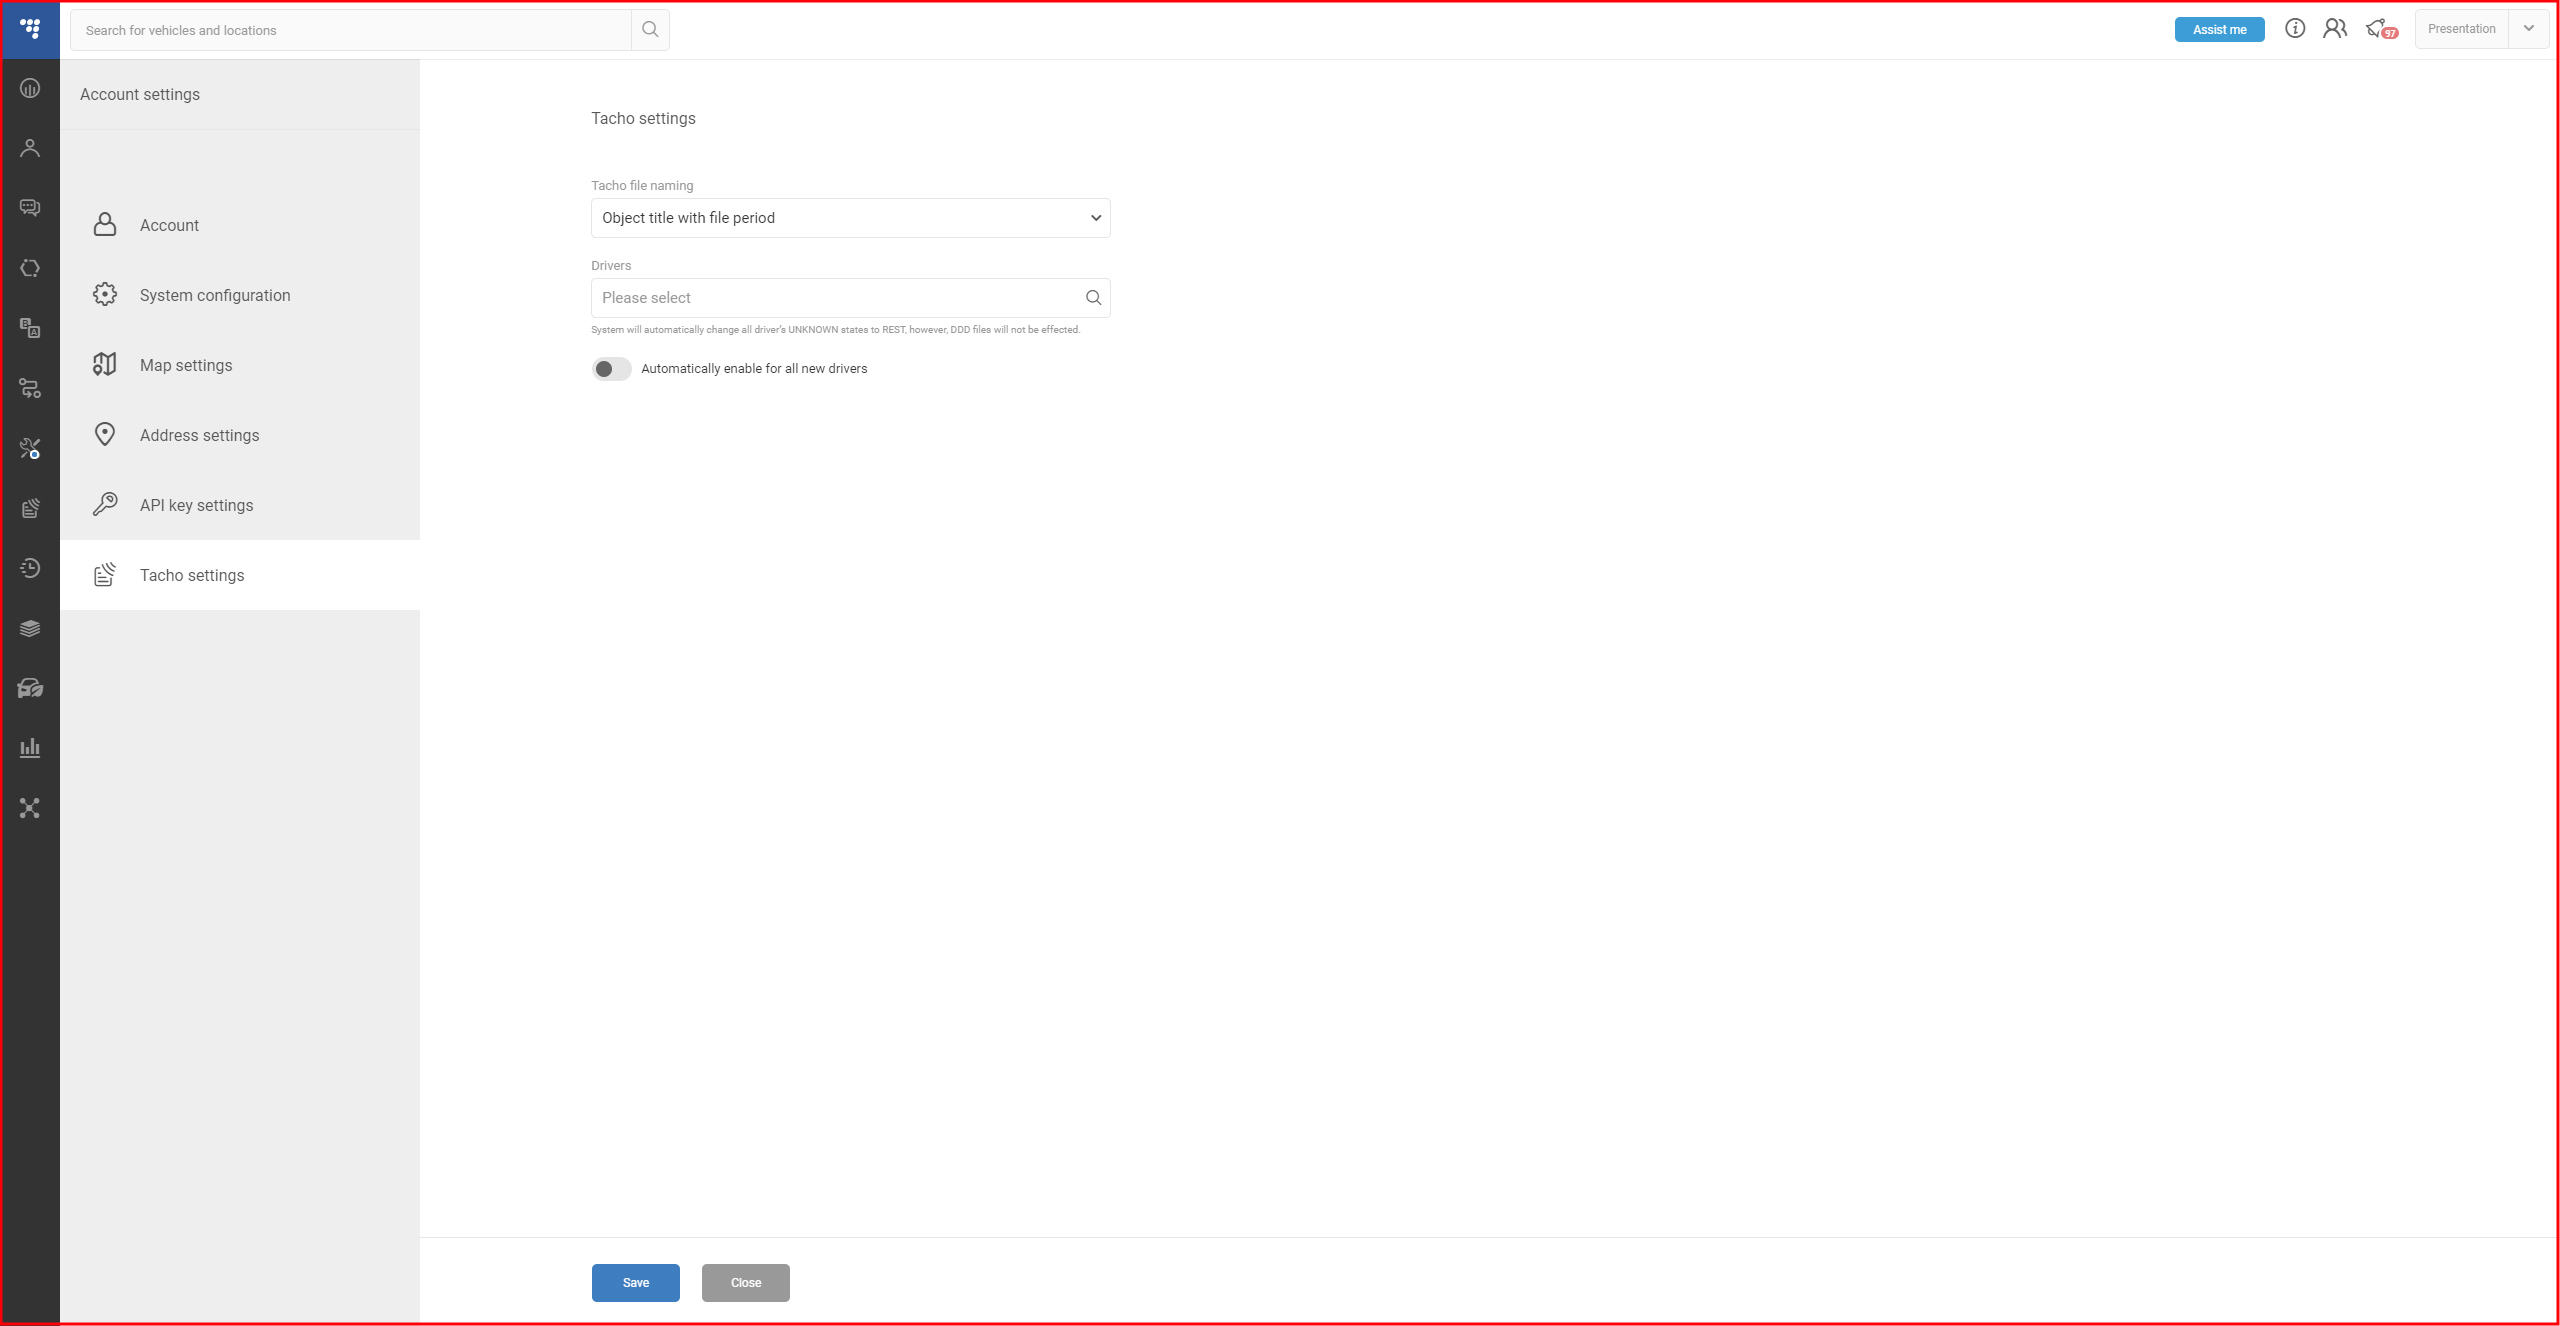
The Tacho settings window allows configuring data related to tachographs.
Tacho file naming – select how the generated tachograph files are going to be named. The available options are:
- Object title with file period
- European
- Spanish
- French
Drivers – every selected driver’s UNKNOWN states will be changed to REST. This does not affect the DDD file itself. You can click Automatically enable for all new drivers, so that this setting is automatically applied to every new driver created.
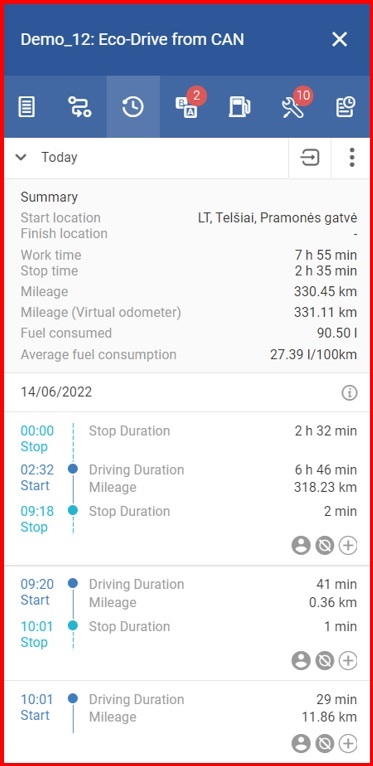
Trips settings
Trips settings allow users to select a default trip type which will be set up for all trips for objects which do not have automatic trip type detection. After selecting trip type from the drop down menu, the user must click the “Save” button.
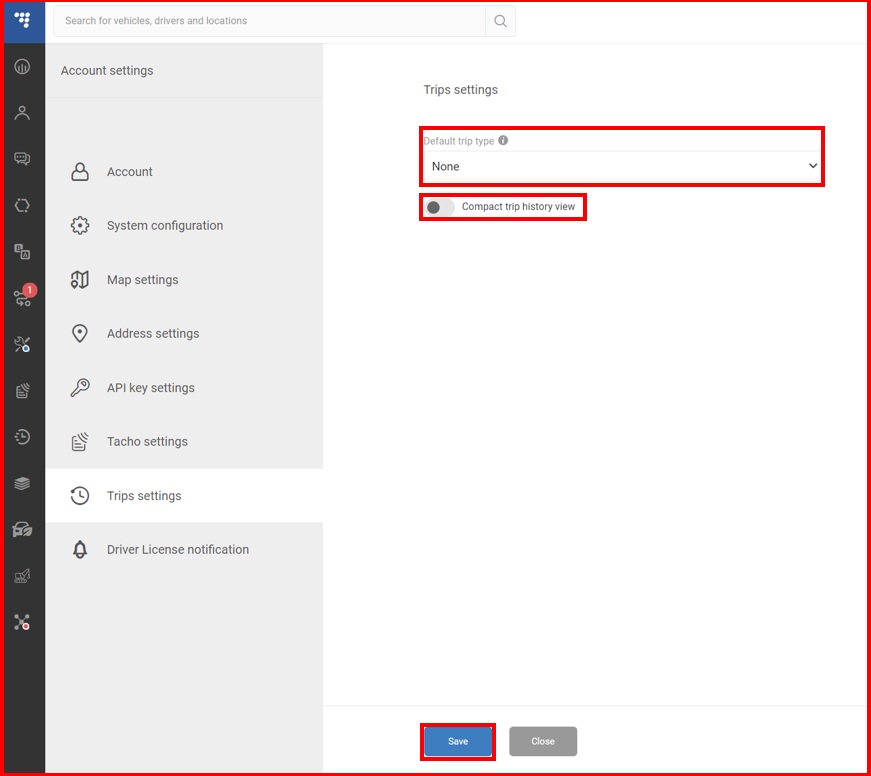
In Trips settings user can also select to see Compact trip history view. If Compact trip history view function is disabled, the user will see expanded view with full information in the trip history section.
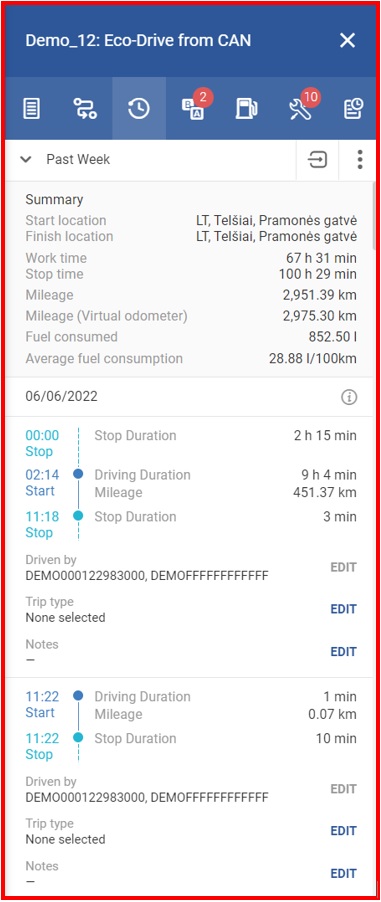
If Compact trip history view function is enabled, the user will see compact view in the trip history section with some information hidden.