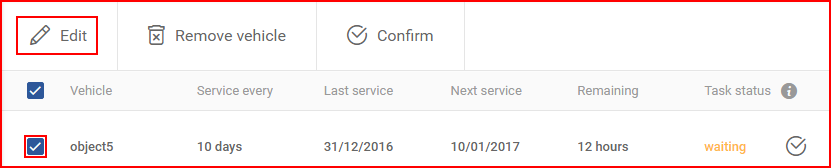
Since all information is generalized when creating a maintenance task, some information can be inaccurate and require additional manipulation. This can be done using the “Edit” function. First the user must select the vehicle or vehicles he desires to edit by clicking the checkboxes at the beginning of the vehicle row in the vehicle list. Afterwards the user must click the edit button.
After the previous sequence is complete, a new window will appear where the user can edit some of the maintenance settings for the vehicle. A warning window will always appear on the right side of the screen, that any manipulations to the task will affect all the selected vehicles in the list (marked checkboxes). To unlock the settings, the user must simply click the unlock button in each settings section.
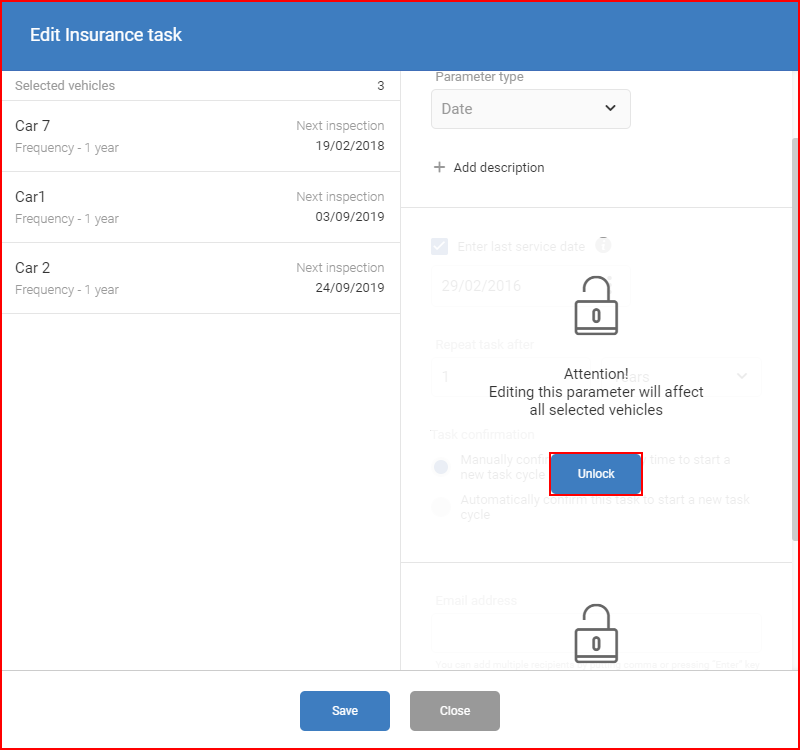
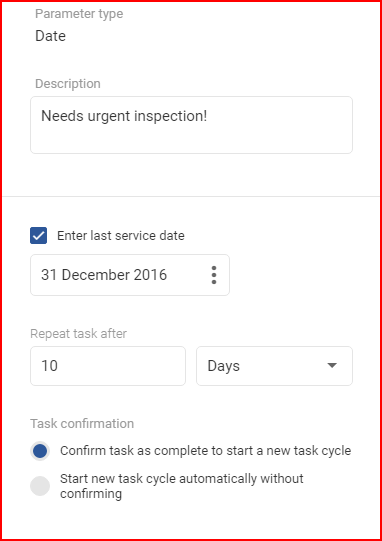
Clicking unlock will give the user access to some of the settings. Not all settings can be changed after the initial task is created. The following fields can be edited:
- Description;
- Enter last service date/mileage/working hours;
- Repeat after selection;
- Task confirmation selection;
- Email address for alerts;
- Alert timer selection.
After any changes the “Save” button must be clicked otherwise all the changes will be discarded. If the user decide to discard the changes, he must click the cancel button or click anywhere outside the edit window.
The edit function allows the user to modify the initial generalized “Last service” value and change the next service period for each assigned vehicle individually. Parameter type cannot be change in the edit function, so one maintenance task is made for one type of period parameter (mileage/date/working hours).